June 4th, 2014 §
Some families spend their leisure time together relaxing on the beach or meandering across the golf course. In my family, group recreation is most often in the form of a construction or clean-up project, soundtracked not by lapping waves or the shout of “Fore!,” but by the loud rumble of a diesel engine.
This past weekend my parents helped cross off one of my most anticipated Bonafide Farm tasks. And all it took was two long trailers, a small tractor, a big excavator, a dualie pick-up, half a dozen chains and winches, and a couple ropes. With all that equipment and three people, I finally got rid of this:
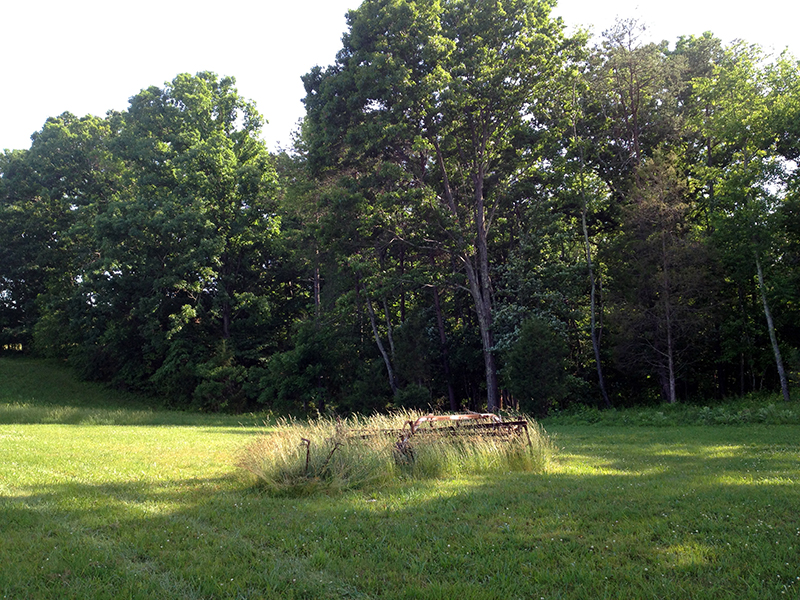
Hidden within that grassy mess is a 1950s David Bradley hay rake, which when I bought the farm was stashed along the woodline, covered in vines and honeysuckle. One of my closest encouters with it was during my first summer at the farm, when I was crawling around in the woods trying to retrieve errant guineas, and I looked up to see a massive snake stretched out along the warm metal, sunning itself. After that I stayed far away.
Two winters ago, when my friend Steve and my dad and I cleared the woodline of invasive trees and brambles and ripped out the old pasture fence, we dragged the hay rake out of the woods and dropped it in the field. Where it sat, all last spring, summer, fall, winter, and spring again. I posted it to CraigsList, but unfortunately it was in such poor shape—totally rusted through in spots—that I didn’t get any takers. I hated mowing around it, and hated how it looked like a big piece of rusted junk in the middle of my otherwise well-kept field. Which, it was, arty sunset shots notwithstanding.
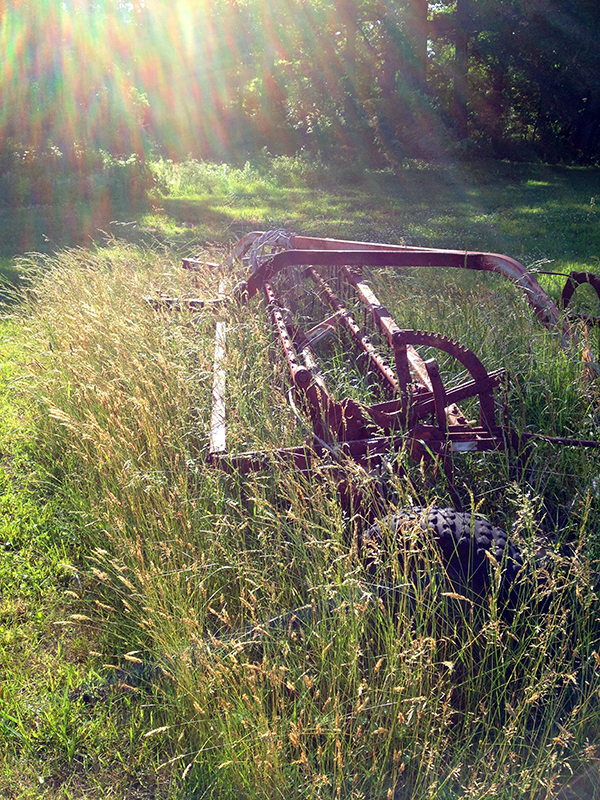
Well finally last Saturday night my dad hooked the green tractor to the hay rake and took it for its final ride across these fields. Of course, the rubber tires were rotted off so it was more of a drag than a ride.
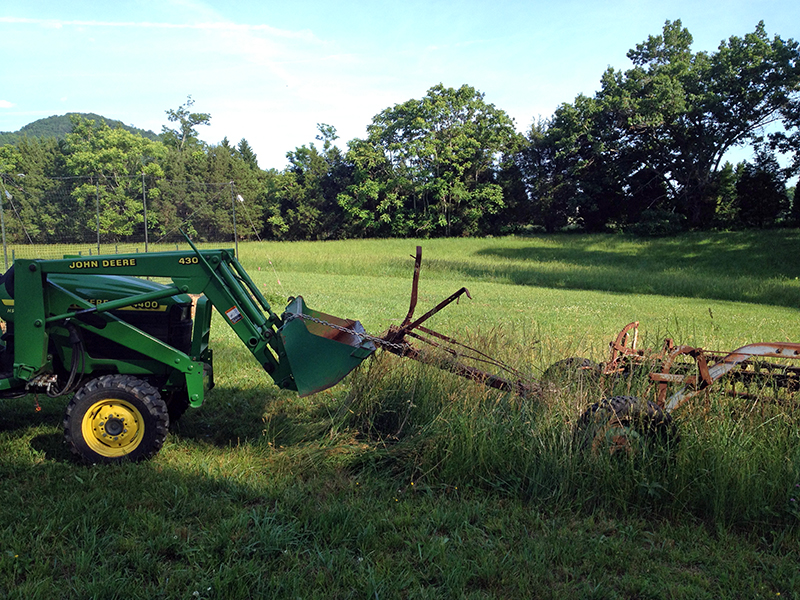
Then Dad staged up an empty trailer and returned the next morning with Mom and the excavator.
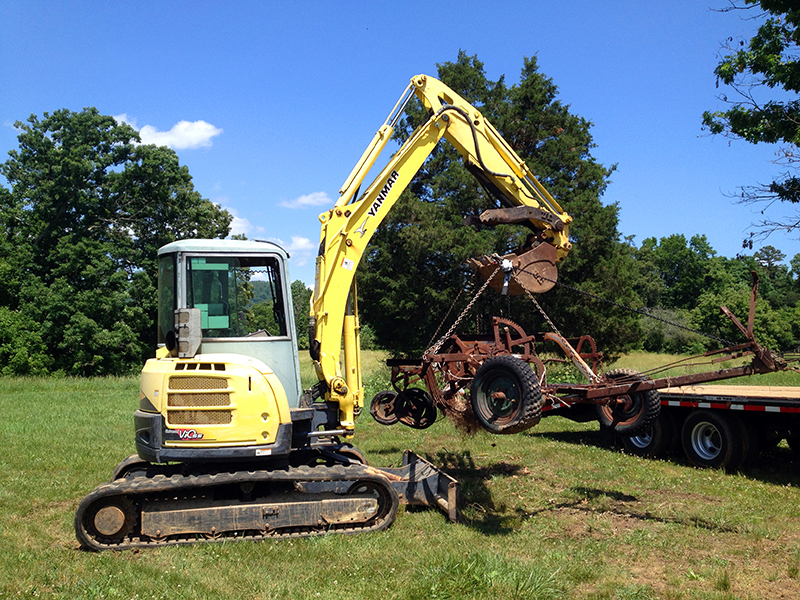
It took a few tries to get all the chains positioned so that the rake would balance when lifted in the air, but eventually Dad got the perfect pick. Then Mom and I got on ropes on either side of the rake to direct it as Dad lowered it on the bed of the trailer. We got it set down just perfectly within the confines of the eight-foot trailer bed.
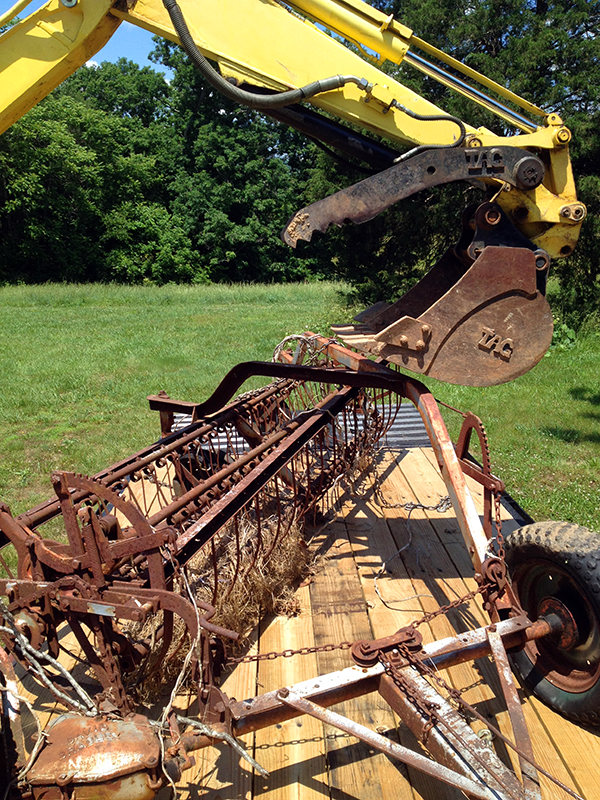
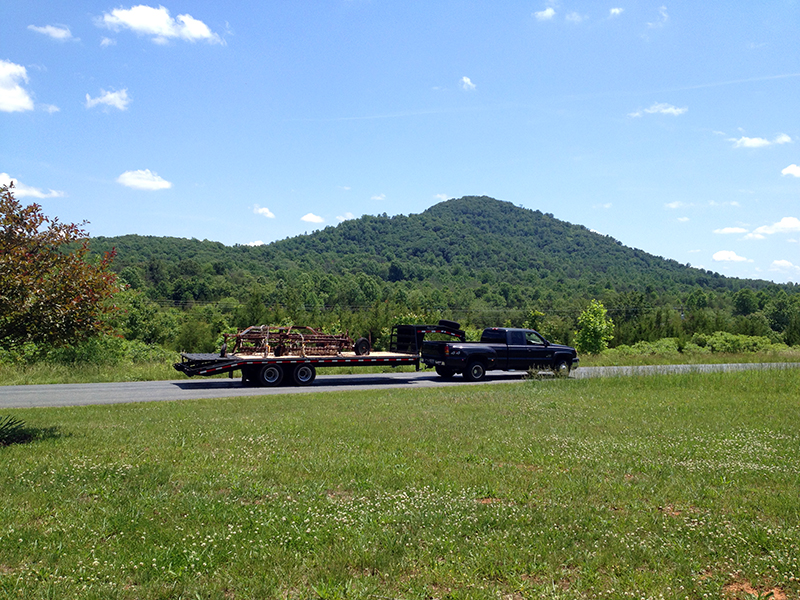
Then Dad chained it down and drove the whole rig off the farm to the recycling center. I was ecstatic to see it go—I had wanted this off the property ever since I bought this place five years ago!
With every bit of clean-up we do, we’re reclaiming this piece of land which, though incredibly beautiful, was neglected and in some ways abused before I got here. Putting all this positive work, energy and intention into this property is nurturing it so that it can, in turn, take care of me. And I couldn’t do it without my awesome parents, so thank you both for all you do to help. There are no two people in the world who I’d rather stand around with and breathe diesel fumes.
February 13th, 2014 §
The winter storm that started trouble making in Texas is now upon Free Union and headed up the East coast. It started snowing last night just after 6:00 p.m., and at 9:00 this morning there were 13 inches on the ground and more still falling. This is a pretty significant snow event for our area.
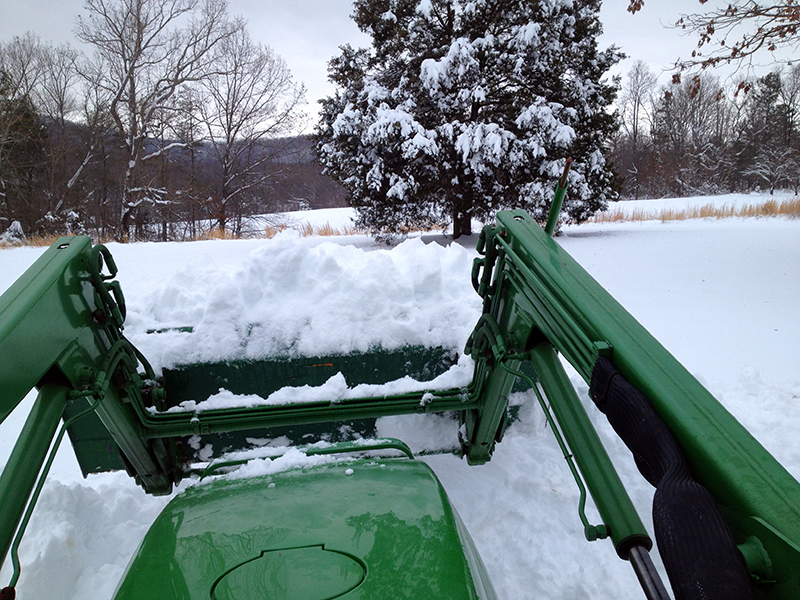
I ducked out in a break between snow bands to dig out the driveway. Yesterday I had staged the tractor, putting on the smaller bucket and moving equipment around in the garage so I could back the tractor in, ready to head out bucket first in the event of a big snow. Sometimes my storm preparations seem like overkill, as in Central Virginia snow events tend to bust more often than boom, but all the forecasters were saying this one was a sure thing. I didn’t want to be caught with my tractor trapped inside behind the zero-turn mower, sporting the wrong bucket for shoveling snow.
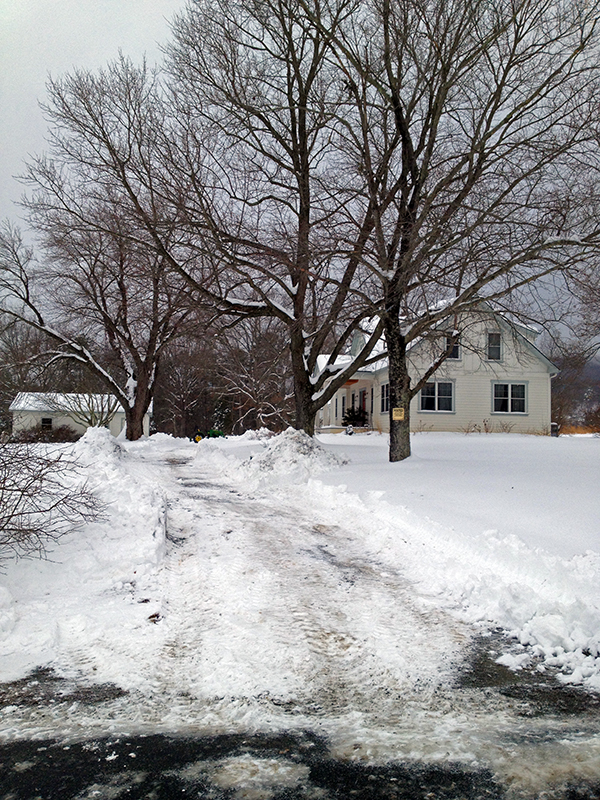
Using a tractor bucket instead of a snow plow is slow going. It took me about two hours to dig my way out of the garage and down the driveway toward the road, where I cleared the path to the mailbox for the mailman who probably won’t come for days. I worked pretty slowly, trying to preserve what little gravel I have on the driveway. I thought it was interesting that I was the only person out clearing anything—my neighbor was snowboarding down the road with his three teenage kids!
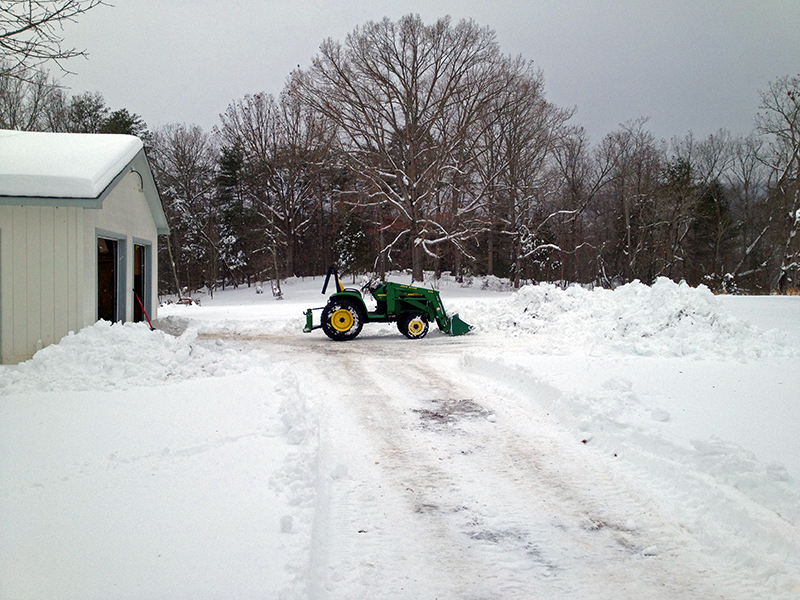
I often mention on this blog how much I love my green tractor, and today was no exception as that tractor meant the difference between being trapped in the mountains and not, once the main road is plowed. I felt like a Carhartt-clad snow queen in her chariot, enjoying the slack-jawed gaping of the few country neighbors who slid by in their pick-ups.
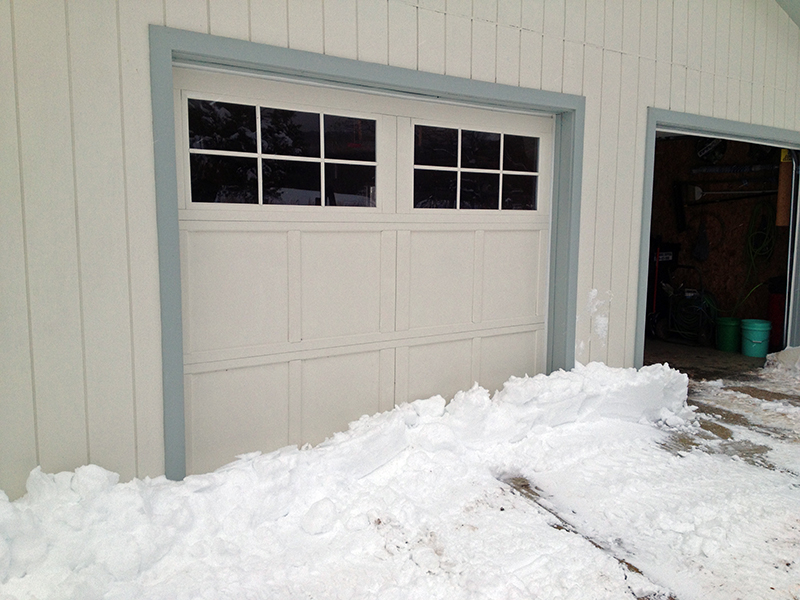
I had only a tiny bit of shovel work right in front of the garage on the side where my car is parked. Once I was done I checked on the chickens, filled up the very-popular bird feeders and headed inside to the woodstove and a cup of hot tea, just as the next round of heavy snow began to come down.
We’re supposed to get a few more inches of wet and heavy snow tonight, and the winds are really picking up and blowing into near white-out conditions—certainly working to undo this afternoon’s plowing. High winds mean the power may go out, so I’ll hit publish while I still can. But at least I have my driveway plowed enough to get out with my S.U.V.
Now, when the fifteen miles into town are a bit more clear, I could actually go somewhere!
November 18th, 2013 §
Today dawned in marked contrast to the last few days. In place of cool mist and fog were bright sun and almost 70 degree temperatures. I seized the opportunity to complete the year’s final tasks in the garden that surrounds the house.
I started by robbing my compost pile that’s been in the making for almost a year. It’s a mix of garden waste, grass clippings, soiled chicken house bedding, and kitchen scraps. Instead of engaging in a hot composting process, which requires a more precise mix of nitrogen-rich greens and carbonous browns, plus proper moisture and aeration, I just throw everything in a pile in the woods and let time work its magic. Which it does, yielding a worm-full and deeply nutritious mix that every fall gets spread about the farm.
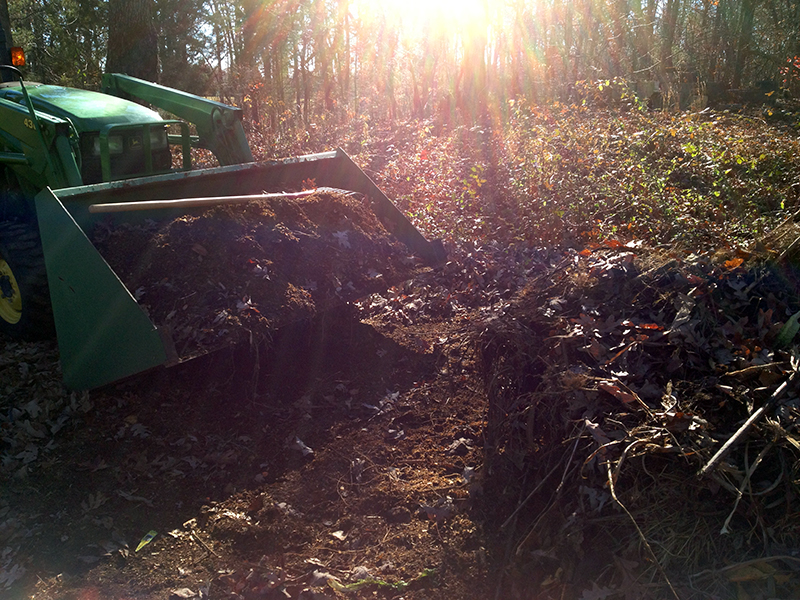
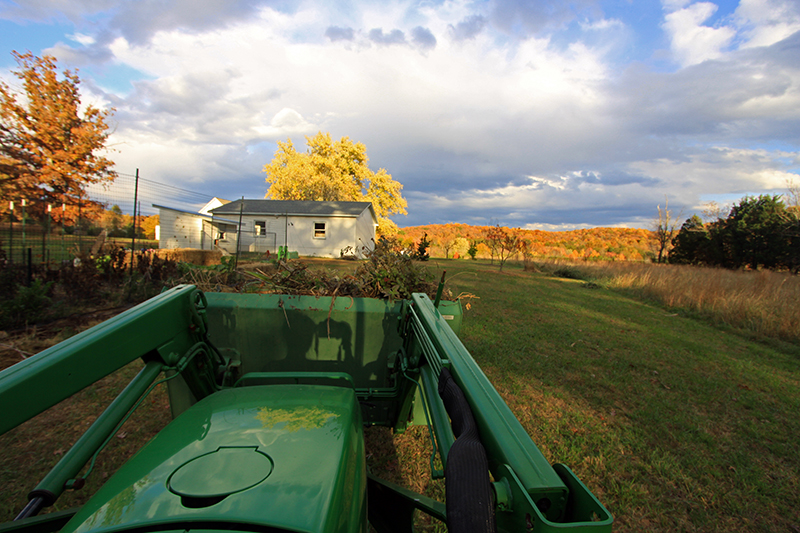
I forked the compost into the big tractor bucket. I prefer using this large bucket when dealing with bulky materials because it can carry much more than the smaller bucket. The downside, though, is that I can’t dig or scoop with this big bucket without damaging the tractor’s arms, so that means lots of hand forking. In many ways this is still necessary, though, as the margins of the pile aren’t well defined and the pile isn’t large enough to efficiently scoop with a small bucket anyway.
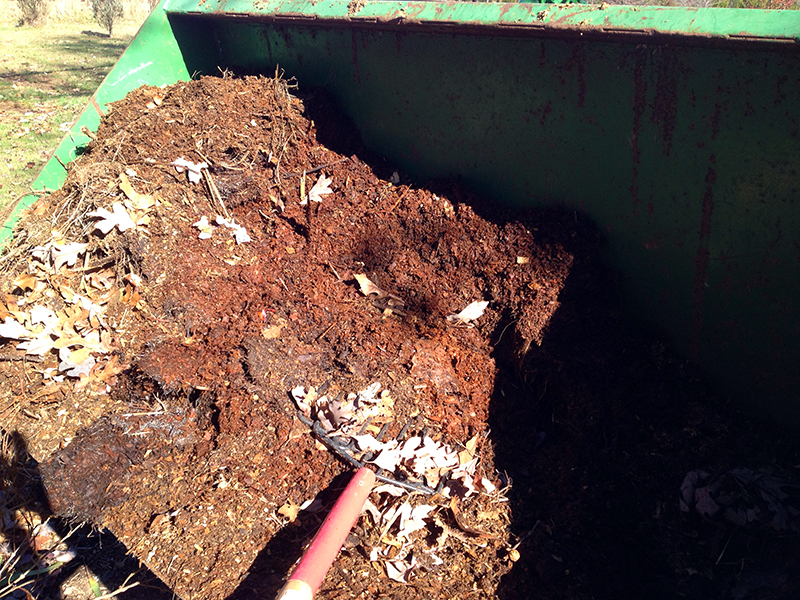
I managed to eek two large buckets of compost out of my pile. It’s not a ton, but I spread it almost an inch thick over all the exposed dirt in the garden and even had enough to pile some extra around heavy feeders, such as the roses.
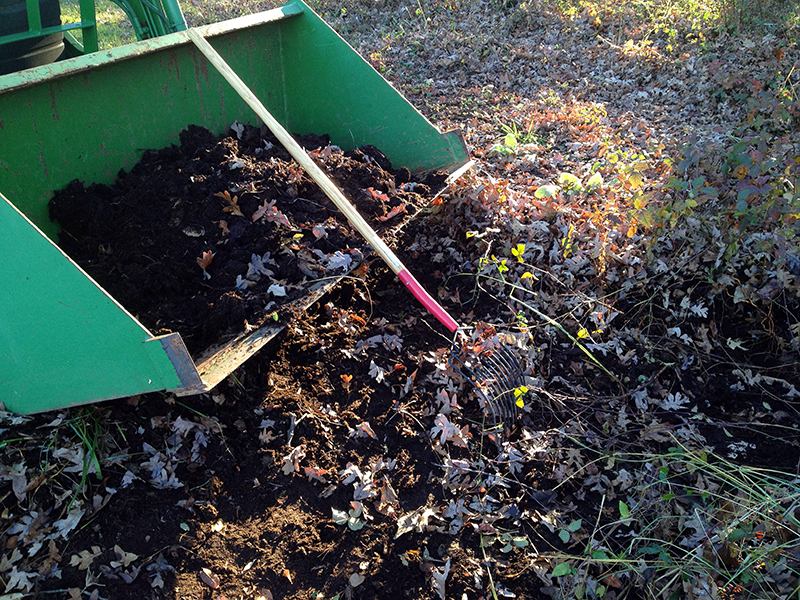
Once the compost was down, I went back for mulch. My target was the remnants of the ten yards that were delivered in early April. They’d been spread about a bit in the field and briars and grass were starting to grow up in the pile.
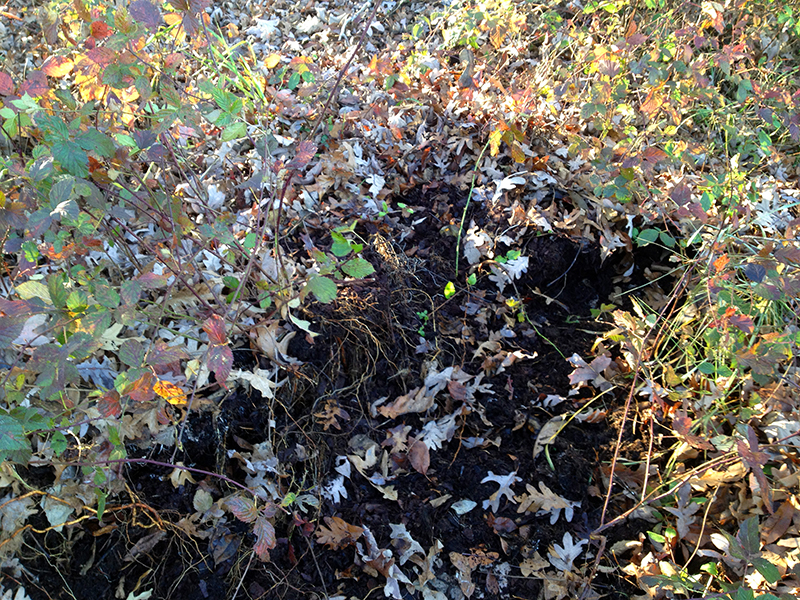
This required lots of hand forking and tedious, prickly picking through, but I managed to get four big bucketfuls out of a rather insubstantial looking pile. Not only did it feel good to reclaim something for which I’d paid good money, but the eight-month rest in the field had decomposed the mulch the absolutely perfect consistency—damp, dark, crumbly and ready to go to work building soil. It makes me realize I should be ordering all my mulch at least half a year in advance of when I want to apply it.

Anyone who’s been reading this blog for a while knows that when it comes to mulch, I prioritize its soil-building properties over any aesthetic contribution it may make to the landscape. The key to building good soil is keeping it mulched with an appropriate material, one that breaks down and adds organic matter to the soil. When you’re working with what I’ve got here—compacted red Virginia clay around a construction site—short of digging out all the native dirt and replacing it the only way to create great soil is through repeated application of amendments such as compost and mulch. Do that for ten or fifteen years and you might get somewhere. I am three years in and my fantasies of dropping a trowel and having it sink blade deep in rich, black soil are a long way off.
But I work at it. And will keep working at it every year as long as I can wield the pitchfork.
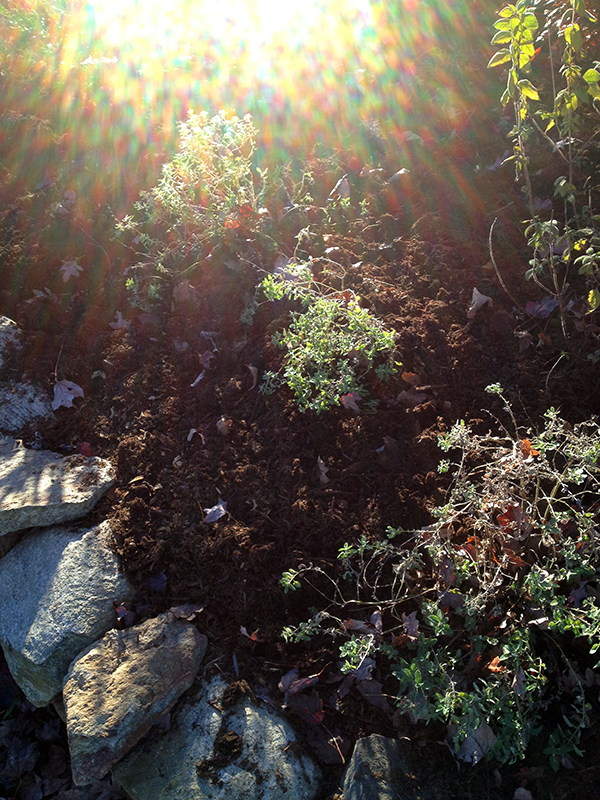
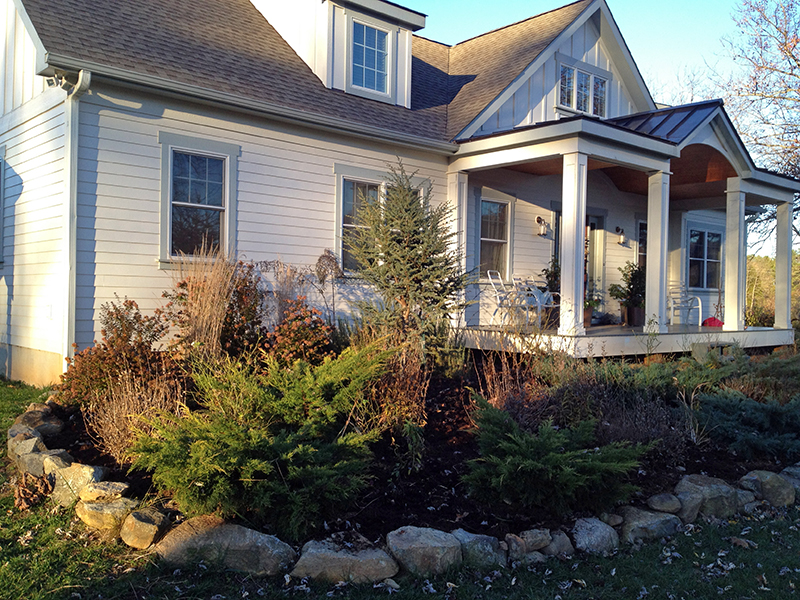
By sundown I could barely move but I was finished spreading compost and mulch, and I felt good about this final gardening act of the year. This is always one of the most physically demanding days of the year, and I am glad to have it behind me. Now I celebrate, and rest easy knowing I have left a nutritious blanket over my garden that will nourish it through this winter and into the spring to come. It’s a good feeling, despite the protest of every nerve and muscle in my bone-tired body. I’m headed for the epsom salts and a scalding bath, and most likely a well-deserved beer.
November 5th, 2013 §
November 3rd, 2013 §
Anytime after the first freeze of fall I am on the lookout for a few days of nice weather in order to put the garden to bed. This weekend was perfect for the job, with temperatures in the 60s, bright blue skies and sun streaming through the red, orange and yellow trees. Such glorious weather is, I suppose, a small consolation for what is one of my saddest markers of seasonal change. Take a look at this pathetic sight:
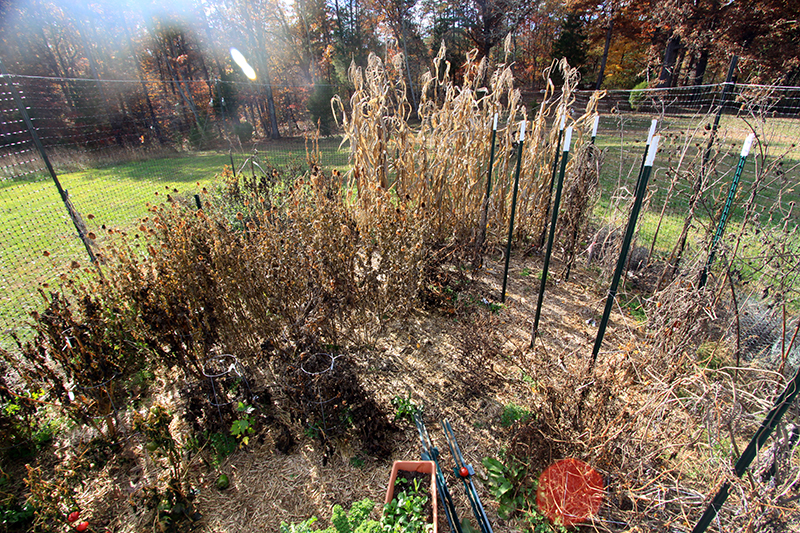
I started with the tomatoes, cutting them down from their stakes.
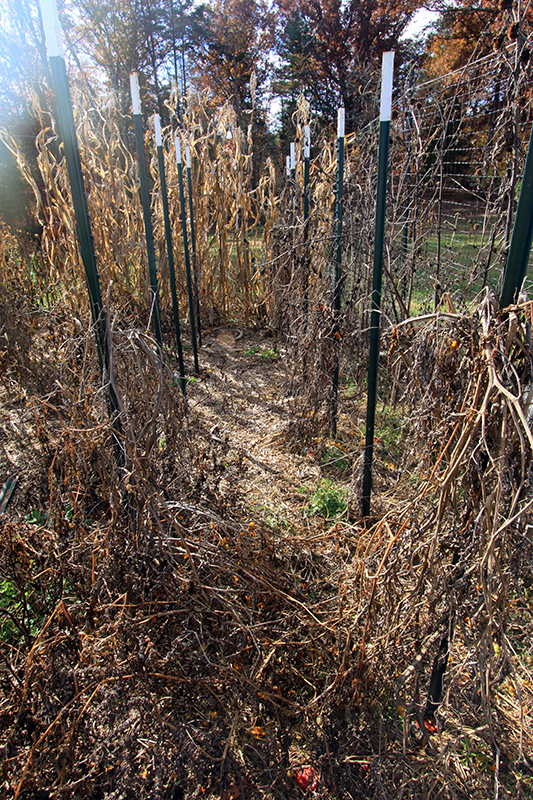
I always use cotton or jute twine to stake my tomatoes so that at the end of the season everything can go right in the compost, which beats having to pick pieces of plastic or wire out of the jumbled vines. I wasn’t too meticulous with picking up the dropped fruit as I plan on running the chickens in here during winter and they will appreciate the treats.
Then I moved on to ripping up the cosmos and zinnias, and as I did I saved seed heads from varieties that did particularly well. I plan to scatter these seeds over some bare spots in hope of starting a wildflower patch.

Then I cut the hyacinth bean vines off of the deer fence. A tedious job, indeed, to avoid cutting the plastic fence. Next year I will sow my hyacinth bean up the sides of the metal chicken run. Finally I pulled the frozen peppers out. I was annoyed at myself to find that there were so many peppers that I hadn’t harvested before it was too late. This is what happens when the first frost happens when the farmer is out of town for a couple of days!

Then I took a break from the vegetable garden to walk through the pastures, cutting out the prickly shrubs that are the first woody plants to initiate reforestation of cleared areas. It took several big tractor bucket loads to get everything to the compost and brush piles in the woods.
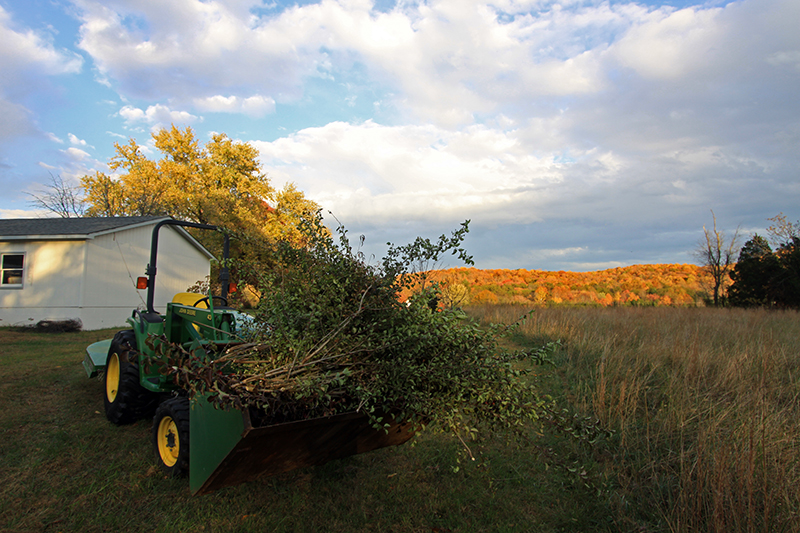
By then the sun was setting and I had been working outside for more than seven hours in a row. So when the chickens headed into roost, I did the same, straight for a hot epsom salt bath. Up next: day two of vegetable garden cleanup.
September 17th, 2013 §
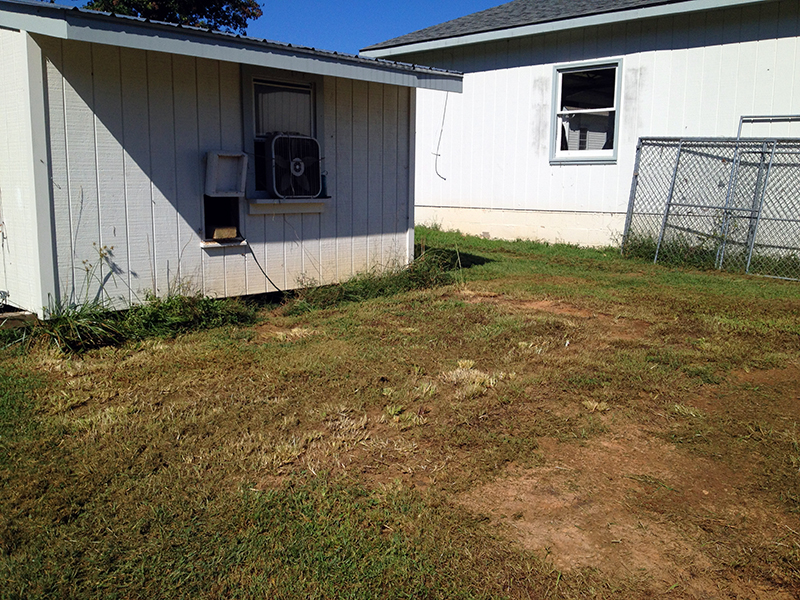
This is what the backside of the coop has looked like since late winter.
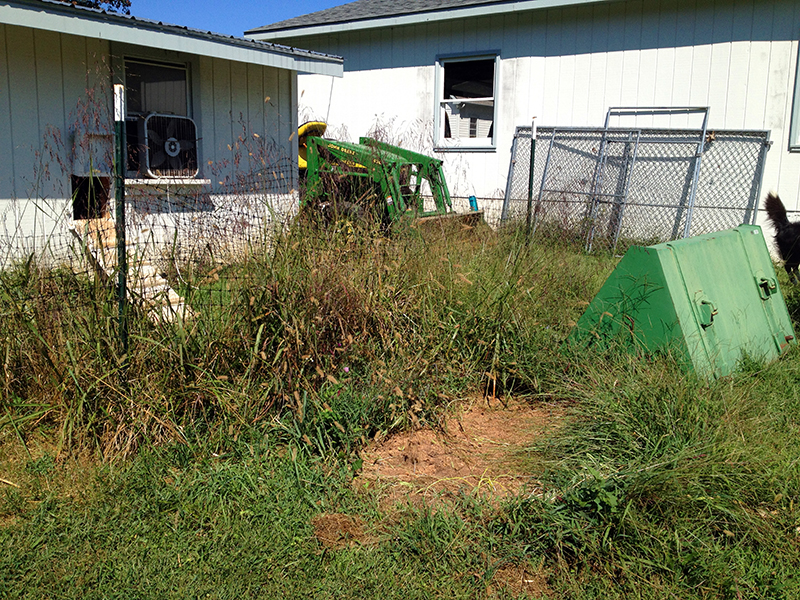
I’d thrown some netting up there when I decided to start free-ranging the chickens, and I wanted them to get used to being outside and coming and going through their chicken door before I let them totally loose. It worked, but since then this deer-netting and t-post pen has been used only to help capture the chickens to put them in the coop. Because the deer netting is plastic, I couldn’t weed-whack around it without destroying the netting, so the grass had grown up and through and sealed the net to the ground. Throw in a few tractor implements that I couldn’t move because the tractor was at my dad’s farm, and I had a real redneck mess and an eyesore that bothered me every time I looked at it.
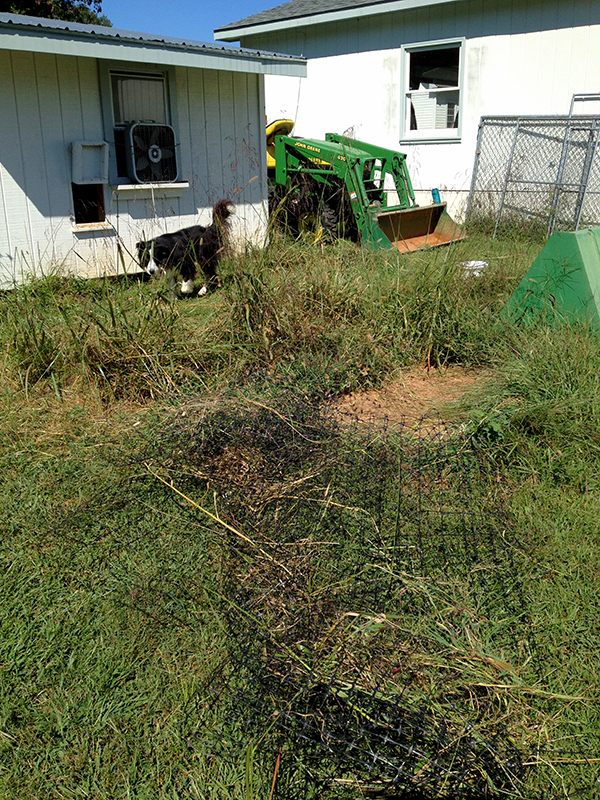
But on Friday the tractor came back, so I could finally move the forks and buckets and get to work cleaning up this mess. I removed the t-posts and then started pulling up the netting. It was so grown in that I had to use my scissors to cut the grass away from the bottom edge of the net. Not really a fun job. But I got it all up and then mowed the area.
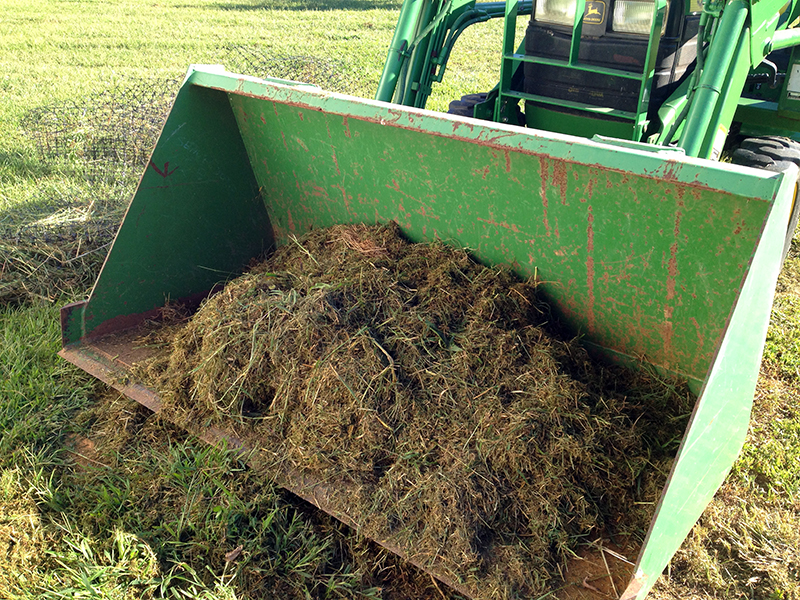
I couldn’t get my weed wacker started, so I had to cut the grass along the coop with scissors too. All this grass made for a nice tractor-bucket full of greens to juice the compost pile.
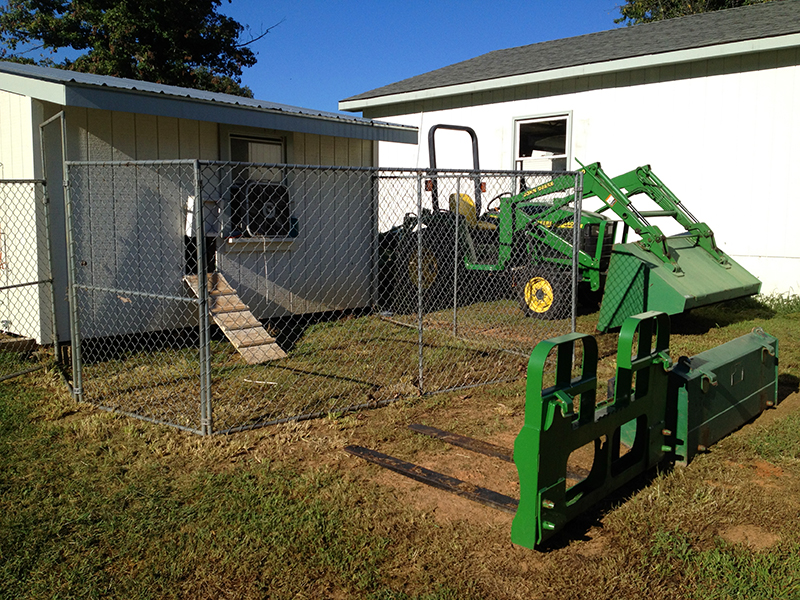
Then I had a clean slate to start setting up the dog kennel that’s leaning against the garage in the pictures above. I played around with a few configurations. Unfortunately I had two 10′ panels, and two panels that were only about 3.5′ wide. So a nice square pen wasn’t an option. Although the configuration I came up with bothers my sense of aesthetic order, the panels were free so I worked with what I had.
This was another one of the infinite jobs around here that would have taken two people about 20 minutes to do. But working alone I was at it for more than an hour, having to use shims and all sorts of other tricks to maneuver the panels upright and level so I could screw them together. And I totally torqued the tip of my thumb, trapping it between two panels while lifting them in to place.
But, injuries and annoyance aside, I got the pen up. I am living with it to see how I like it for a while, and if I decide it will stay I plan to dig some wire around the bottom so that I can have the chickens confined in there without worrying that they will be attacked. It’s not the most exciting or beautiful upgrade, but it’s an improvement that cost nothing but a few hour’s work and all sense of feeling in my left thumb.
August 8th, 2013 §
This summer I’ve grown to realize that I enjoy taking things out of my garden just as much—or maybe even more—than I do planting. Must be my editorial training, or perhaps it’s just a love of a quick, dramatic change.
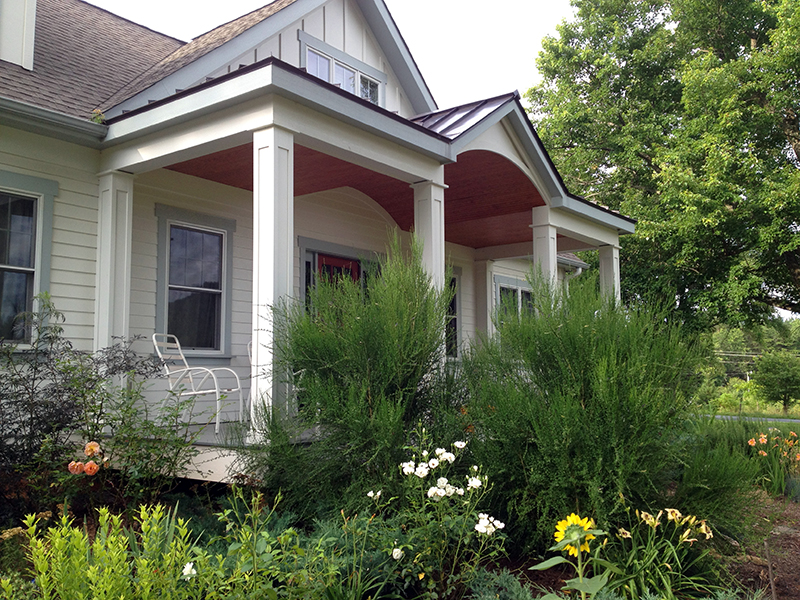
Now that the garden around the house is in its third year of existence, plants are beginning to mature and thugs are making themselves known. Case in point: the two “Lena” Scotch brooms that when planted were one-quart, 10″ shrubs. They’re briefly pretty in the spring, when the bloom with rose-pink flowers, but the rest of the year they look like this: Like ugly, shaggy, muppets.
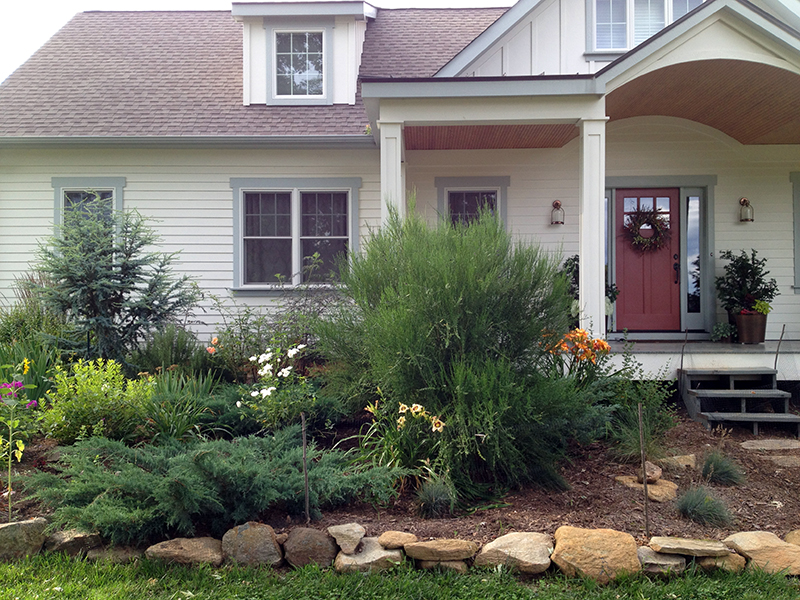
These bushes grew rapidly (though I haven’t experienced them to be at all invasive in my area, which I know is a concern for some parts of the country), and with each passing month I vowed they’d have to go.
But as it happens, I put it off, time kept passing, the shrubs kept growing, and then one day this summer I realized they’d completely overtaken a large section of the garden, were smothering a juniper beneath them, and were rotting my front porch where their branches held moisture against the wood.
I briefly considered trying to dig them out whole, saving them for replanting elsewhere. Then I weighed this logistical difficulty (they were close to six feet tall) against their value (not much), their short estimated lifespan, and their tendency to respond poorly to damage or pruning efforts. Not worth it.
So I went in with my loppers and cut their branches down to the ground. First one:
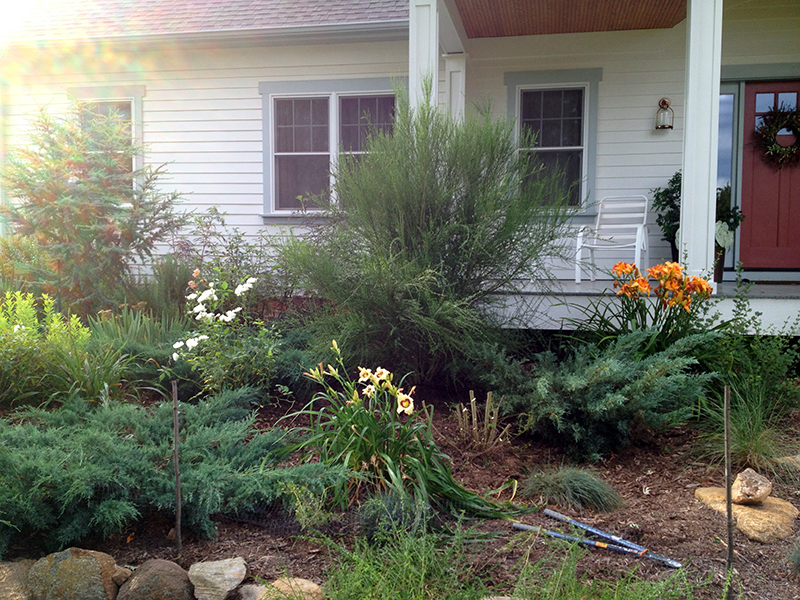
And then the other.
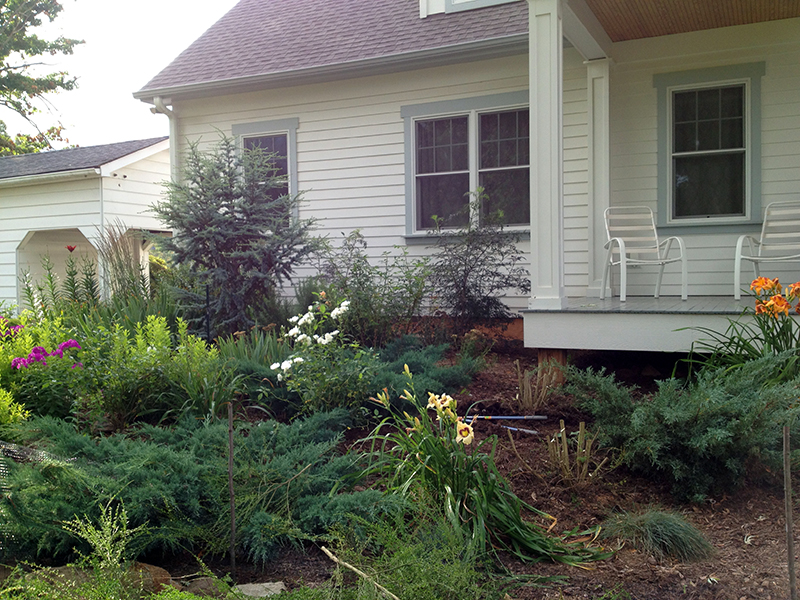
Ah! Looking so much better already! Now I just had to get the stumps out. A few exploratory shovel jabs into solid red clay got me nowhere. So I ran my hose over to the stumps and started drowning them out.
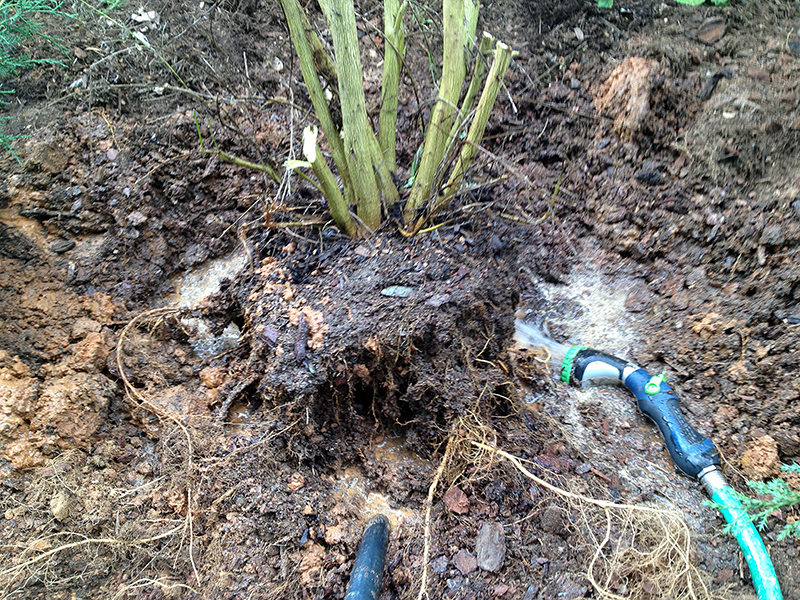
This worked really well. As the water loosened the soil, I could prize the root ball up and cut the most tenacious roots with my pruners. It was a hard, sweaty, dirty job, but I eventually got both root balls out. Even almost completely devoid of soil, each root ball weighed about 40 pounds. Good thing I had the tractor! I filled the big bucket with root balls, and all the cut foliage, and made the triumphant drive to the stump pile in the woods.
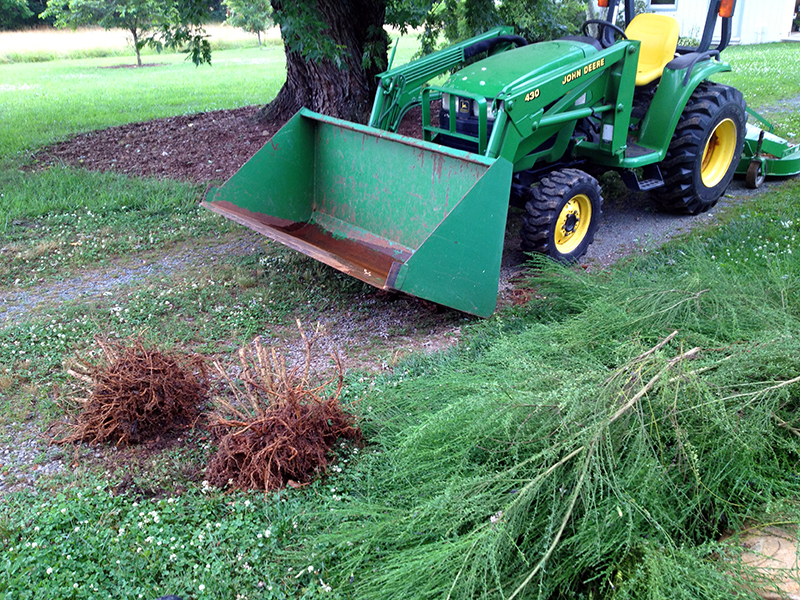
Up next, the Scotch broom are replaced with more interesting, better-behaved new plants.
May 8th, 2013 §
Once all the rocks were in place, I covered the turf that extended into the bed with newspaper several sheets thick. This grass-killing trick had been effective when I used it under the mulch rings I placed around my trees. Then I went in to the woods and dug up bucket loads of loamy topsoil, mostly with a shovel so I could pick out the rocks, sticks and vines as I went.
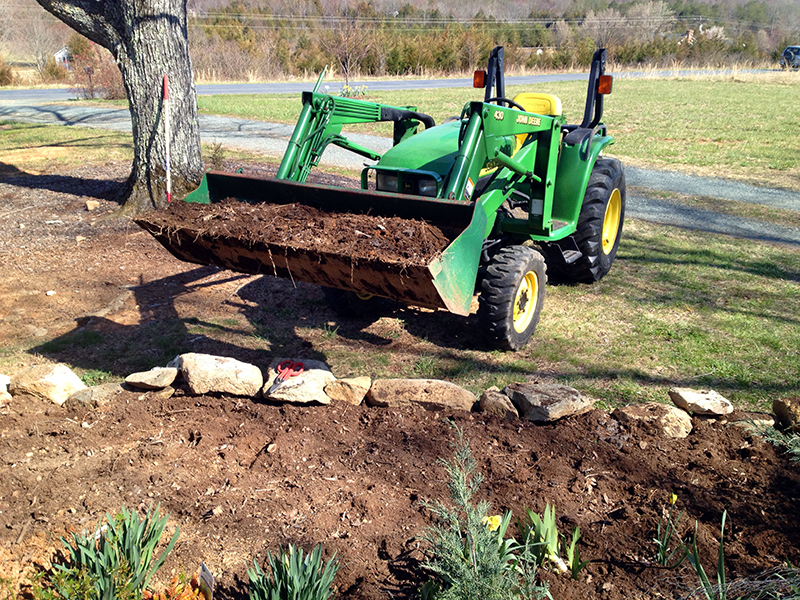
I dumped this topsoil into the new bed space, on top of the newspaper and up against the back wall of rocks, in effect forming a raised bed around two sides of the house.
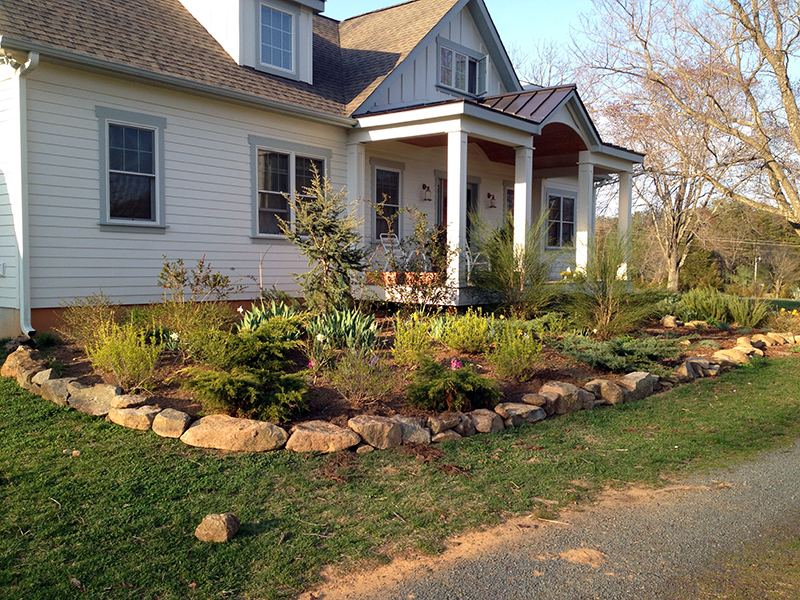
Then on April 10 I called my favorite mulch guy and had ten yards of double shredded hardwood mulch dropped near the woods. This is prettier—and more expensive—than the pine bark nuggets I buy for mulching around my big trees (below, on the ground). It will also break down much faster, helping to enrich the soil as it does.

I spent a day hand-forking the aforementioned ten yards of mulch into my garden. It was super-tricky, delicate work as many of my perennials were just starting to emerge and hard to see, and I didn’t want to smother them.
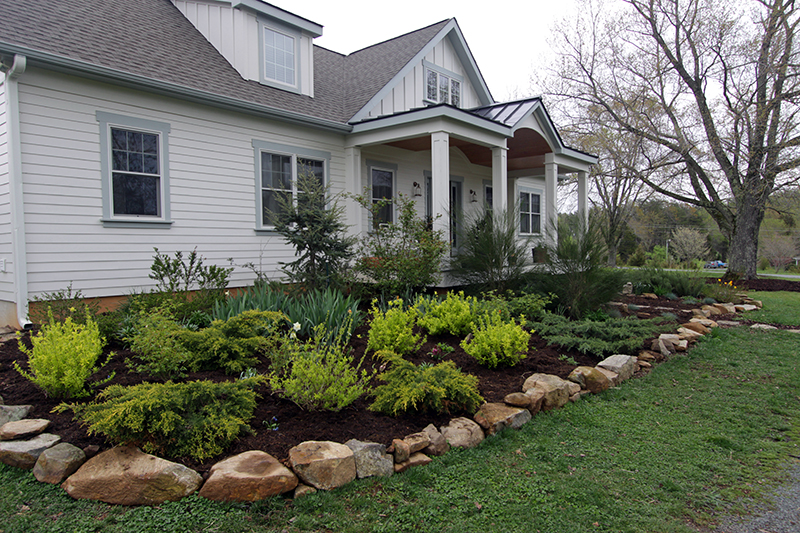
But after eight hours of mulching and only a few blisters across my palms, it was done. And looked pretty nice, I thought. There are a few spots that can use another stone or two, but I will fill those in once I’ve fully recovered.
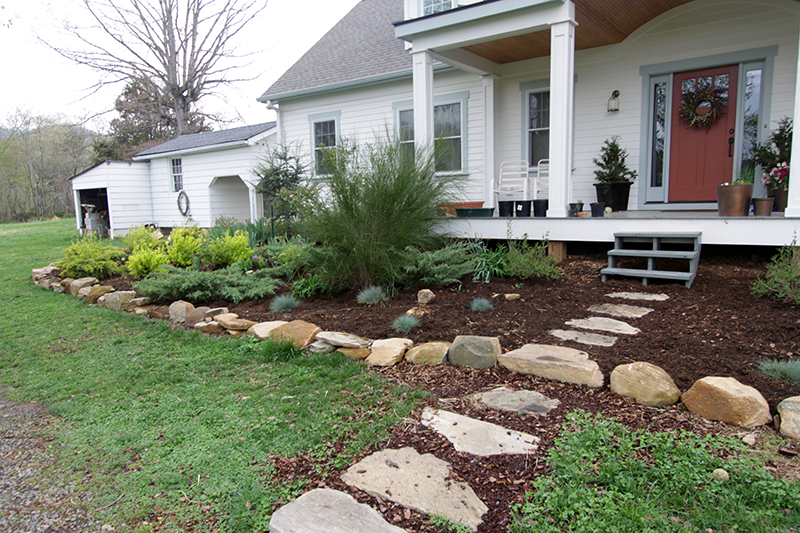
It’s not the fancy hardscape I’d most love, but for $285 worth of mulch and untold hours of bodybreaking labor, I finally have some decent-looking garden beds that are in keeping with the informal, cottage nature of the house. What’s more, this project massively contributes toward my goal of making maintenance around here as easy as possible. Now I just run the string trimmer right up against the rocks—which means no more futile hours spent hacking enroaching turf out of the beds. Plus, the mulch will help keep weeds out and moisture in during the hot summer while feeding the soil and coddling the earthworms beneath.
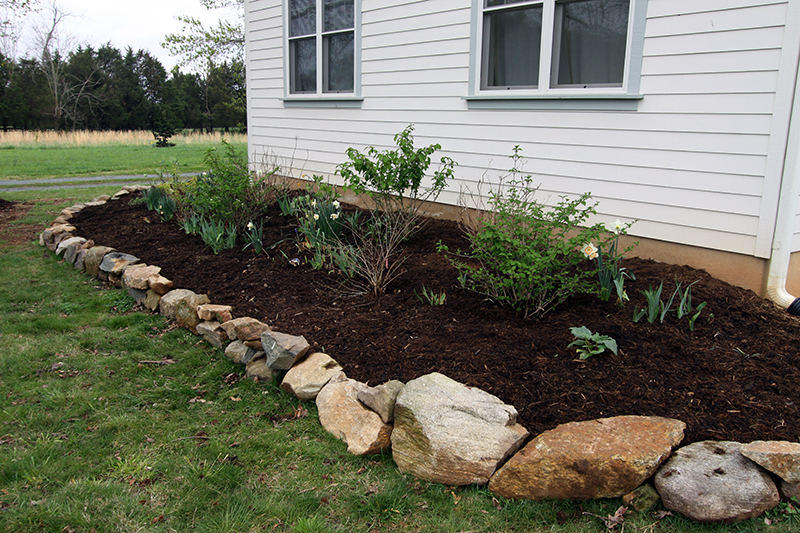
And, I am really excited to have gained a bit more extra bed space, complete with pretty decent soil—thanks, forest! I have already started planting some fun new additions, including peonies for the shadier areas and sedums for the sunny front corner. My plan is to eventually colonize the rock wall with sedums growing over it and through the spaces between rocks.
The garden has really come on in the weeks since these pictures were taken, so a little virtual plant walk will be coming soon.
May 7th, 2013 §
Much of March and April was devoted to building a rock wall around the front and road-facing side of the house. I’d grown tired of hacking turf out of the unedged beds, and the bed on the side of the house that faces the road was too steep to hold water on the plants in it. As you can see below, within the stone wall, it wasn’t a good look. Last summer I’d gotten some quotes to build a nice stone retaining wall around this end of the house and around the front, with a flagstone front walk and stairs. The quotes ranged from $8,000-$18,000, which just wasn’t in the budget at this time in my life.
So I started pulling rocks out of piles in the woods and used the tractor to get them near the house. Some of these rocks were the foundation of the house I tore down to build mine, and others no doubt came from clearing the pastures way back when. All winter long I played around with the rocks, moving them many times until I got them arranged in a line I liked and that would almost double the depth of the bed on this front corner of the house.
I had really low expectations for this project, as I think rock-edged beds can be pretty stupid looking. And I know that a proper rock wall is dug into the ground for stability and protection against frost heave. But I made peace with the idea that this didn’t have to be a perfectly permanent solution, and I figured that if I used rocks that were as large as I could handle the installation would appear more like a rock wall and less like a line of rocks, which is exactly what it looked like below, during the head-scratching phase of this project.
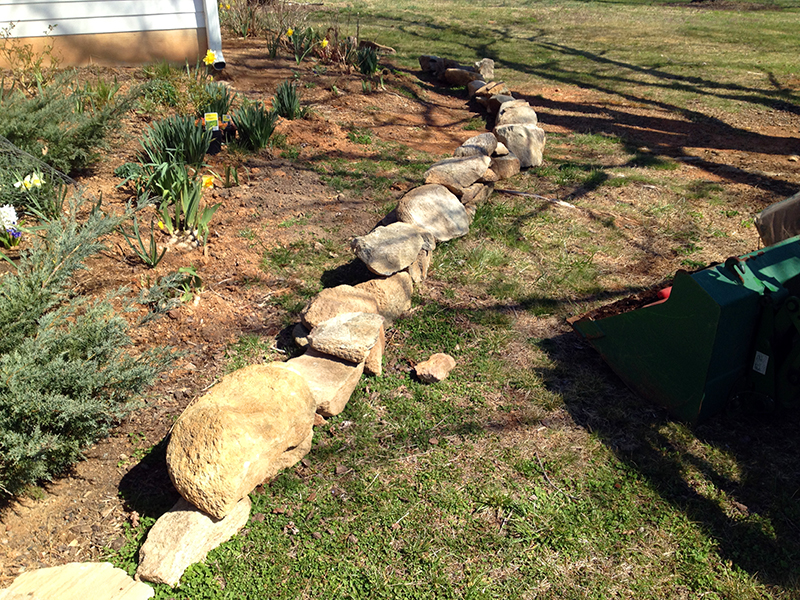
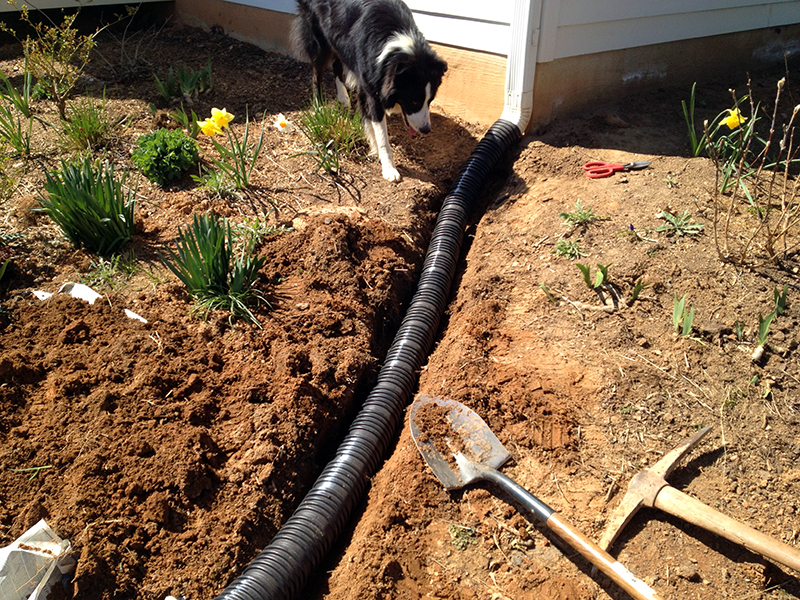
I’d been having trouble with runoff from the downspout in the above photo. Every time it rained, water ran down the bed and pooled near a maple tree in the yard, messing up its mulch ring and eroding the bank. So I figured that I’d take care of this issue by burying a drainage pipe under the bed I was expanding. It was easy to dig it in and hide its opening at the inside edge of the new wall. The bottom of the pipe is dotted with quarter-sized holes that let water escape as it flows away from the downspout.
Then I went back to the woods for more rocks, some of which took every ounce of my strength and willpower to budge into the tractor bucket. I don’t remember how many trips it took, but there are 173 rocks in this installation and many are not insignificantly sized.
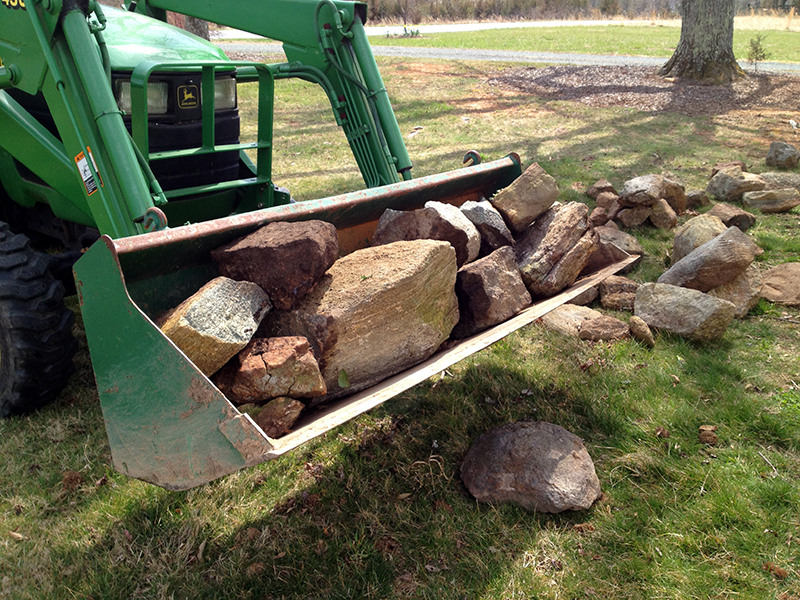
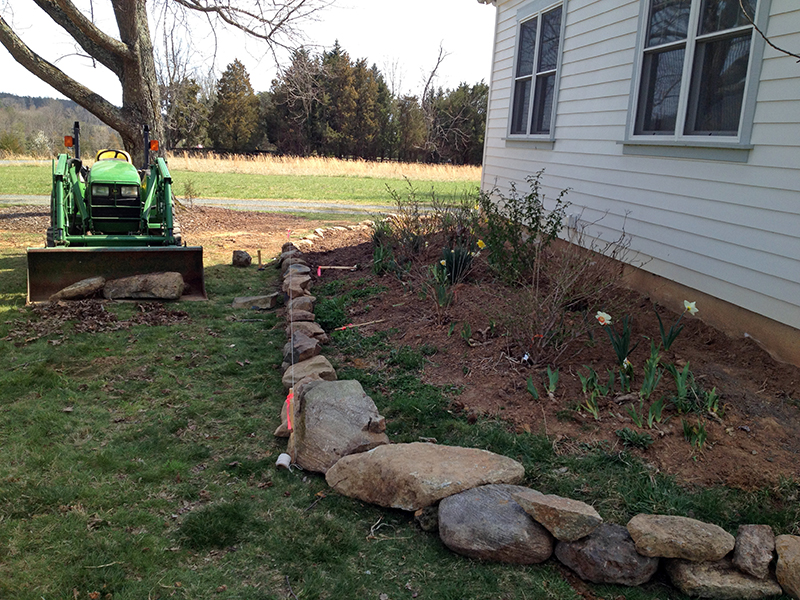
I spent days fiddling with rocks, turning each this way and that, trying my best to fit them into a wall-like configuration. Of course this week coincided with our freak 90-degree April heat wave. Let’s just say I got tan and back to my summer weight during this heavy-labor boot camp!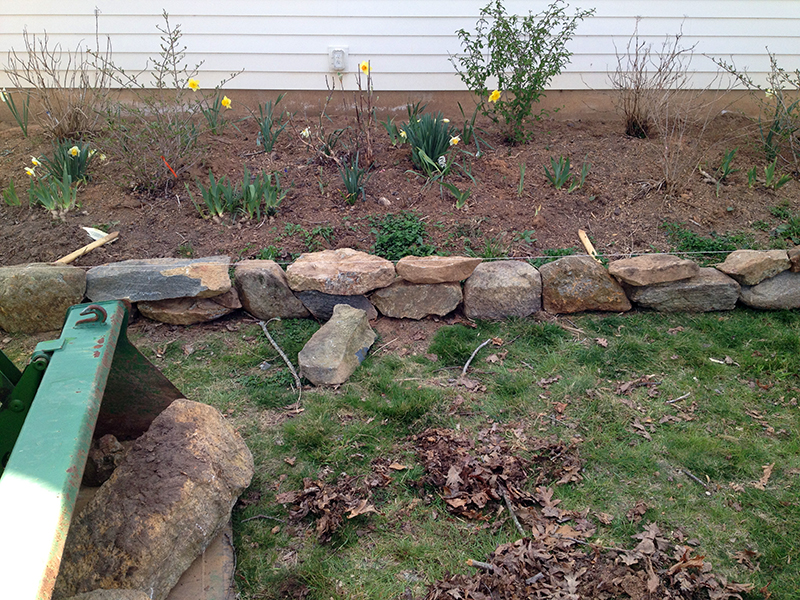
Up next, the wall continues…
March 7th, 2010 §
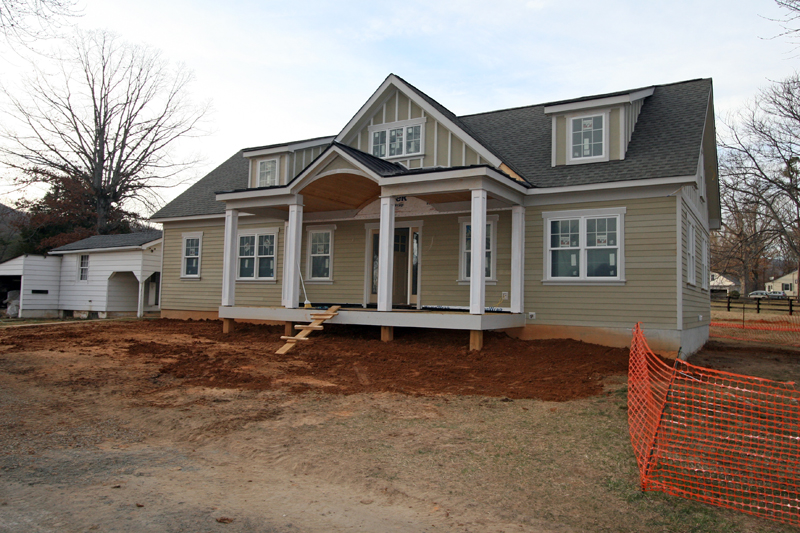
Spent yesterday in the beautiful new crawlspace wresting a dehumidifier around all the HVAC ducting. Then back at the house today to do some preliminary grading. We wanted to raise the soil grade under the front porch before the tongue and groove flooring was installed, but before doing that we had to clean up tons of construction debris from around the foundation. I had budgeted a couple of hours for this project, but like with everything having to do with this house, it took much longer than anticipated.
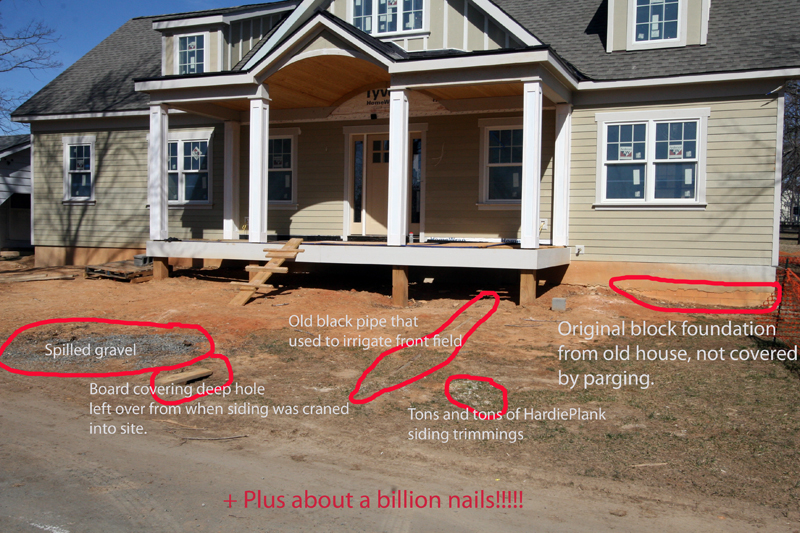
There was much clean-up to do—from raking trimmed pieces of siding material and lumber out of the dirt and grass to picking up countless nails, many of which came out of the driveway. We also pulled tons of rocks and chunks of concrete away from the foundation. Then it was time to dump many tractor buckets of soil (saved when we dug the crawlspace deeper) through the porch joists.
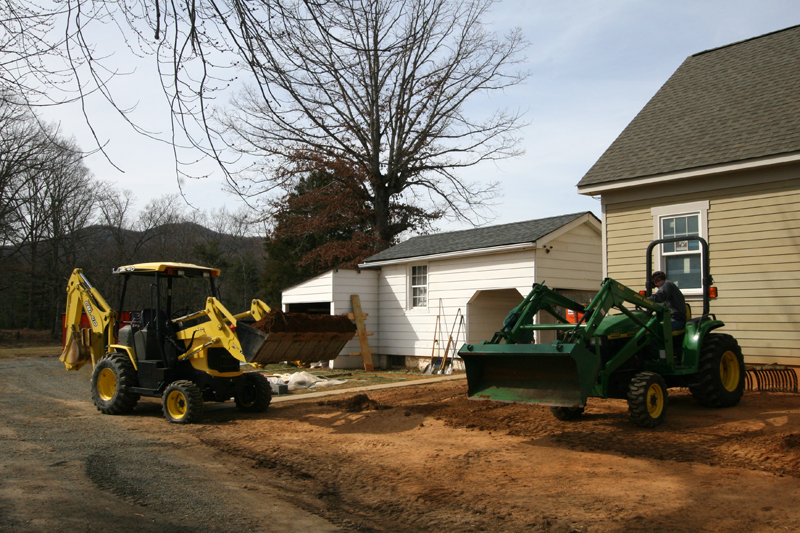
And then came the fun of a long afternoon spent shoveling soaking wet clay into position to obtain the proper grade around the house for water to drain away from the foundation and not stay puddled against it. Man, that clay is heavy and even with two tractors and various helpful attachments (e.g. York rake), I am beat. In fact, little muscles I never knew I had in my forearms are so protesting as I type that I am signing off until another day. It didn’t feel like much changed until I looked at the before photo (above) and after (below). But in reality my parents and I got a lot of cleanup done around the house, and with each bucketful of crap we tip in the dumpster, the house morphs from construction scene to home.
