August 12th, 2014 §
Last week the house got a major upgrade in that one of the two entries now has proper steps!

Yes, I am embarrassed to admit that for more than four years I lived with two cinder blocks and a couple paint-stained board as my only way off the back porch. It was one of those things, of which there are myriad when you build your own house, that get left to the last minute because I couldn’t decide on a design while the contractors were on the job. The contractor left, and I was left with a precipitous drop off the porch onto a wobbly 2″x6″. I adapted, and managed to navigate the tricky board/door combination okay, and as these things happen when there are a zillion other projects higher in priority, it just became normal. If a bit kountry.
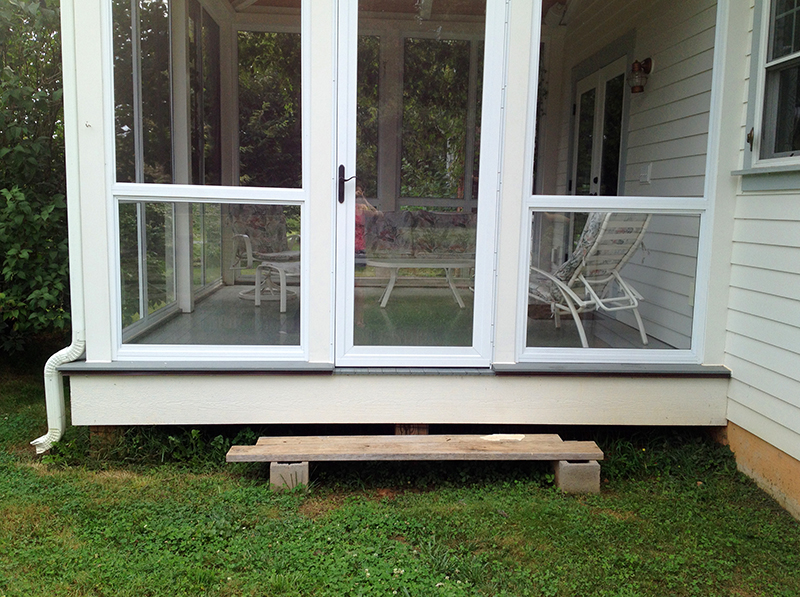
But last week, thanks to a few day’s hired labor, I now have a proper set of stairs at the back of the house. I had a flash of inspiration last winter when I realized a simple set of stairs wouldn’t suffice in this situation. It would have been too hard to stand on them and open an out-swinging door. So I came up with this idea to make essentially a mini-deck, which gives plenty of room to operate the door and also all sorts of nooks for sitting, potted plants, English Shepherds, etc.
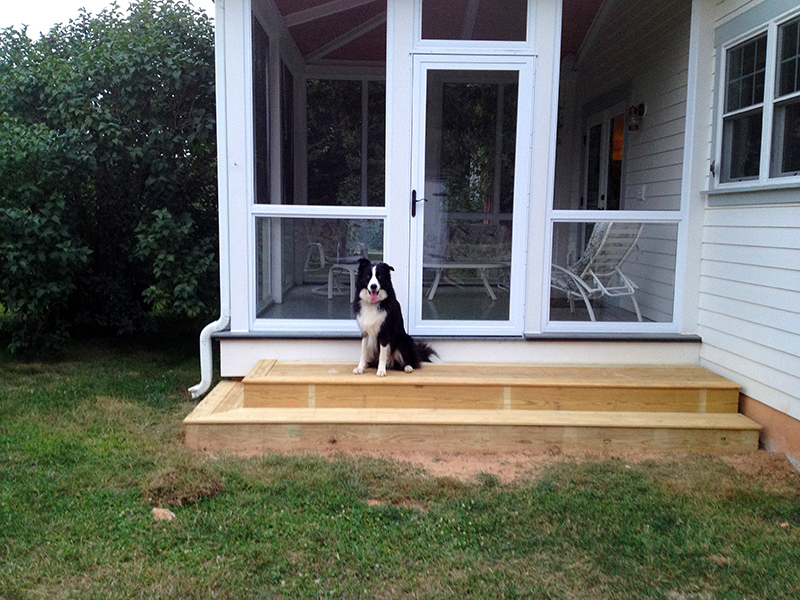
In time the new pressure-treated wood will weather, and then if I am feeling ambitious I can paint it to match the house. But for now I am thrilled with how it turned out. I keep going in and out the door so easily that I laugh with delight, remembering how annoying it was before. I grilled out last weekend and didn’t burn myself opening the door like I did on the fourth of July! Now if I just had a nice stone patio for my new steps to connect to. It’s in the master plan…maybe in another four years!
August 2nd, 2014 §
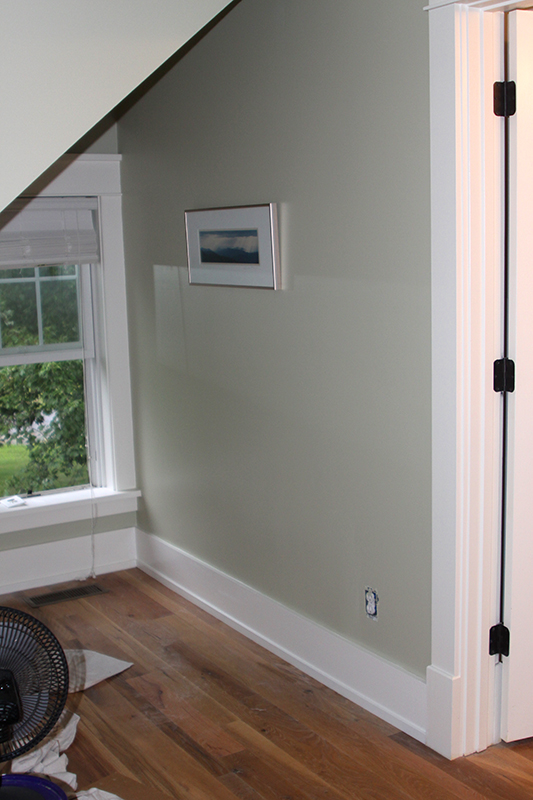
Sound the bells of celebration! More than four years after moving into my new house, I finally have every single gaping hole in the wall filled and every missing piece of baseboard and trim completed! This is huge progress! The last piece went in upstairs in the little room at the top of the stairs between the bed and bathrooms. I had left this open as a possible access panel to underneath the bathtub on the other side of the wall, in case I needed to add a supplemental heater to keep the bathwater warm in my six-foot bathtub. It turned out that I didn’t need the heater, but I never got around to fixing the hole.
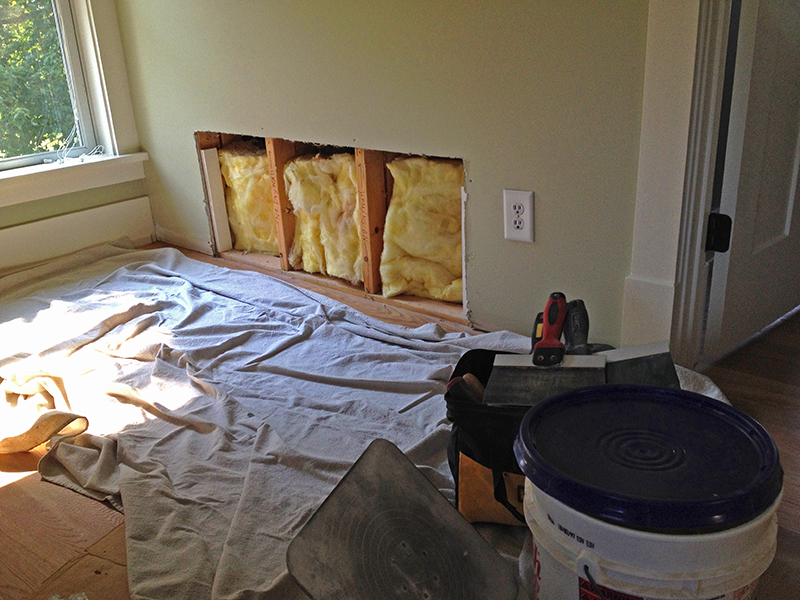
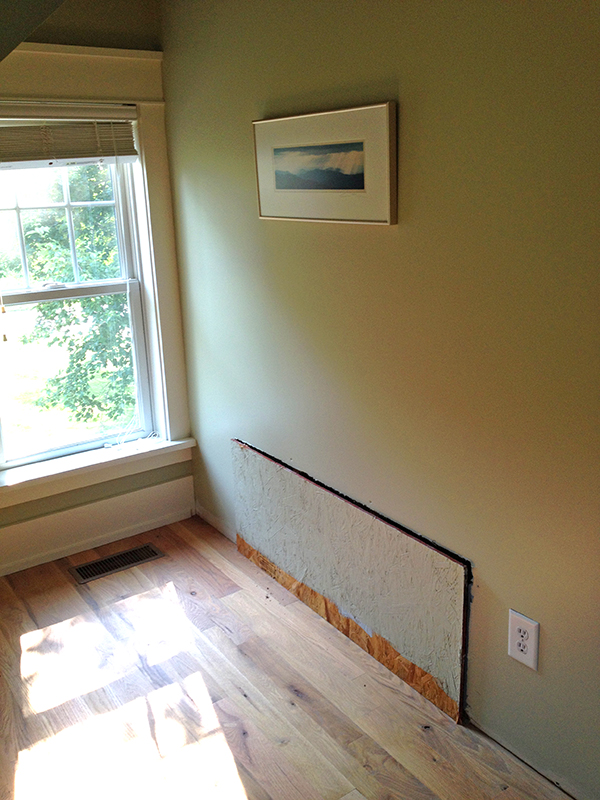
Until a few weeks ago. My dad rightfully thought I needed to learn another home construction skill—drywall—so we used this as a training project. We removed the OSB panel that had been “temporarily” screwed into place over the hole.
Dad cut the drywall to size and screwed it in, then did the first couple of coats of mud. I picked up from there with the finish work, sanding, smoothing with a wet sponge, and trying to feather the edge of the mud gracefully into the existing wall.

I didn’t do the most awesome of jobs, but I just had to move on. We nailed in the base trim, then I was back to caulking, filling, sanding and painting. Just last night I got the final coat of paint on, and I am calling this project complete. Yea!
July 21st, 2014 §
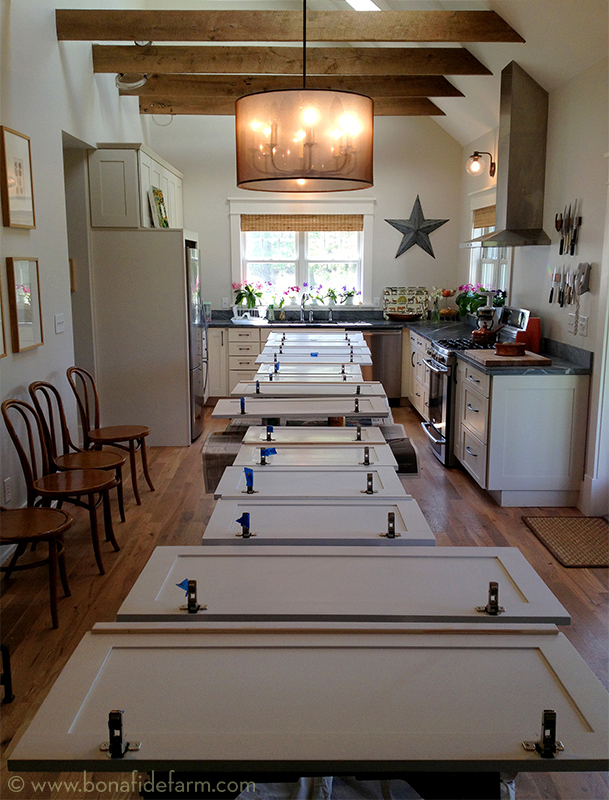
Remember back when I posted the photo of this spring’s major construction project? Well just because I failed to follow up doesn’t mean the construction stopped. Indeed, I spent most of the spring, when I wasn’t in the garden, working to install, trim, finish and paint seventeen custom cabinet doors.
When I built my house I had the brilliant idea to leave all the under-eave spaces on the second floor open, with the idea being that they would provide valuable storage space in a house with no attic nor basement. My dad offered to build custom doors, so when the builders signed off on the job it meant that I was left with giant holes in the walls of every room upstairs and long stretches of missing baseboard around all these openings. For four years I stared at pieces of cardboard that I hastily nailed over the openings on the day I moved in, after my cat decided to try to commit suicide by wedging herself between an exposed rafter and some insulation.
Obviously I hated these holes, as they were a blight on a brand-new house. I also hated that because they were so exposed inside, they let in a lot of cold air, wind, and, yes, mice. So last fall when I had the crawlspace properly conditioned I had a crew spray the inside of all the cubbies with foam insulation. That went a long way toward cutting down on heat loss and together with the foam in the crawlspace seems to have really helped the mouse problem. 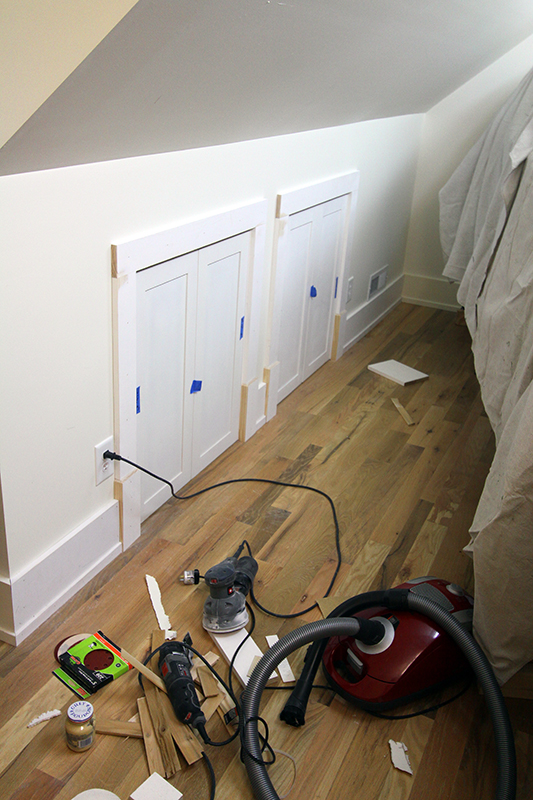
This spring my dad finished building the doors, and he installed them and trimmed them out, even cutting custom plinth blocks that were a slightly scaled down version of the blocks I used around my human doors. Install was no picnic as we discovered less-than-perfectly plumb walls that necessitated some creative carpentry work. 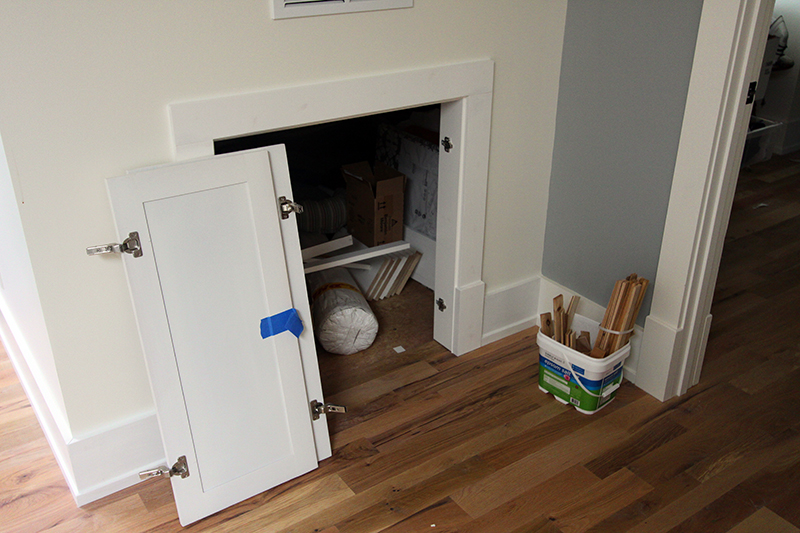
Then it was up to me to fill nail holes, sand all the trim smooth, caulk for what felt like miles, and finally paint two coats of oil-based paint on everything, sanding between coats. It felt like it took me forever, but the end result is totally worth it.
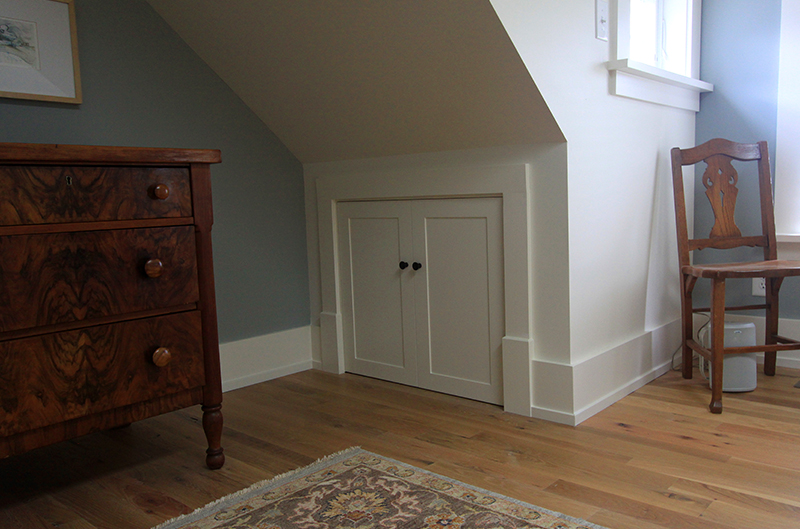
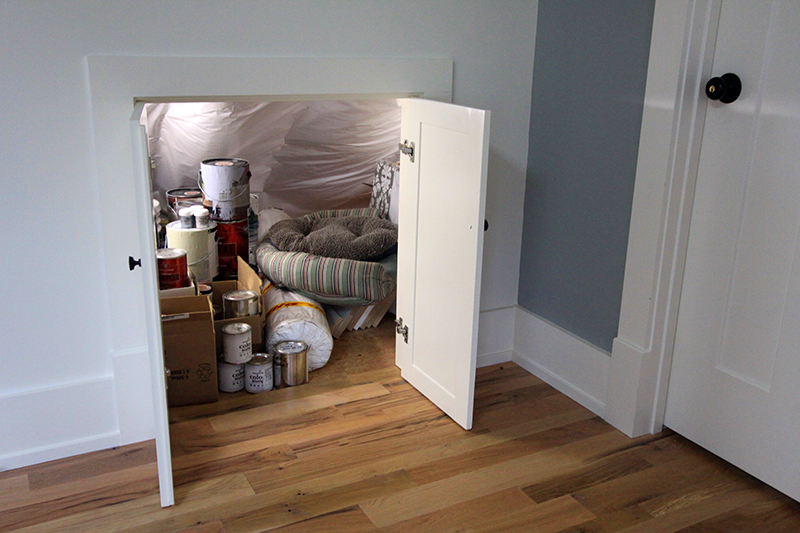
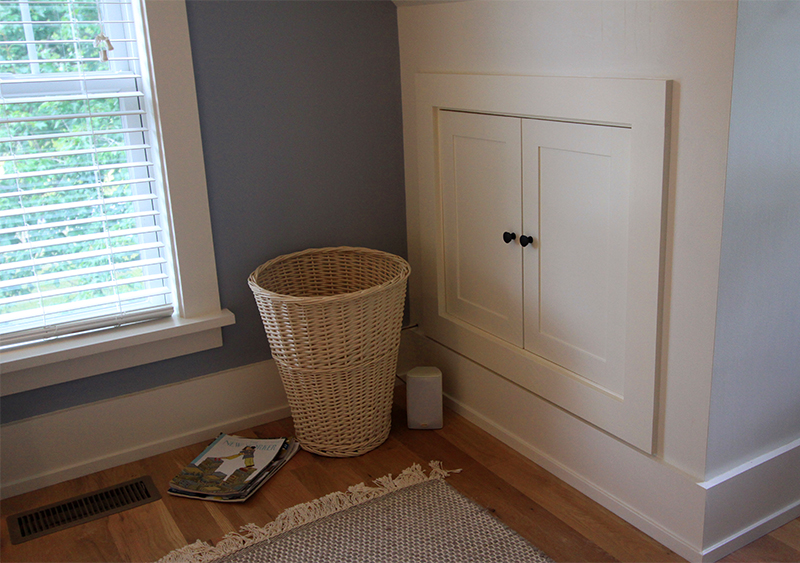
The two cubbies in the master bedroom, above, and one of the two on either side of the dormer in the master bath, below:
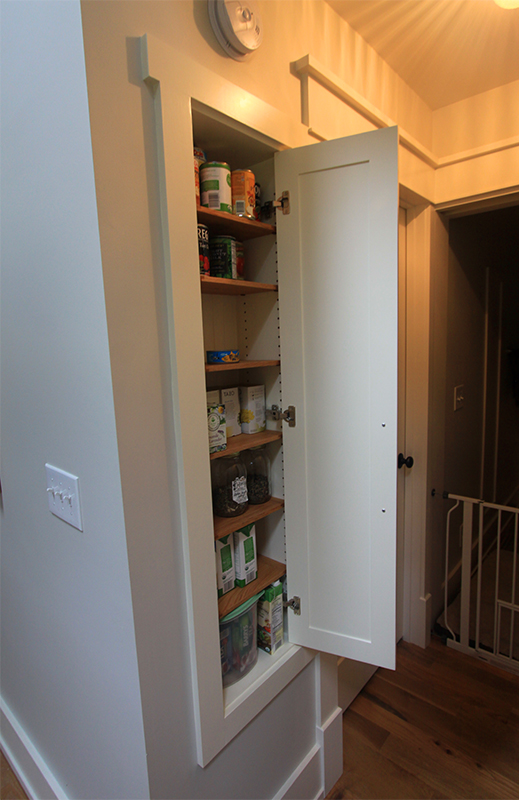
We also took care of what had been another hole, open the the HVAC ducting, right off the kitchen. This was meant to be a pantry, and now it finally is. In addition to making the door, Dad built an insert backed with beadboard and made beautiful little shelves out of a red oak tree harvested on his farm.
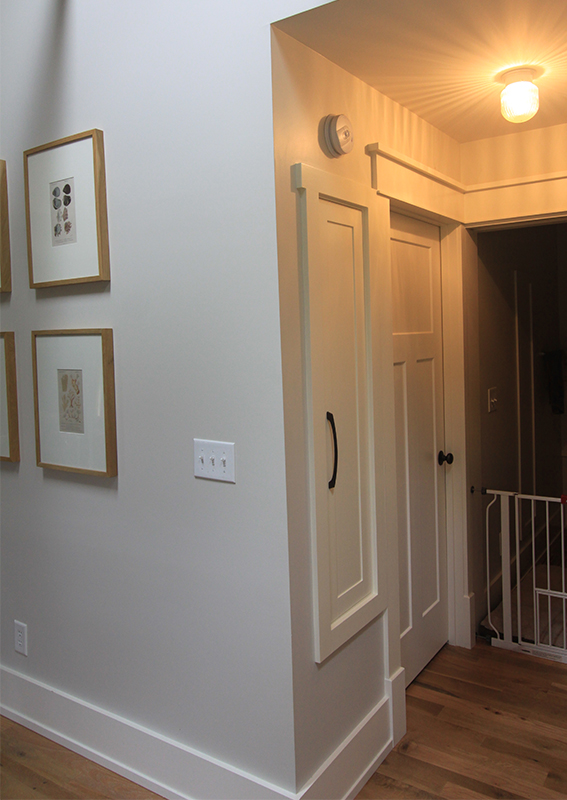
It doesn’t look like much space, but again I was trying to maximize storage in this small house. And this little niche fits a surprising amount of food. Dad also made some access panels to cover the hole in the laundry room open to all the structured wiring for the house and another access hole behind the master bath shower.
One point of frustration on this project was learning that oil-painted surfaces yellow over time. All my trim was done in Benjamin Moore’s White Dove when the house was built, and I loved it. But over just the past four years I suspected my trim was yellowing. This was confirmed when I went to paint all the new cubby doors and trim in brand-new White Dove. The new paint was no where near the color of the four-year-old paint. I was pretty darn disappointed that paint that cost $100/gallon didn’t retain its color. I had to get new paint matched to the yellowed trim, and it’s not perfect. Plus, I detest yellow-toned trim, and that’s what I am stuck with now. Lesson learned: Use latex to paint anything that you don’t want to yellow. That’s what I will be doing the next time I need the trim painted.
But all in all, this was a huge project with one pantry, eight cubbies, and two access panels complete. Thanks for your help and beautiful work, Dad! The cubbies are a massive upgrade and add tons of custom charm to this little cottage.
May 9th, 2014 §
It’s been a long time since I’ve subjected myself, my dad and the house to any interior construction projects. But now there’s wood filler dust coating every surface, I’m tripping over drills and saws and sanders, and my kitchen has looked like this for a week:

That’s 25 feet of good-time, fumey, oil painting fun, my friends. Stay tuned for the big reveal!
April 26th, 2014 §
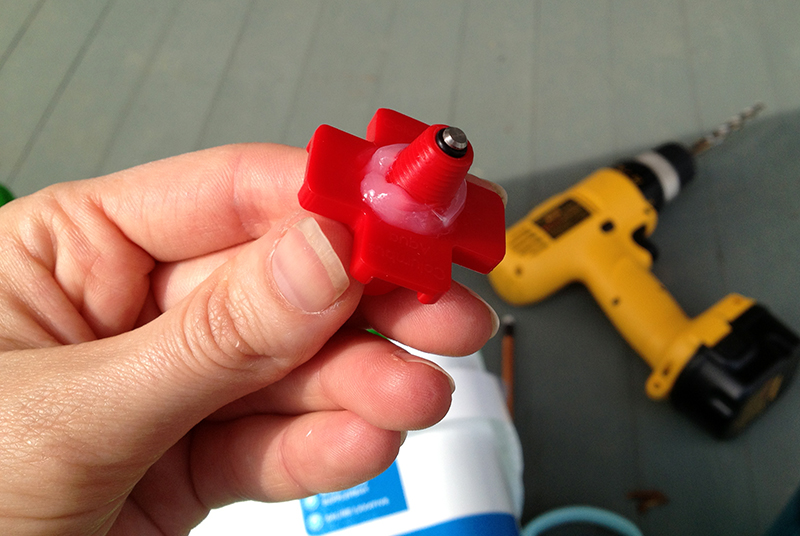
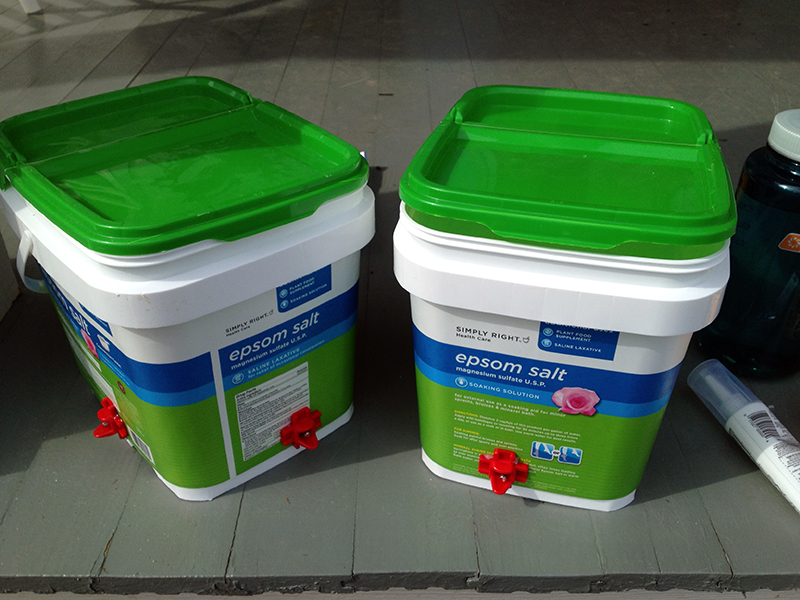
The creation of the chick waterer went so well that I wasted no time in making a few more for the main coop. These would be permanent containers, so I used clear silicone to install the nipple waterers into a couple of recycled containers. Yes, I buy epsom salts in 10 pound tubs, about fifty pounds at a go. Don’t laugh. Farming really beats up the body!
These are actually pretty great containers because 1. they were free, 2. they’re opaque, which helps prevent algae growth, 3. they’re sturdy—if they held ten pounds of epsom salt they’d have no trouble holding ten pounds of water, and 4. they had well-positioned handles to make hanging easy.
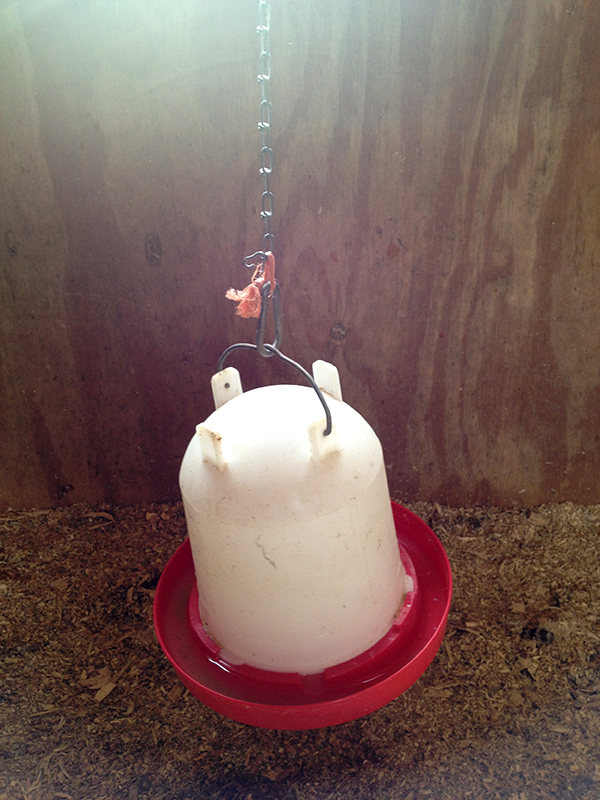
The idea was to get rid of the situation below—hanging waterers that were the bane of my chicken-keeping life. The water got so dirty, downright filthy in the heat of summer, and when the chickens drank it down low enough the whole thing tipped, spilling the water out into the bedding and wetting the wooden floor of the coop enough to cause it to rot. The wet bedding is bad for birds, makes habitat for disgusting flies, and stinks. Plus, the one-gallon waterer needed to be filled twice a day in the heat of summer, and required frequent checking to make sure it hadn’t spilled.
With my new waterers assembled, it was time for some framing in the coop. I assembled a few bucks worth of supplies and fired up the drill.
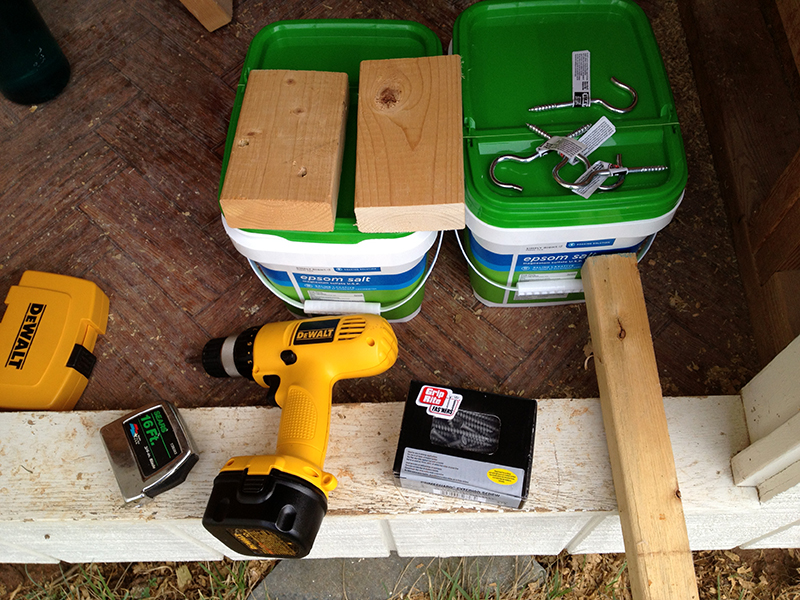
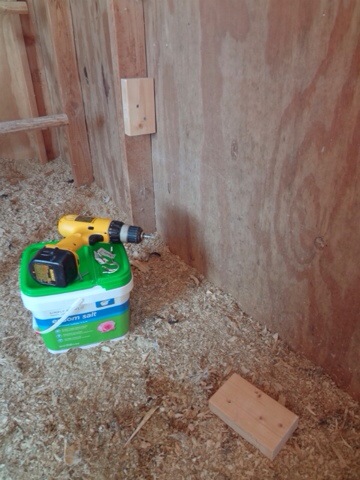
First I put up some blocking, using a couple of scrap 2×4 pieces.
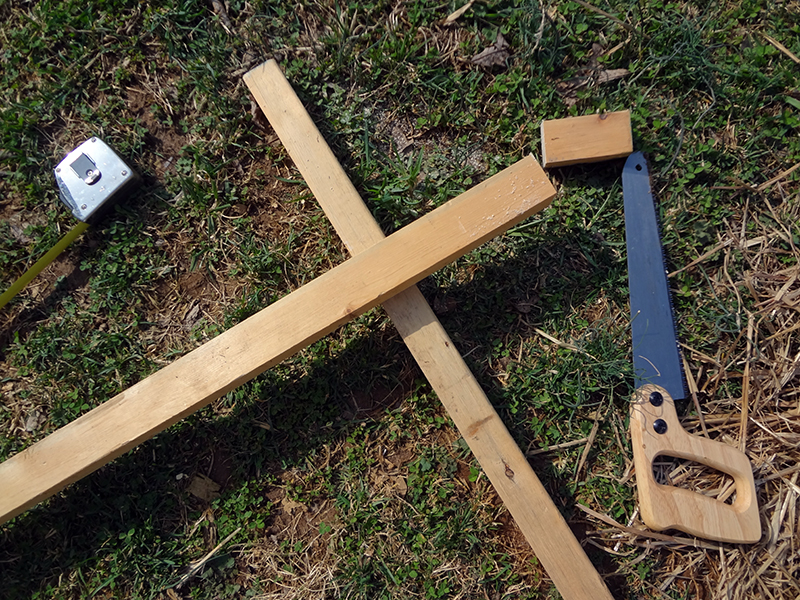
Then I cut a piece of scrap wood to length and screwed it in place on top of the blocking.
Finally I installed heavy-duty cup hooks to fit the width of the container handles.
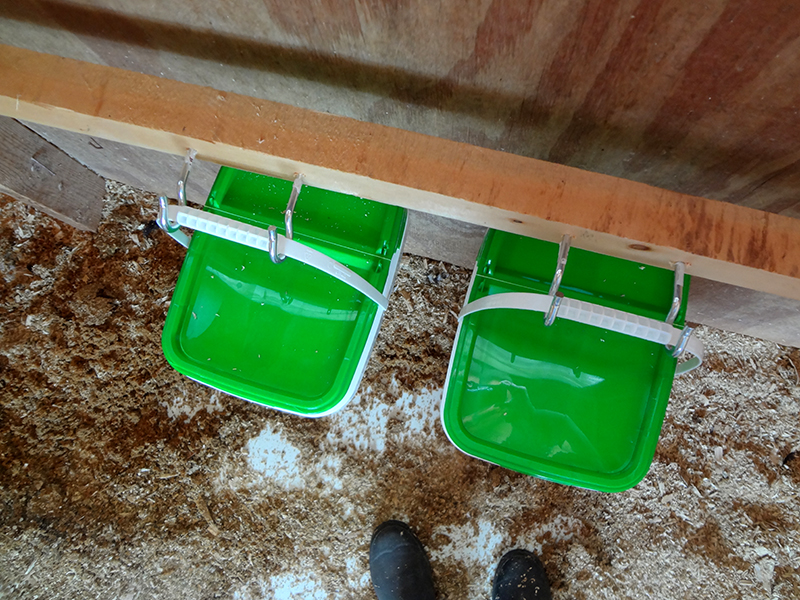
And voila! A new chicken watering system!
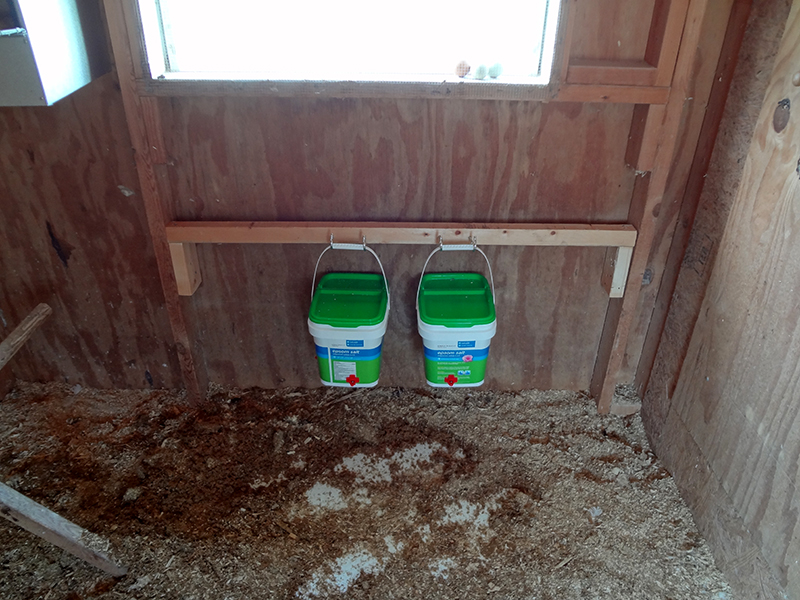
I taught the chickens how to use the new waterers with the cranberry trick I used in the broody coop, and after a few weeks of use I am still happy with this system. The bedding remains dry, there’s enough water in the containers to avoid filing them every day, and it stays clean and fresh. Down the line I could even add more containers if I wanted. In all this is an incredible upgrade that solved the biggest, messiest problem of chicken-keeping, and I am happy with how it turned out. I only wish these new horizontal nipple waterers would have been available four years ago when I started keeping chickens!
November 25th, 2013 §
As we head into the last month of 2013, I figured I better record some of the larger projects I undertook this year but didn’t manage to write about. I know they’re no longer newsy, but I find that I frequently refer to my own blog to jog my memory about when I did certain projects, so it’s important to get them up here even if they’re month’s late.
First up, the ironic hydrant installation. Backstory: for the first year I gardened here, I carried 5 gallon buckets of water, one in each hand, to water the vegetable garden. Then I wised up and ran a few hundred feet of garden hose from the spigot on the well house. It lay across the field and driveway all summer, in all its crappy artificial green glory, and made not only an eyesore but a pretty annoying mowing obstacle.
Of course, each of these summers saw record high temperatures, summer droughts, and even some pretty serious storms that killed the power for sometimes up to a full week. I did my best to keep the garden watered, but finally told myself my plants had better grow some deep roots and fend for themselves. I threw on a thick layer of straw mulch and walked away.
Come spring 2013, I decided it was time to get some proper water out to the vegetable garden. So I called a nice guy and we set a date for him to come install a water line and frost-free hydrant. And then it started raining. And didn’t stop all spring. Which was great for my young garden, but we kept having to push back our installation date because it was raining too much to open the deep trench that was required to house the water line. And so, with these flooded conditions it was June 25 until it was dry enough to install the hydrant.
But the crew arrived that morning and within a few hours had opened a deep trench all the way from the wellhouse, where all my plumbing is located, to the garden.
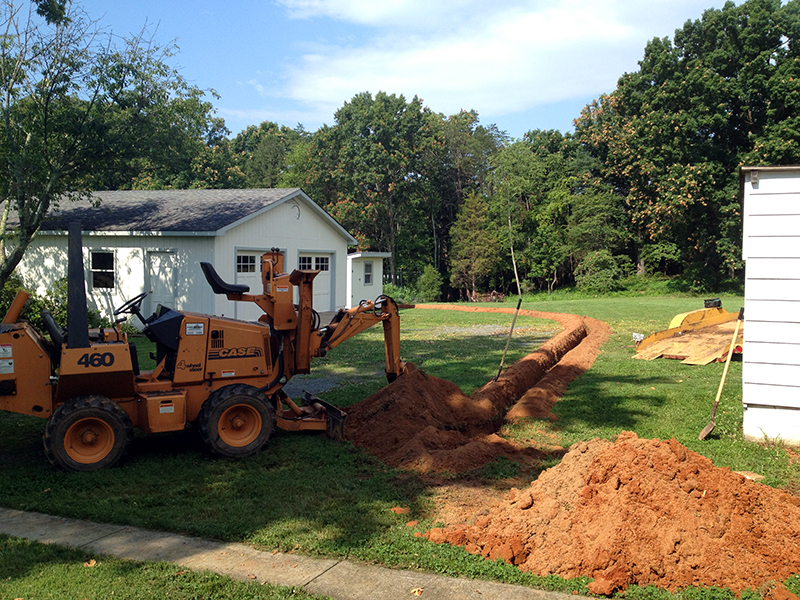
They installed a new water line coming through the foundation of the wellhouse basement and ran pipe in the trench…
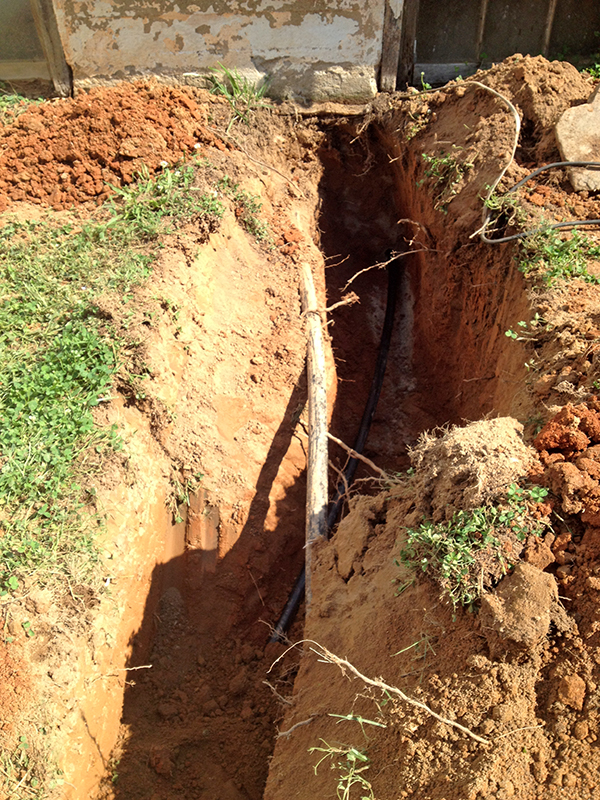
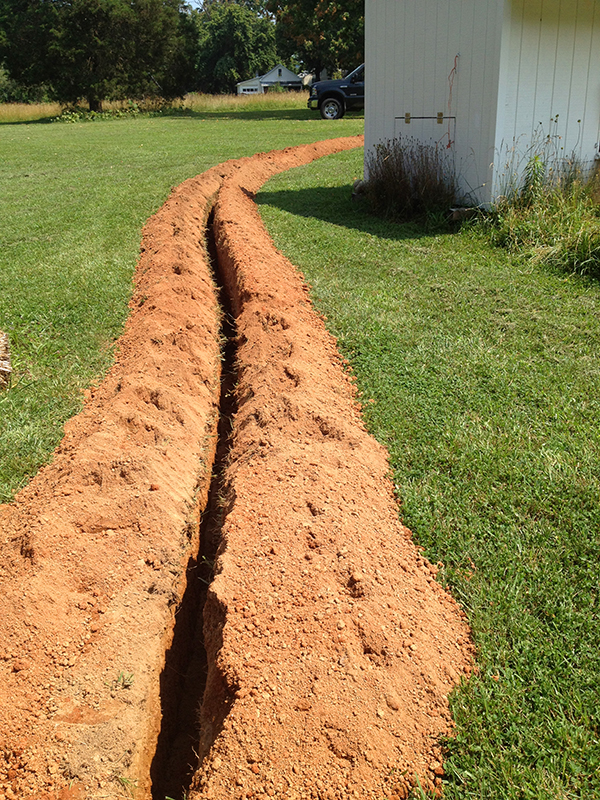
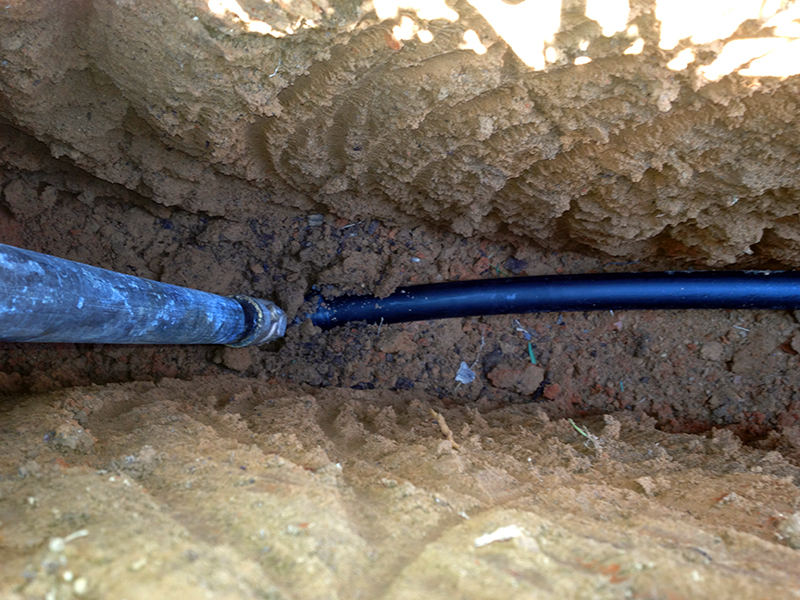
...and out to a new hydrant right next to the vegetable garden. I chose to not put the hydrant within the garden so I could use it to fill the chicken waterers without going in the garden. The photos above give you a good sense of the native red Virginia clay that I’m working with as I build my gardens, and is a good illustration of why I get so excited when I can eventually turn this into black, crumbly, worm-filled soil!
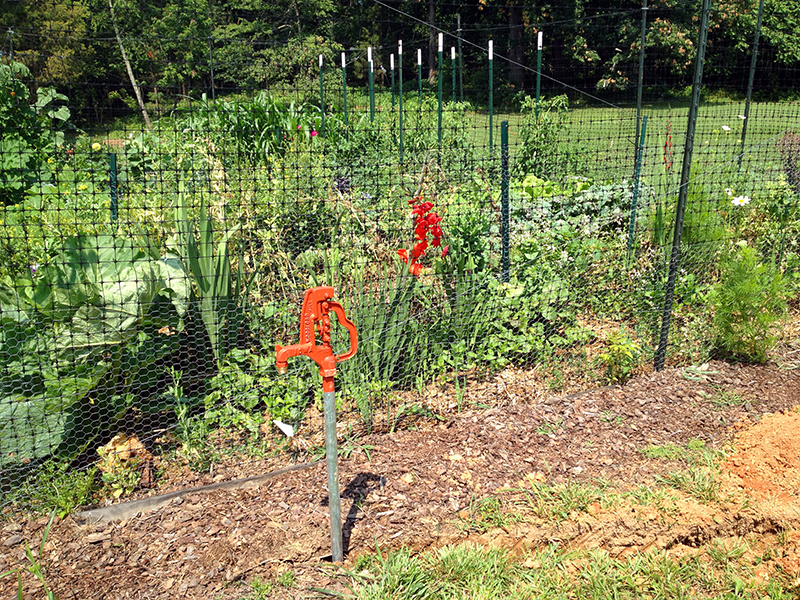
And now I have an awesome water source right where I need it. That I used to water the garden exactly twice this year, as the rain continued and kept things so happy that supplemental water was totally unnecessary. You can see in that photo how far along the garden was on June 25, without any extra water at all.
I know there are bound to be more summer droughts, but I sure was laughing that the year I chose to install the water line is the year I didn’t end up needing it! Oh well. Every little bit of infrastructure I add to this property improves it and takes me a step further along the path of carving a working homestead out of a field.
October 12th, 2013 §
Apparently, I collect paint cans. And this doesn’t even count all the exterior paint stored in the garage!
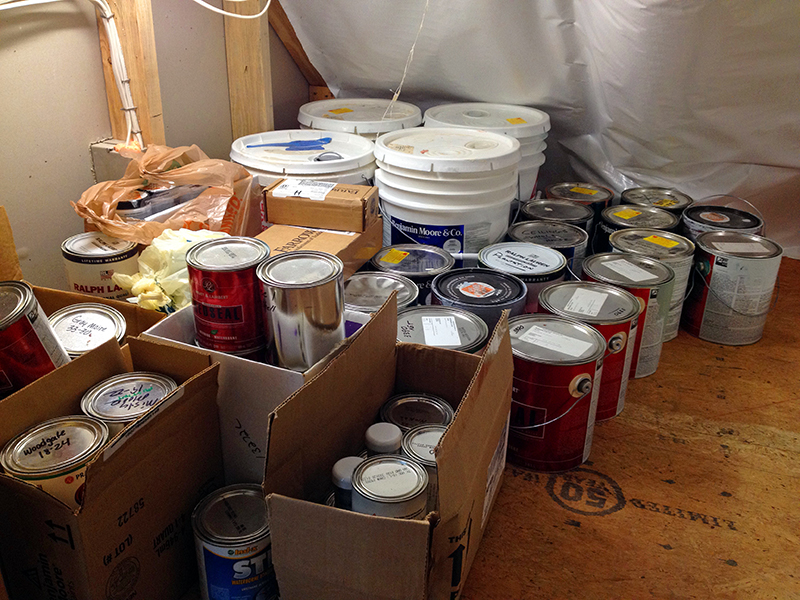
I had a crew here this week spraying foam insulation in all of the six under-eave cubby holes that I use for attic storage on the second floor. My hope is that the insualtion will help seal the mice out, as well as the cold air that was streaming into the house from these unfinished spaces that were, until this week, fairly open to the outside.
I had to take everything out of the cubbies for the guys to work in them, and yesterday while I was putting it all back I was a bit shocked to realize how many cans of paint I have collected. This is what happens when you’re obsessed with paint colors and you’ve painted certain rooms more than three times within three years of living in a house to get just the perfect shade. I blame twelve years of apartment living–in which I was forced to suffer with regulation dingy-looking off-white walls—for inducing this paint-bingeing behavior!
May 30th, 2013 §
Ever since I moved to Bonafide Farm, I’ve wanted to grow hops. But the infrastructure always stopped me. Hops are vines (actually, botanically they are bines) that will grow 20′ or more, and need trellises that I just didn’t have the energy to conceive and build.
But in mid-April I was down in Nelson County, which is now regionally acclaimed for its breweries (Devil’s Backbone, Blue Mountain, etc.) enjoying a post-hike flight at Wild Wolf with some friends. A sign at a shop across the patio advertised hop rhizomes. I couldn’t resist. Turns out I had discovered HomebrewZ!, a delightful little shop stocking all your homebrew essentials.
A very lovely woman sold me her last seven Cascade rhizomes and instructed me to “go across the way” to speak with another woman who would impart all the secrets of hops culture to this neophyte. I got the skinny from this sage and rejoined my friends and our dogs on the patio.
The rhizomes,which are nothing more than 3-4″ twigs, languished in a paper bag until I could do a little research and make a trip to the hardware store for supplies. Then my friend Simon and I spent an evening hauling forest topsoil and compost to the site of an old berry patch by the south side of the garage. Once we had the soil nice and juicy (hops are heavy feeders with an extensive root system), I mounted the ladder, drill in hand.
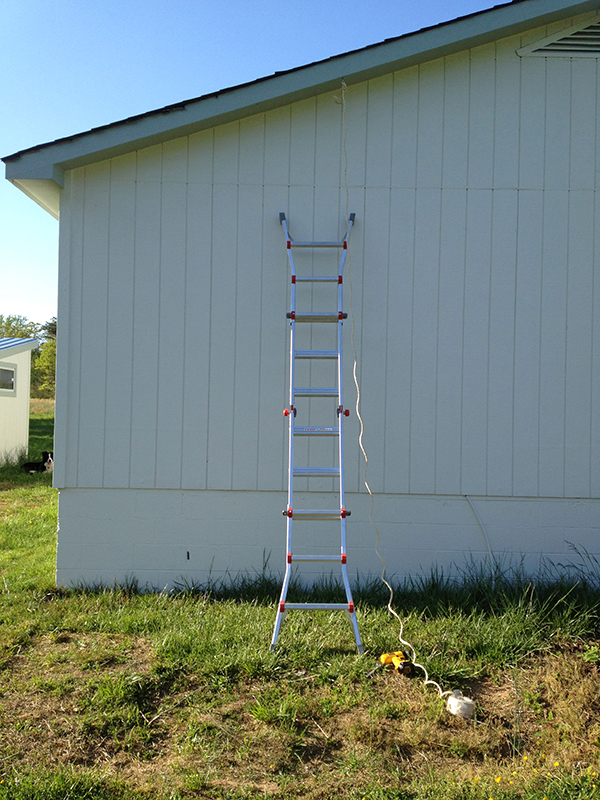
Right up under the eaves I installed two stainless steel eye-bolts. Then I ran 3/8″ sisal rope from them down to dog tie-outs that I’d screwed in to the growing bed. And this was the extent of my trellis system. One of the best things I have learned from living here is that sometimes things work out best when I am just pushed to react to what a situation demands, instead of obsessively planning to the point of inaction.
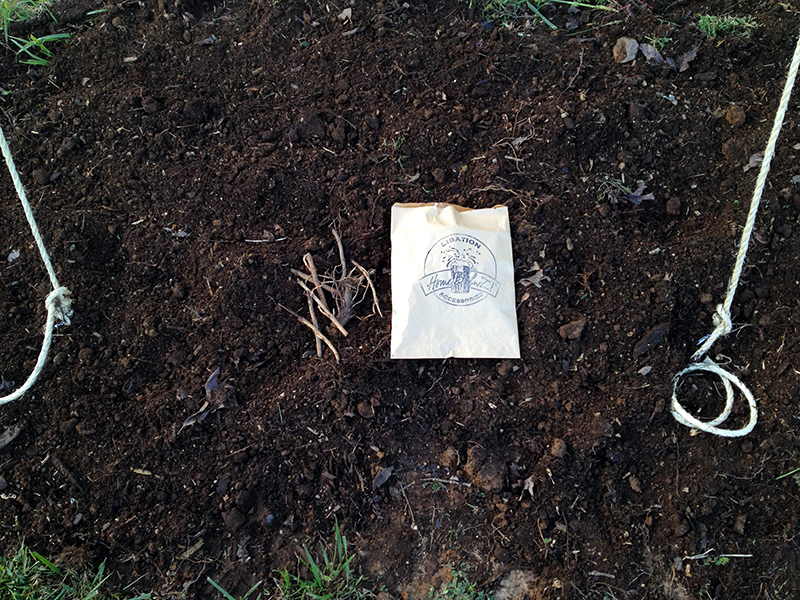
I arranged the rhizomes in the soil around each tie-out, covered them over, and hoped for the best.
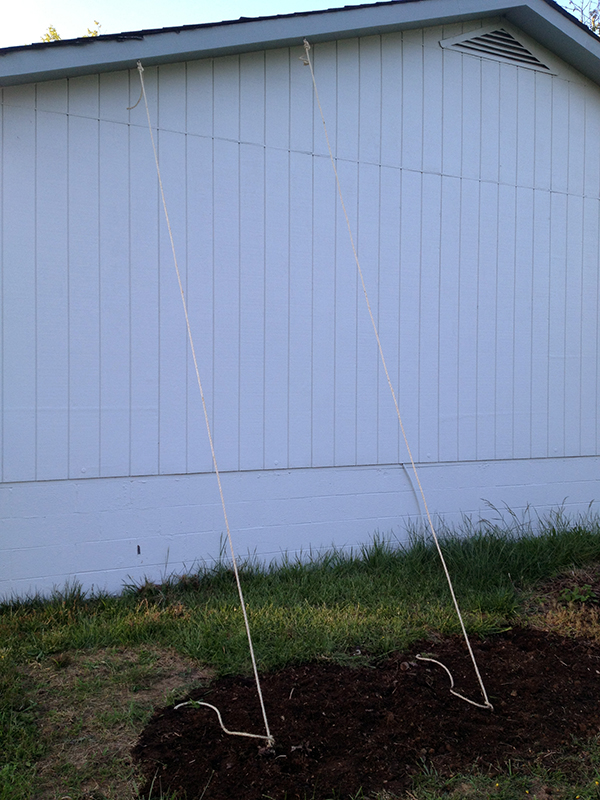
A few weeks passed with no change. Just as I began to worry that I’d gotten some dead rhizomes, tiny leaves appeared. And then there were more. I made chicken wire cages to keep the chickens from eating the hops, and in a few days more sprouts appeared. And then I went away to the beach for eight days, and when I returned my little hop babies had found their ropes and started to twine. So precocious!
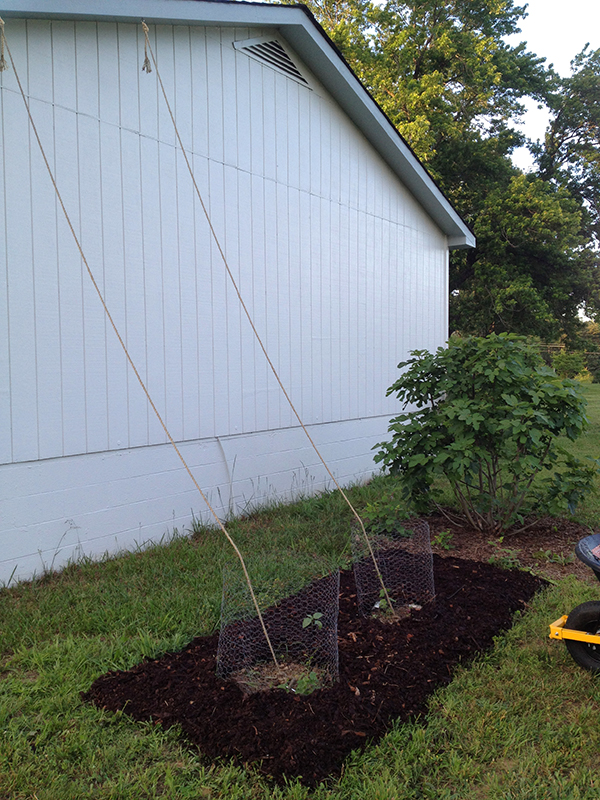
Unfortunately the pasture was fast overtaking this nice, rich new bed, so last weekend I dug out all the weeds, laid down newspaper, and piled mulch on top. This will keep the weed pressure off my hops so they can grow to their max. That’s my Celeste fig next to them, which came through this winter without any intervention from me and is on its way to becoming a beautiful asset.
I found another little snake in the mulch. This is the second “mulch snake” I’ve encountered.
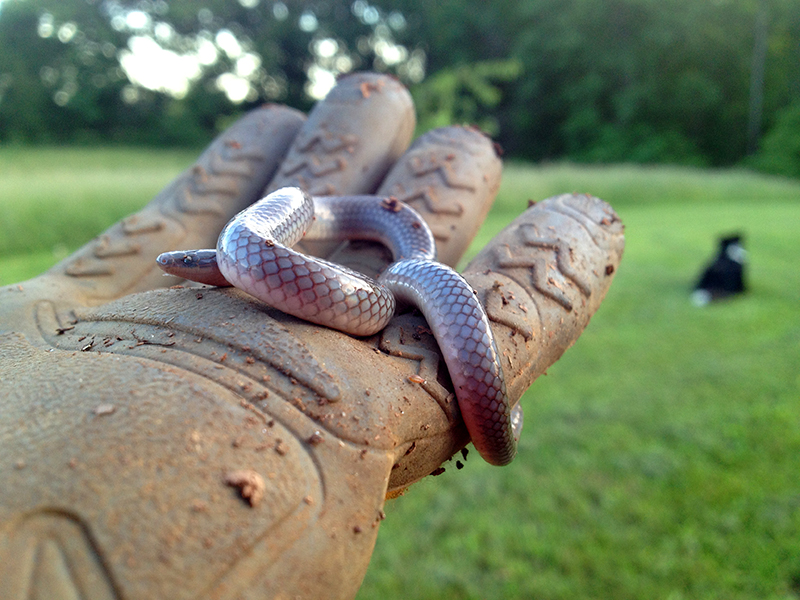
I placed him next to the growing hops. I figured twiney things belonged together.
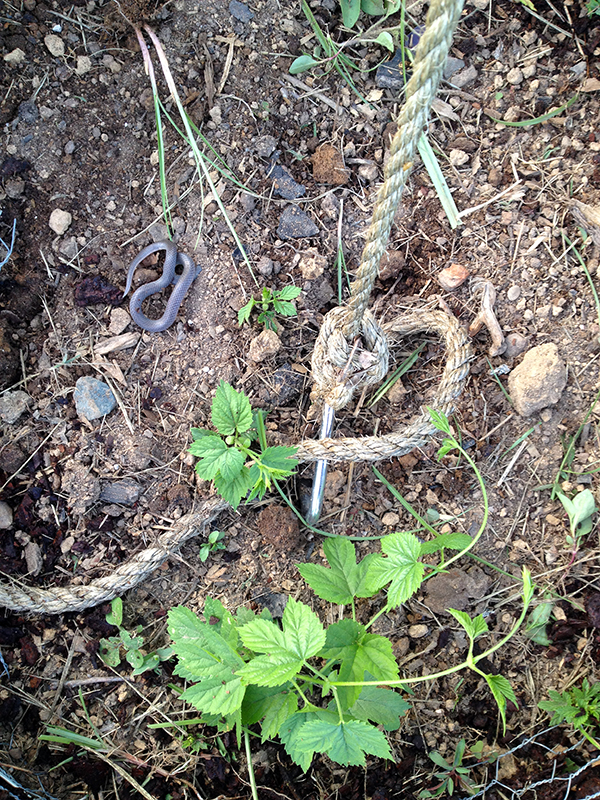
I am very excited to see what my hops do. Maybe someday I’ll be making a Bonafide Brew with my own homegrown hops! And if not, hops are a wonderful herbal sedative often used to induce sleep. A girl can dream…
January 25th, 2013 §
of the season. Up before sunrise yesterday for a very cold walk. It was six degrees here at 6:30 a.m. the previous morning. Winter has finally arrived, and I am straying from the wood stove only to fill the bird feeders and defrost the chicken water.
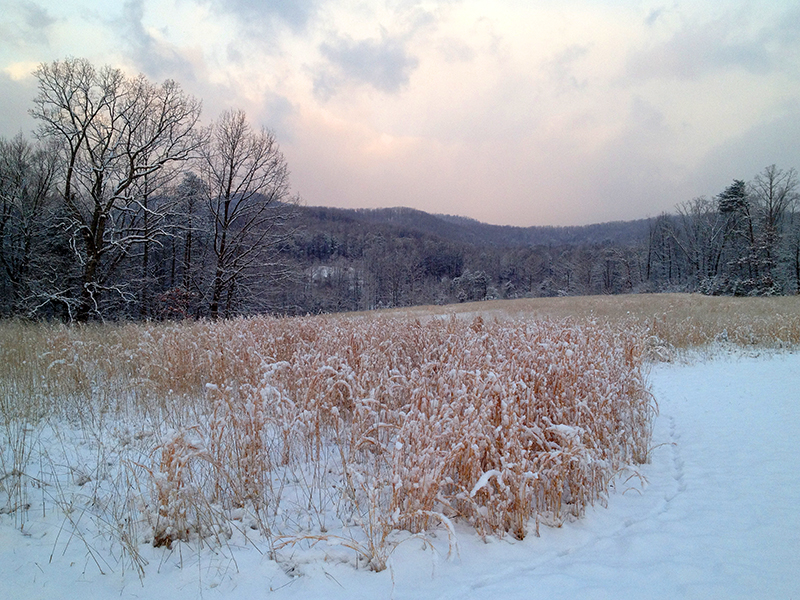
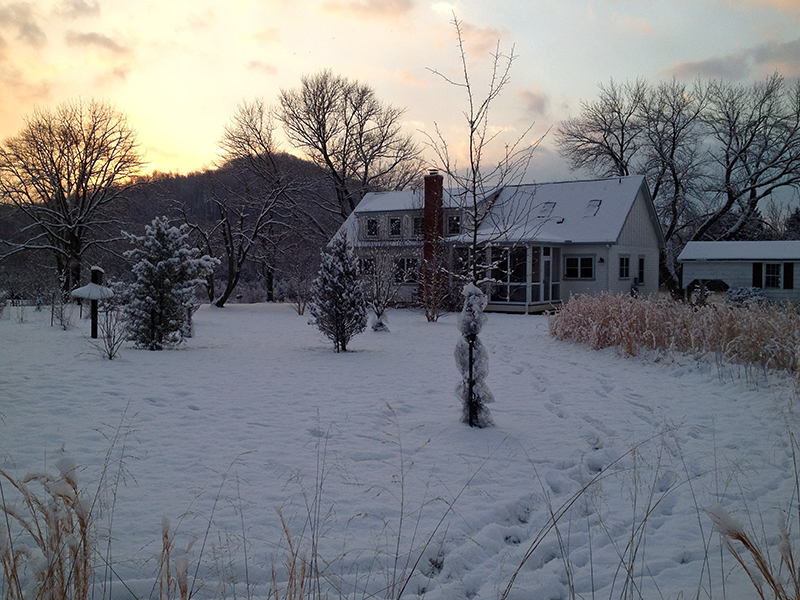
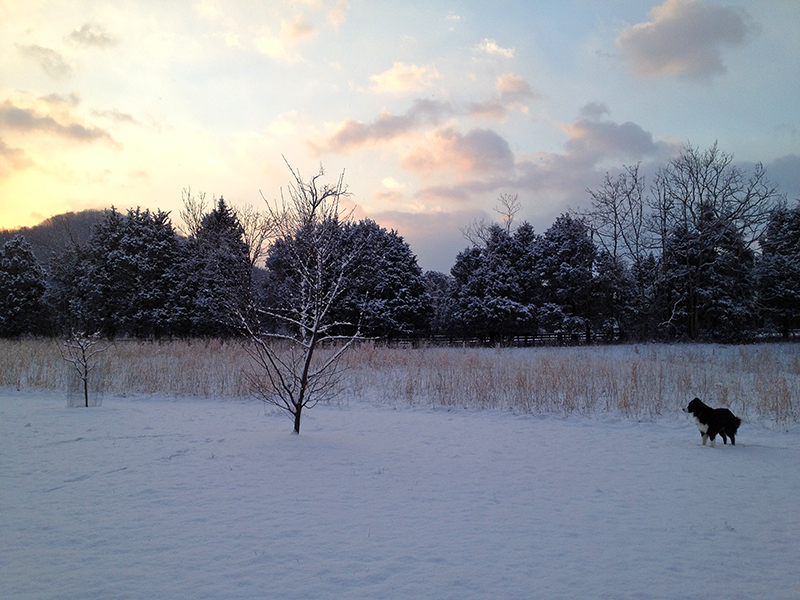
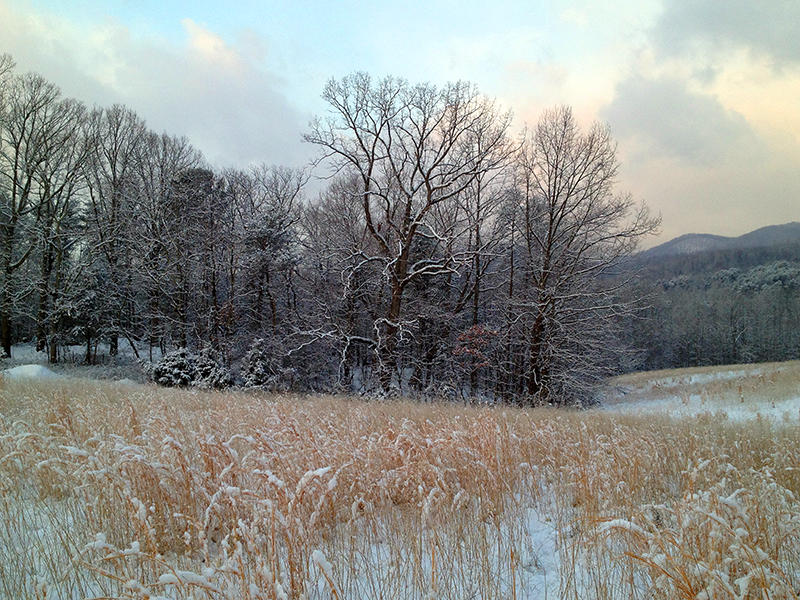
The neatest thing was seeing all the fox tracks in the snow. I haven’t seen a fox in ages and thought they’d ceded the yard to Tucker in their canine turf war. However, they left tons of evidence that they are very much still in residence. Here’s where they went under the chicken coop.
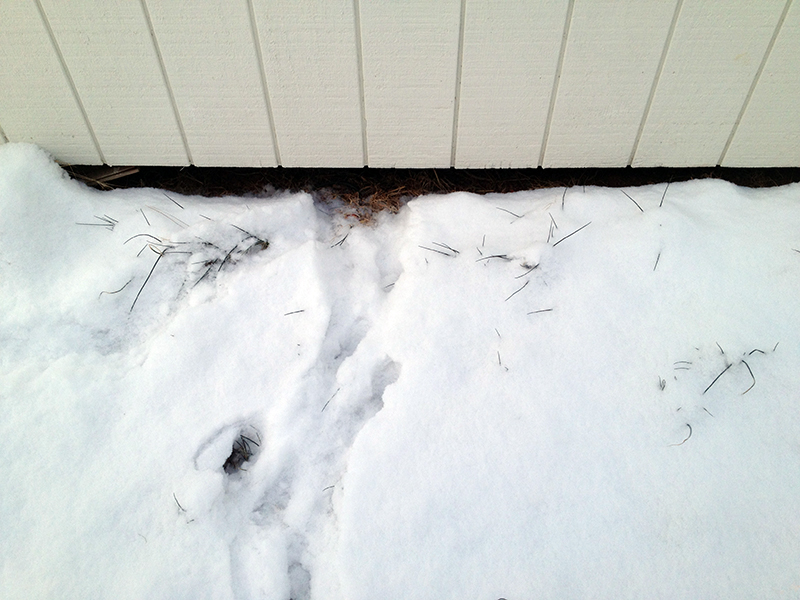
And poked around the clean out door, no doubt sniffing the delicious dinner sleepily roosting just out of reach.
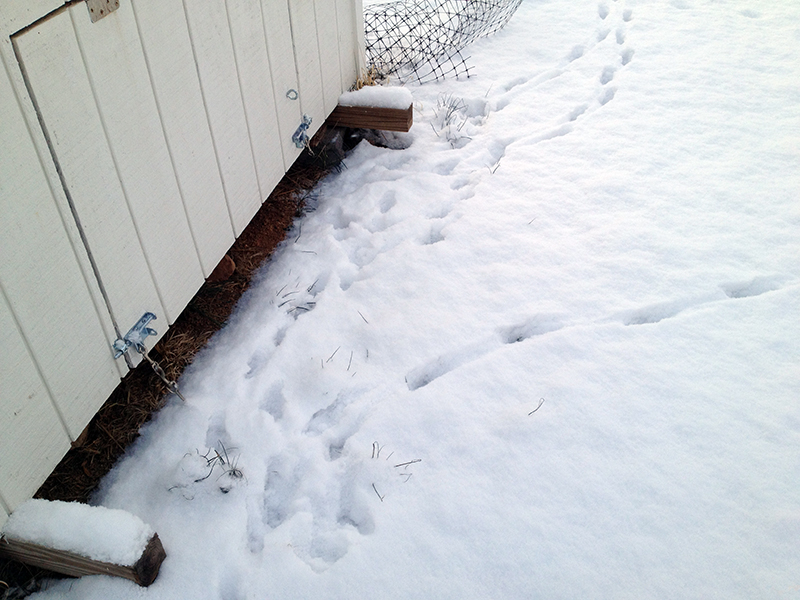 And failing to gain entry, they hopped into the little run behind the coop to try their luck with that side!
But I have the nicest, tightest coop in the East, thanks to my dad and a heatwave construction blitz, so the fox had to look elsewhere for its meal.
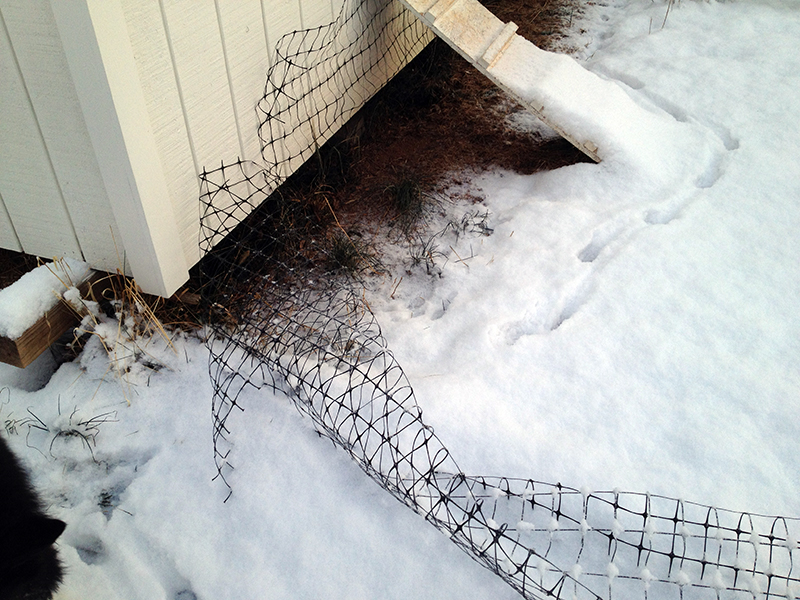
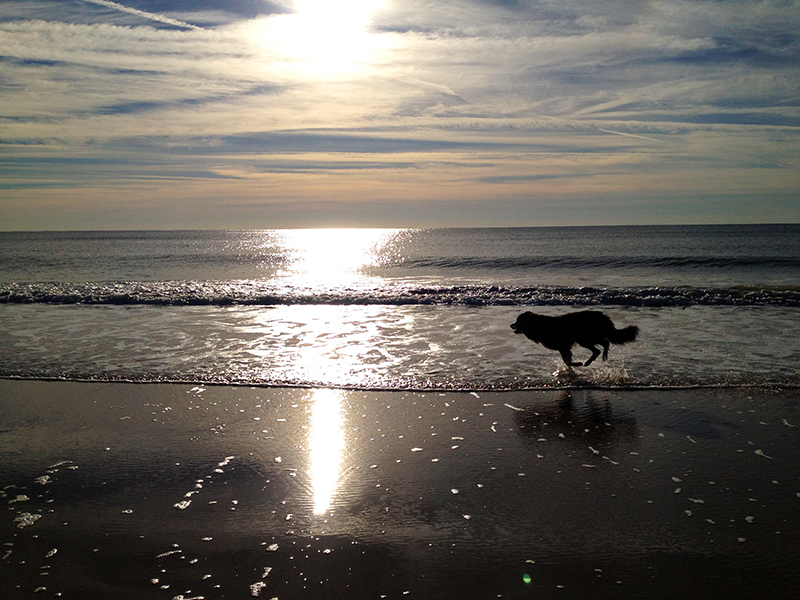
It’s eighteen degrees and snowing again now, and looking downright wintery outside. It’s hard to believe that just a few days ago Tucker and I were enjoying 72-degree days and the sunrise at the beach!
January 1st, 2012 §
In 2011 the pace of construction at Bonafide Farm slowed a bit—but of course when compared to building an entire house in 2010 that doesn’t mean much. But thanks to some pretty vigorous goal setting and the sweat of myself and others we accomplished a lot. All items in bold are linked to their original posts if you want to read more.
And so, in 2011, I:
Created a garden from scratch, and fed myself and others from it
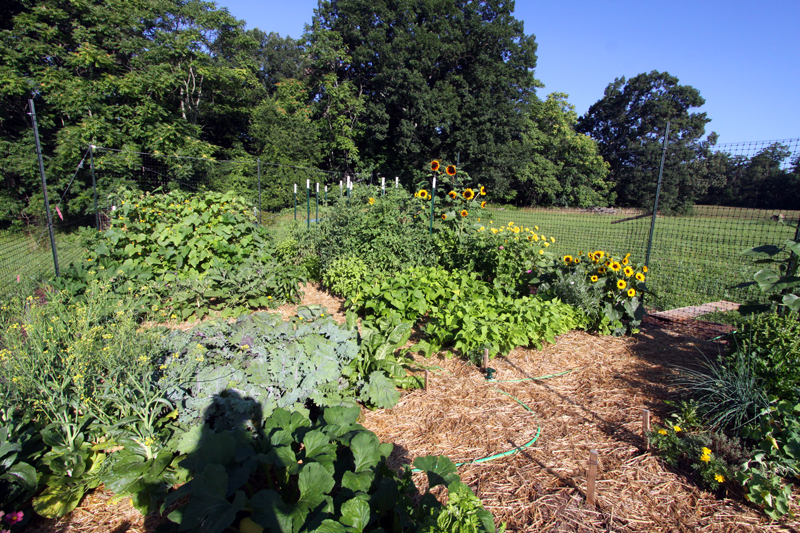
Carving a garden space out of a field was a major undertaking, and fencing and tilling and adding soil amendments and lining paths with landscape cloth took much of the fun out of the early garden season. But even with a late start I harvested my own food from May to late December, and for much of the summer ate only produce I grew. Plus, I gave bags of vegetables to coworkers, friends and family. Not bad for the first year out.
Completed the crawl space pit
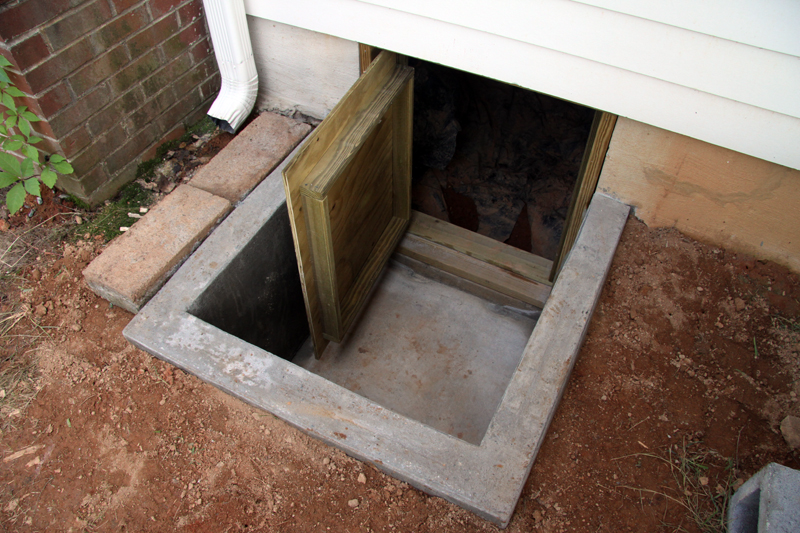
Several summer weekends, including a historically hot Independence Day weekend, were devoted to mixing and pouring concrete to make the walls of my crawl space entry. This project was started in 2010, and I rest easier knowing my crawlspace is sealed off from, well, the creepy crawlies. The finished product is awesome and will be here long after I am dead and gone, but remind me next time to do concrete work when it’s not 100 degrees outside.
Designed and manufactured garden row covers to fight insects
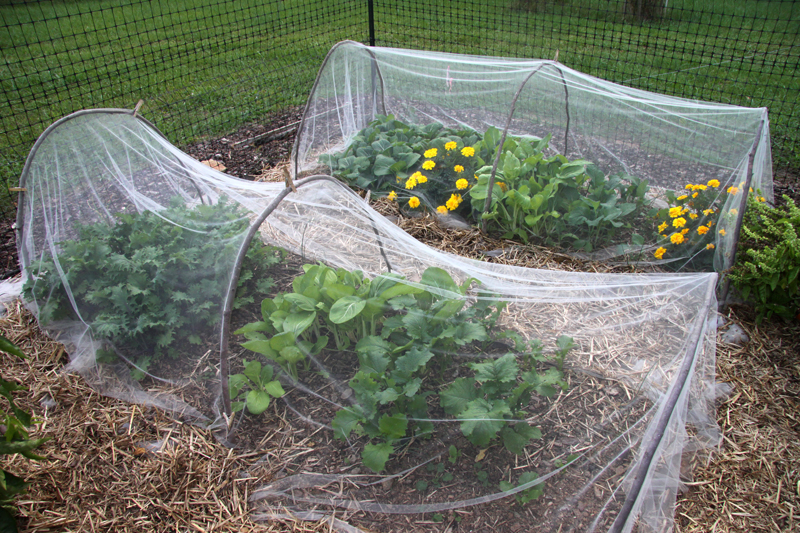
Sweat + seed ticks is all I will say about this August project. But the infrastructure is in place for 2012’s covered rows.
Installed new forest
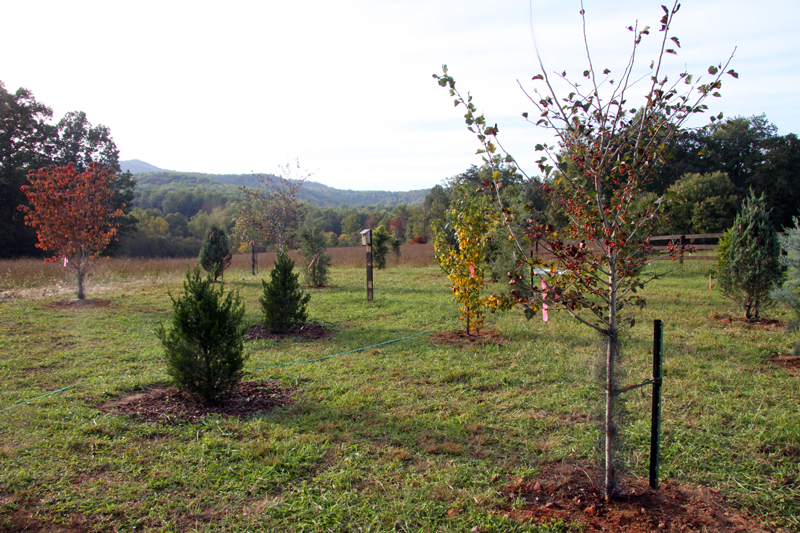
A couple of backbreaking weekends in September and I have a new mower slalom course in my back yard. Which, someday, I hope will be a living screen between my neighbors, the road, and my house.
Installed porch ceiling
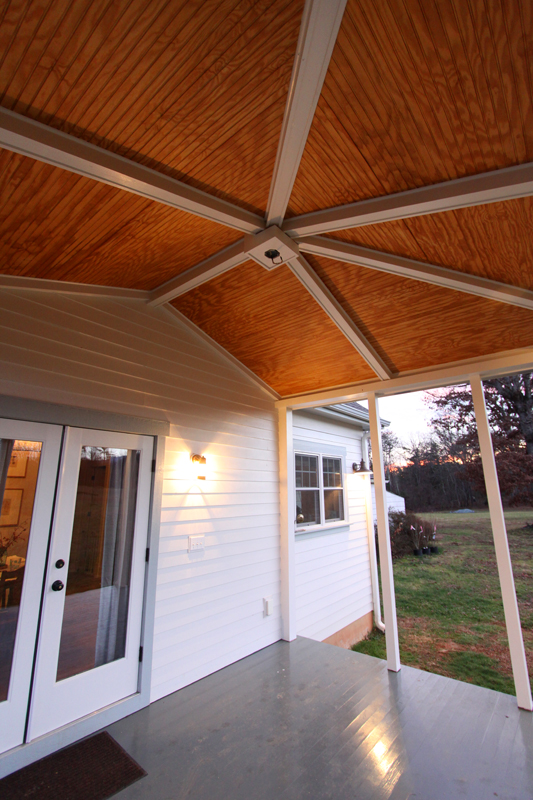
Dear starlings and mice: Consider yourselves evicted. Now to pick a cool fan for the box up there, install some rope lighting, and reinstall my outdoor speakers…
Trimmed coop
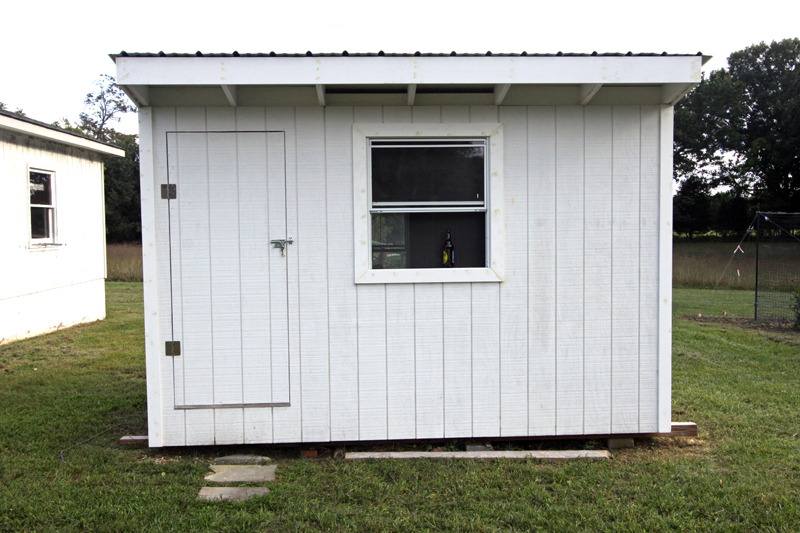
More than a year after the guineas first moved in, their little house is finally looking finished. I just need to hang a window box to pretty it up!
Repaired the garage and installed new doors and openers
This is the post I teased a while back but never got around to writing even though it was the single largest structural and cosmetic undertaking of the year. Much of October and November was spent supervising the repair of this:
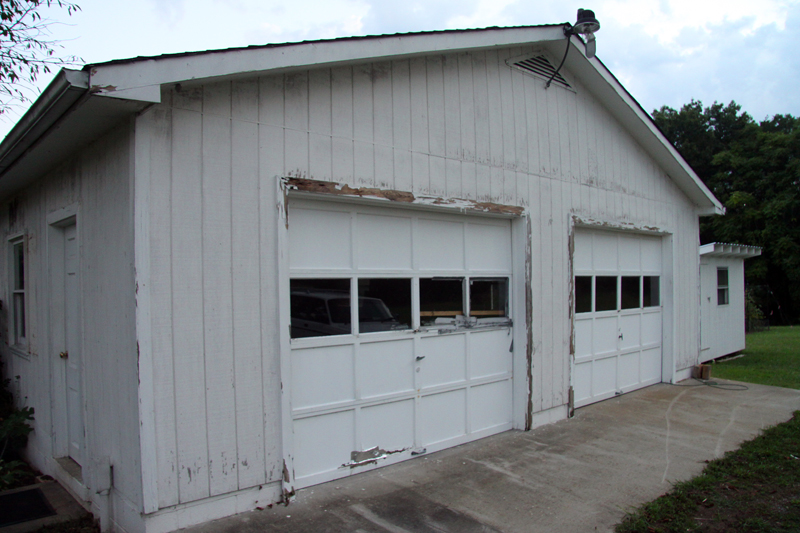
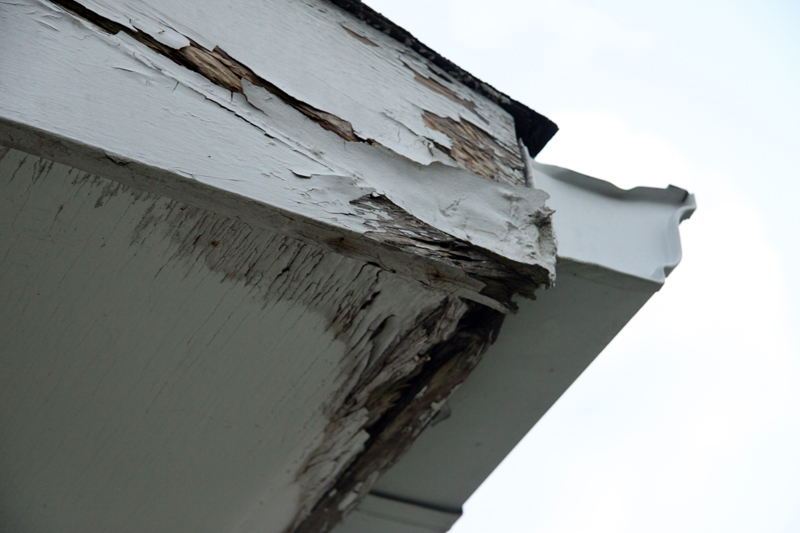
Now it looks like this: 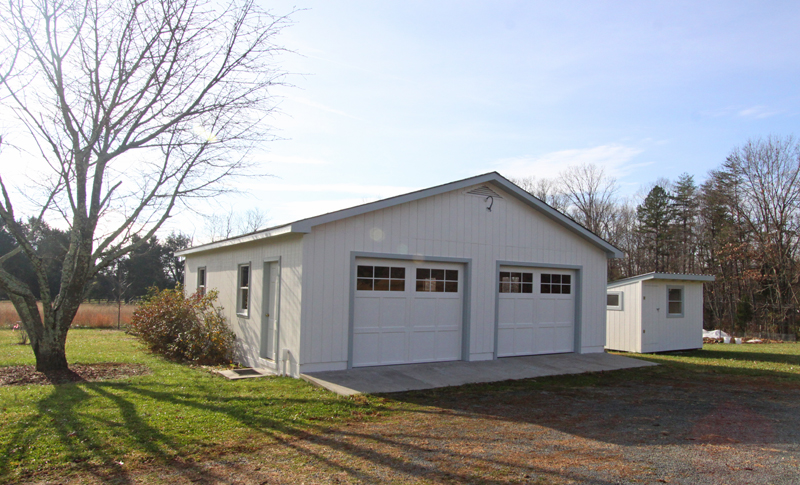
And when I come in the driveway after work, it’s such a luxury to push a button and have a garage door open—instead of parking and staring at a depressingly decrepit duct-taped mess.
Painting!
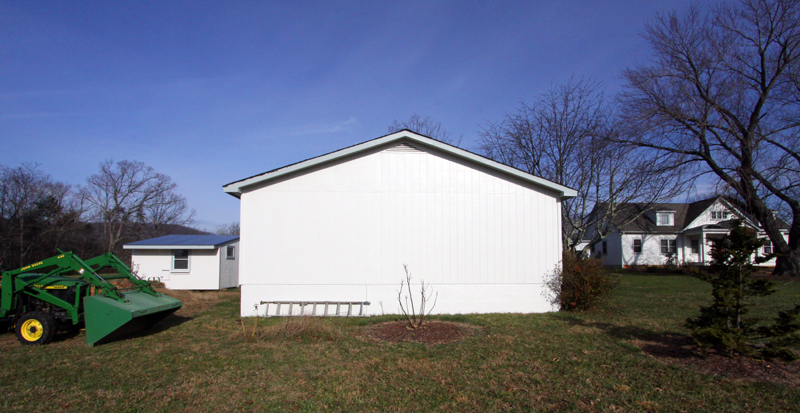
This fall, the completed porch ceiling, repaired garage and newly trimmed coop all got painted to match the house. I am trying to tie all my buildings together and the paint goes a long way toward that goal. As a bonus, I also had the front porch ceiling sealed and both porch floors repainted.
Personal goals
Though all of the above could fall under the personal goal of creating a farmish home, I also got to check off two major life list items.
I learned how to homebrew
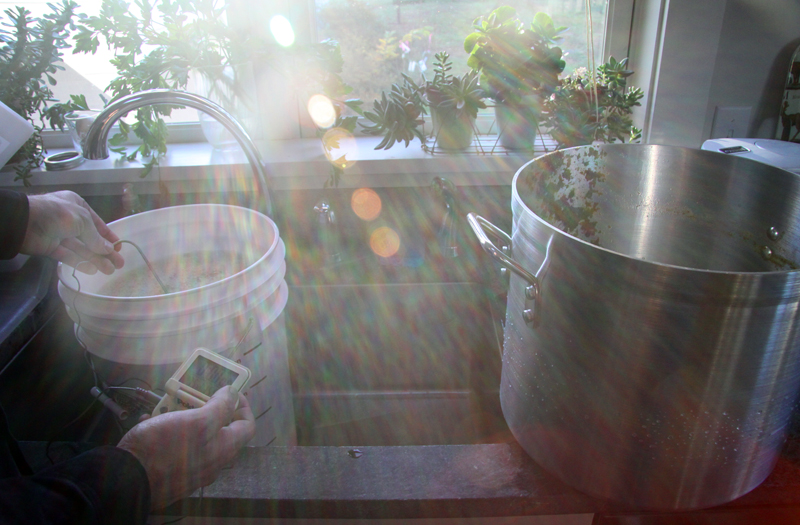
For this goal I am grateful to Brad, who set me down the path of true beer appreciation and shared his expertise over a very hoppy early November weekend. I raise a glass of my first IPA to you.
And, I raised a puppy
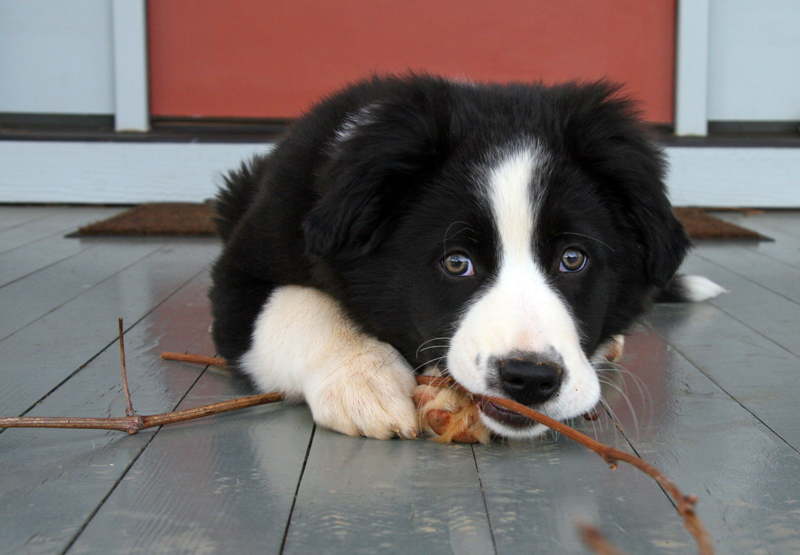 April 3, 2011
 December 23, 2011
Wow, what an experience that was—and, as he nears his first birthday, continues to be! To say he turned my views of both dogs and relationships on their head doesn’t even touch it: all the things I worried about were nonissues and the parts I thought would be easy turned out to be the most challenging. I wouldn’t call much of it fun, but I am incredibly pleased with how Tuck is turning out, and grateful to him that he’s still willing to hang out with me—sleeping at my feet as I type this. I can’t wait to see how he matures.
So those were the highlights of 2011. I think it’s a fair amount accomplished, particularly in addition to living alone and working a full-time job. I am aware, however, of how none of it could have been done on my own. The two people who made most of it possible are my dad, who possesses the magical combination of neverending creativity, intelligence and energy, and who worked next to me through all these construction projects in addition to having his own full-time job and farm, and my mom, under whose loving attention Tucker has thrived and without whom I would never have been able to cross “raise a puppy” off my life list. Thank you both for being totally awesome.
And I would be remiss if I did not mention the cast of characters who move through this place, lending their skills and friendship to this dream. I am a very blessed girl. Thank you all, and we’ll reconvene soon to talk about plans for 2012.


