January 6th, 2014 §
What a wonderfully evocative/apocalyptic name for this weather phenomenon affecting much of the U.S.! Central Virginia is being swirled into its embrace as I write. The temperature dropped 16 degrees in the last three hours, and the thermometer outside my kitchen window now reads 10 degrees at only 9:00 p.m.
This evening I turned on a red heat bulb in the chicken coop. As long as they have access to unfrozen water and plenty of food, chickens are just fine in low temperatures without supplemental heat—they snuggle close together on the roost and they are, after all, walking around wrapped in feather duvets. But with projected temperatures near zero with a wind chill warning, tonight I figured I would help them out a little bit by closing up their windows and heating their coop. It’s very rare that I use heat in the coop—in my climate it’s really not necessary.
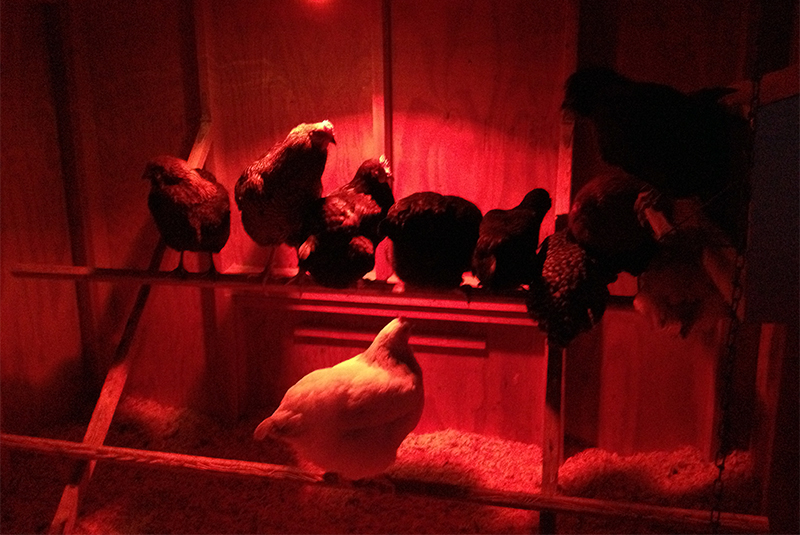
If you’re considering heating a chicken coop with a light bulb, make sure the fixture is securely installed and not just precariously hanging. The risk of fire is too high otherwise. One of my friends burned down his garage when a light fixture he’d suspended over a broody box of chicks fell into their bedding. Imagine just how fast a wooden coop filled with pine shavings would go up in smoke should a lit heat bulb fall into the bedding. That would be one hell of a rotisserie!
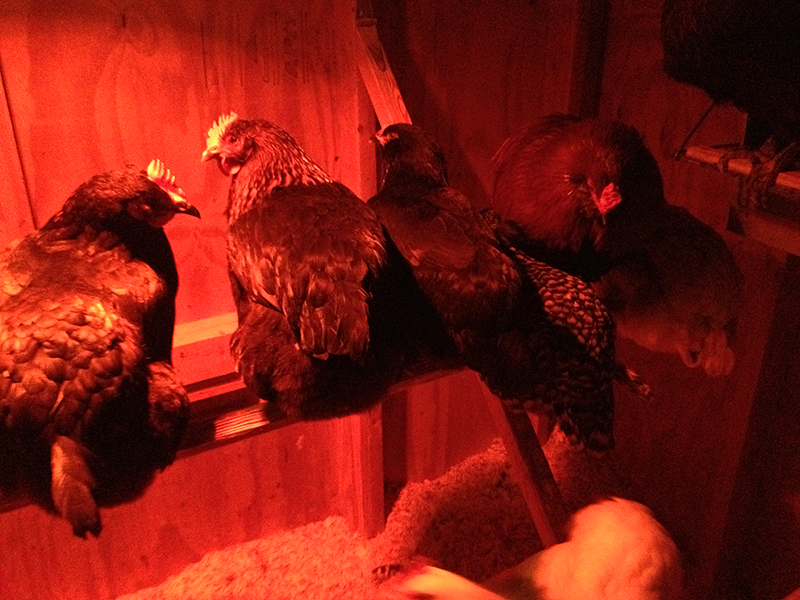
I nailed my light fixture to a rafter and used cable clips to secure the extension cord that powers it to the walls, safe from being pulled down by either people and chickens. The set-up has worked great thus far, and even though I rarely use light or heat in the coop, it’s wonderful to have it there for these polar vortex situations! Which, by the way, and despite the howling winds, I am loving (from the warm coziness of my woodstove-heated snug little home). I have high hopes that all the ticks, squash bugs, harlequin bugs, bean beetles, etc. that plague my person, pets and garden will be totally obliterated in the next two days. A girl can dream!
December 6th, 2013 §
Another olive egger pullet has come online. Yesterday I got two olive pullet eggs, and I figured out that their mother Dahlia is responsible for the big brown egg. She’s setting a good example!

These little olive eggs are so amazing. They’re like the eggs of some exotic species. And today I got one more! The pullets are twenty-one weeks old this week. Eventually the pullets should produce full-size eggs—these are just their starter eggs. Thus I am especially appreciating them because I know they are a fleeting phenomenon.
Something I never knew before I had chickens is that a hen will consistently lay eggs of basically the same shape and color, with the same amount of speckling. If you pay attention, this makes it easy to know which bird is laying which eggs, and how often, and gives you a good idea of a particular hen’s productivity. For example, I can tell from looking at the photo above that different pullets are laying the olive eggs, even if I didn’t know they were both laid on the same day, as one egg is browner with speckles, and the other is a clear, lighter olive. And the first egg I got this week was laid by the pullet that produces speckled olive eggs.
December 3rd, 2013 §
I had a completely unexpected surprise today as I was feeding the chickens. I glanced into their nest box and saw this:

Ever since the girls quit laying for the winter—many weeks ago—I’d stopped checking their nest box for eggs. But it turns out that even without any supplemental light, and headed into the darkest days of winter, at least two chickens are making an effort. One, laying the large brown egg, is either Dahlia or her Black Copper Marans sister. And the other laying chicken is a homegrown olive egger pullet, which is a total surprise as the chicks were born so late this summer that I hadn’t expected any of the four young pullets to lay before next spring.

This little olive pullet egg is the first egg from a chicken born and raised right here on Bonafide Farm. She’s a second-generation Bonafide bird, and a science experiment begun two years ago when I raised her Wheaten Ameraucana (blue egg-laying) and Black Copper Marans (dark brown egg-laying) parents with the hope that their genes would combine to produce a chicken that lays an olive egg.
And today, with this first beautiful olive pullet egg, I can claim success. Well, as much as one can having not actually laid the egg myself!
For more on how this pullet came to be, head on back to July 2013…
October 15th, 2013 §
After harvesting more than 100 ears of ‘Glass Gem’ corn, I needed to do something with it. A harvest wreath was the perfect project. I love to make wreaths—I love the seasonal symbolism of them and the way they act as jewelry for the house, dressing it up in a way that shows that the person who lives there cares enough to make the public face of their home pretty and welcoming.
However, the wreaths one most often encounters in stores are all too frequently plasticly hideous, reminding me of cheap gravestone decor, while being simultaneously, ironically expensive. It’s very hard to find a good wreath, which in my definition is one that looks natural and fairly understated, while also having enough going on to be interesting. The wreath should also be complementary to the home that it’s decorating.
Because I am picky about wreaths, I tend to make my own each season. I’ve done fall fruit wreaths, winter greens wreaths and spring wildflower wreaths, but I’d never before attempted an Indian corn wreath. It was a bit of a learning curve, but here’s how it all went down.
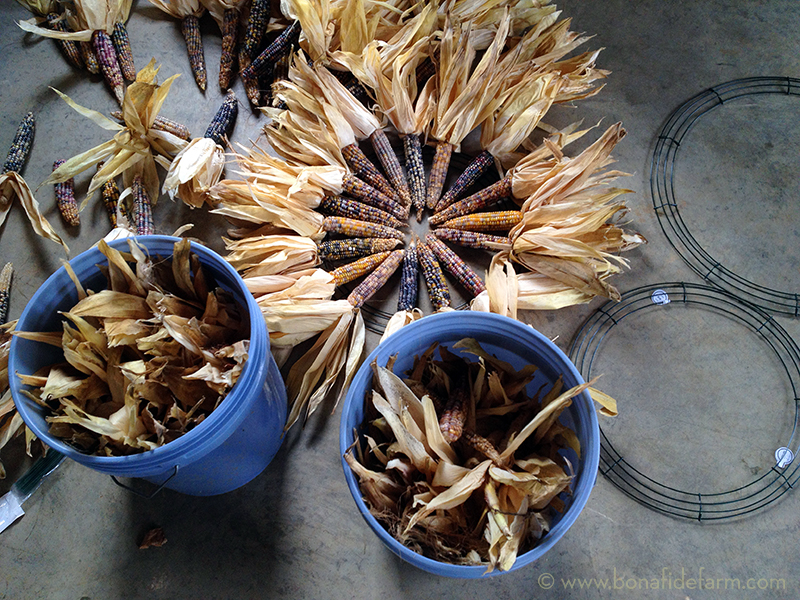
I got a few cheap wire wreath frames, and then I set to work sorting my best-looking ‘Glass Gem’ corn by length into separate buckets. I figured I had enough good corn for two fairly substantial wreaths. Then I did a test fit for the first wreath, choosing the ears for the four cardinal directions and then filling in between them with a nice balance of colors.
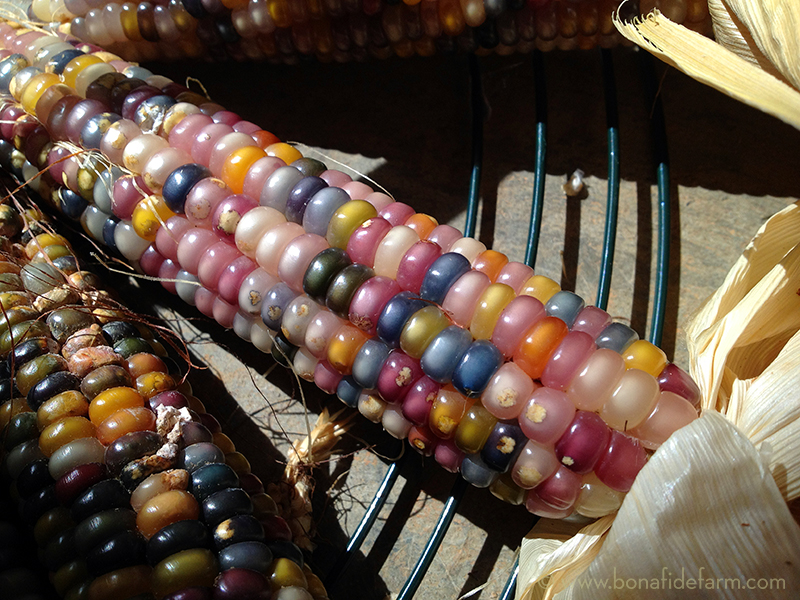
I soon realized that the corn wasn’t thick enough to totally hide the wire frame. I did two things to fix this issue. First, I wired some pieces of rafia sheeting, which were actually cut-up IKEA window screens that I’d had for many years, to the wire base. Second, I folded a few pieces of corn husk back behind each cob, trimming the husk that stuck out past the end of the cob.
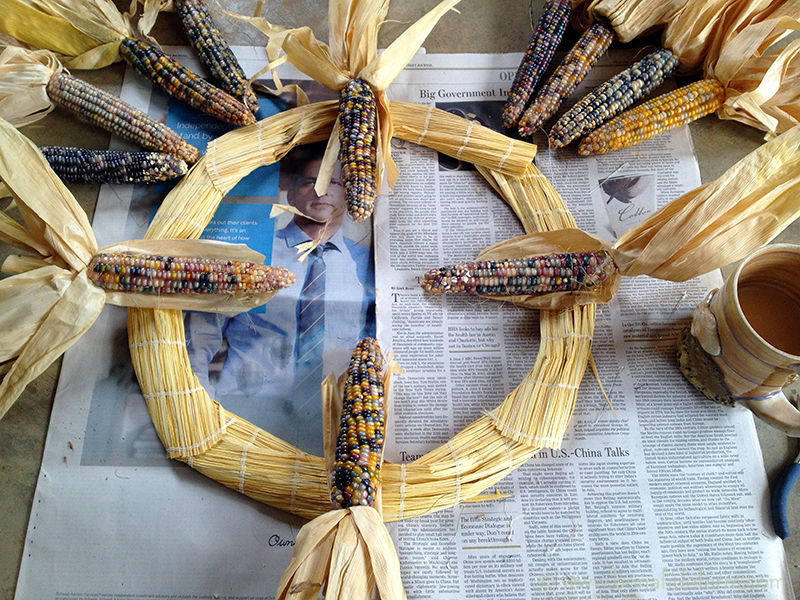
After I hot glued each ear down, they still needed more support to stay on the frame. I had to make two points of connection on each ear to keep them from flopping around or falling off when the wreath was hung. I got a big needle and some very fine gauge wire and sewed each ear onto the frame, going around twice. The silver wire blended in pretty well and wasn’t too noticeable. I tied the wires off in the back of the wreath, leaving them long enough that I could tighten them again should the corn shrink as it dries.
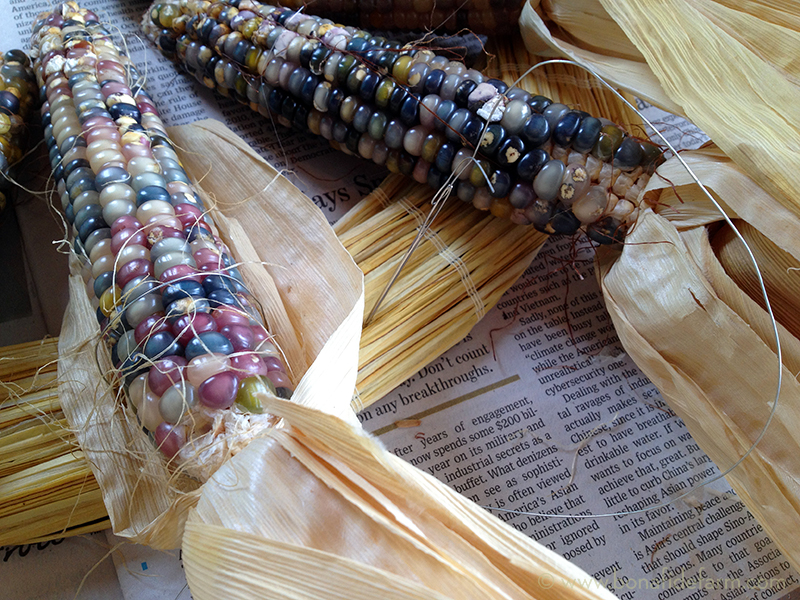
And then I just kept going, glueing and wiring the corn in place, all while sitting on the floor of the garage.
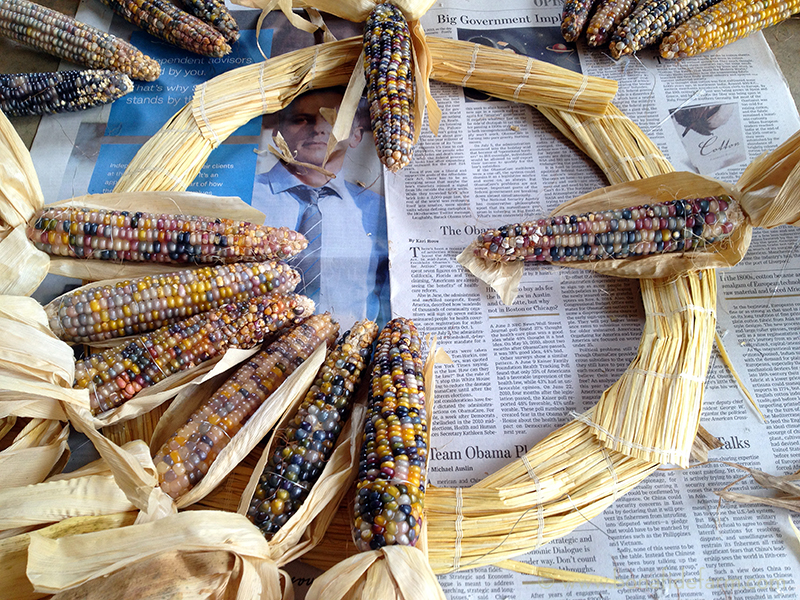
It took a long time to fuss with each piece to make it look nice, but I had lots of company.

In fact, the chickens seemed pretty happy to be snacking on runaway ‘Glass Gem’ corn kernels. What a gourmet treat!
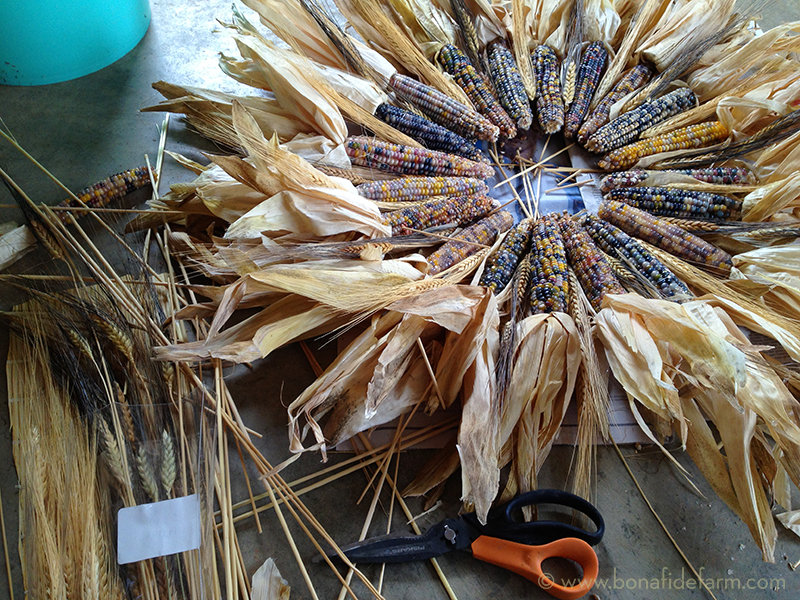
Once I got all the corn cobs attached, I went back and filled in some thin-looking spots with extra corn husk. Some of cobs had lost their husks entirely, so I hot-glued prosthetic husks to them. And then I got some wheat stems (picked up at the craft store) and glued them in between each cob for another layer of interest. I trimmed the tips of some of the cobs with my pruners to help make the negative space in the center of the wreath as even as possible.
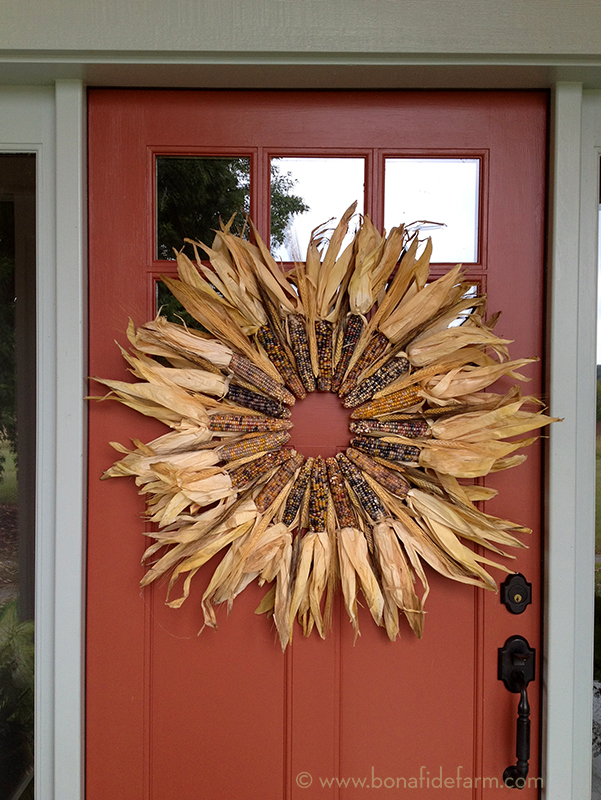
After a test-hang to check for any weird-looking spots, the wreath was ready for the front door. I couldn’t have picked better corn colors to go with my house!
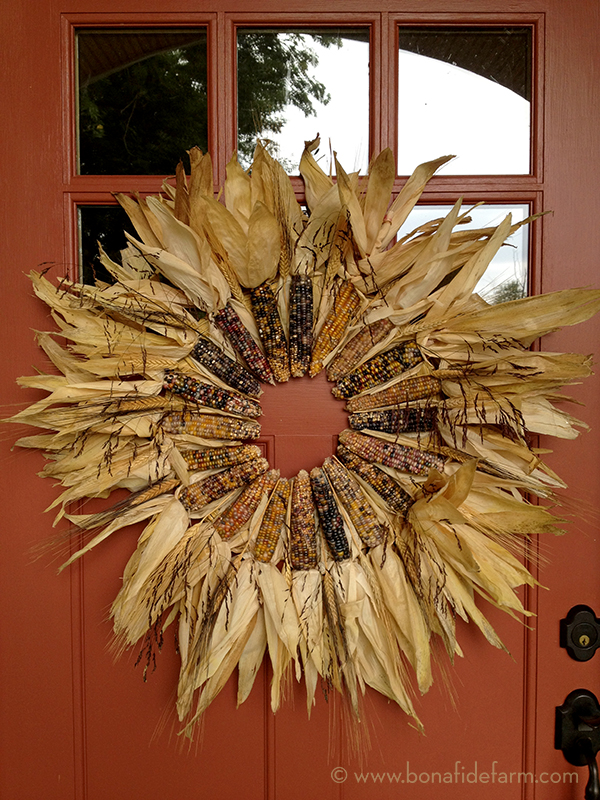
And then I made another for wreath for my mom’s front door. The wreaths have been hanging almost a month and seem to be holding up pretty well. They’re both on protected porches, which I am sure helps to extend their life. But if they should decide to take a turn for the ugly, I know a bunch of chickens that would be pretty thrilled to help dispose of the remnants of my harvest wreath.
September 24th, 2013 §
Once I had all the Glass Gem corn picked, it was time for the best part: opening each ear to reveal the multicolored kernels held within. I set up a little shucking station in the garage and got to work. It was kind of like Christmas as each ear exposed a new and different surprise. I separated and saved the best looking corn silk, in the basket below, for tea.
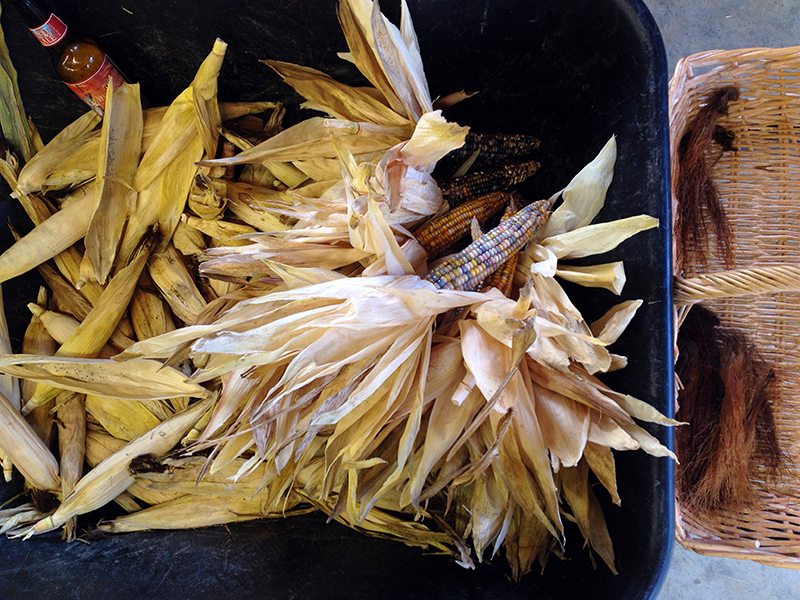
Of course I had company, though one companion grew pretty bored when the shucking stretched into a multihour endeavor.
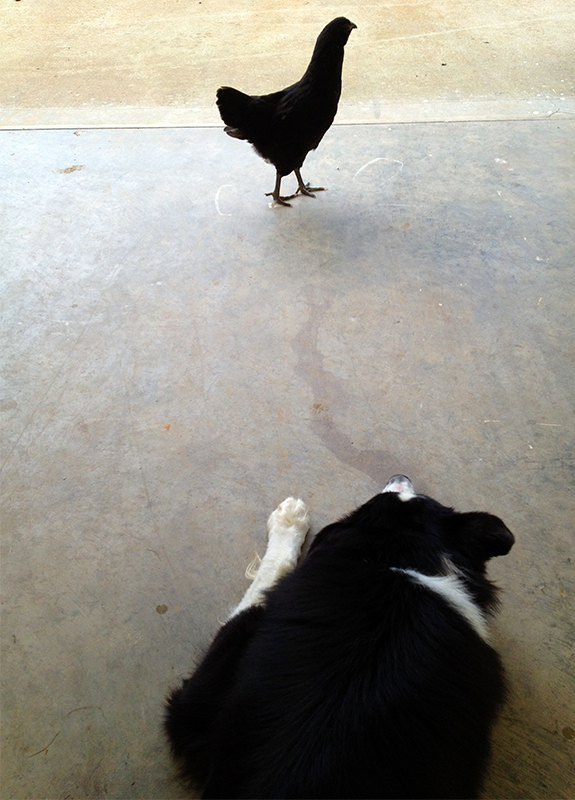
Shucking more than 100 ears, plus the time required to marvel at each beautiful ear, added up as I worked through sundown and into the evening. The rest of the crew got more and more curious as I lined the shucked cobs up on the garage floor, sorting them by size and condition. I was very pleased to see what I consider to be pretty good pollination and kernel set in most of the ears. I found only one insect, a little worm, in all 100+ ears, which seems remarkable to me given how much I struggle with bugs on some of my other crops. Perhaps I have the bluebirds and their nightly visits to the corn patch to thank?
A few of the ears contained kernels that looked as though they were starting to pop. I will have to do more research to figure out what causes that. But in all, I was pretty pleased with my harvest. Maybe it’s just beginner’s luck, or the blessing of an unusually rainy summer, but it’s not too bad for my first corn-growing experience!
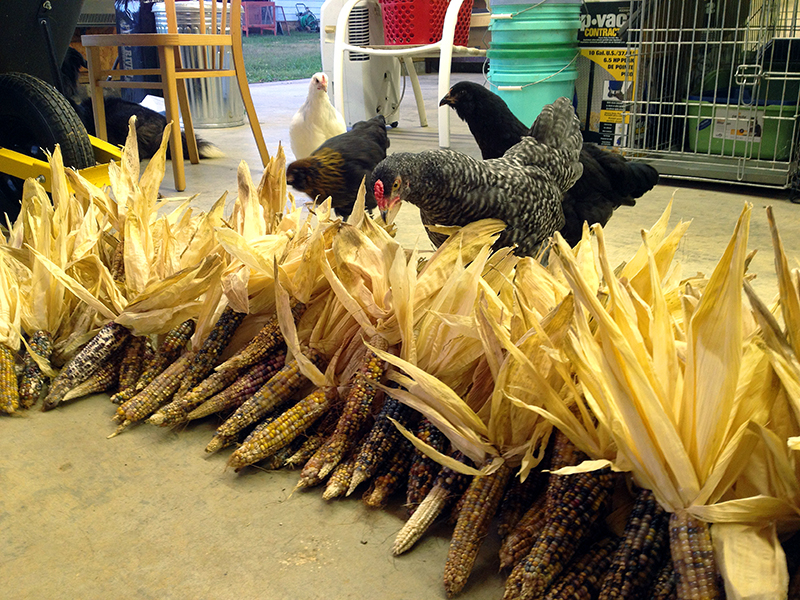
Though they were intrigued, the chicks hadn’t yet figured out that corn is one of the most delicious chicken treats around. And this wasn’t just any corn—it was the famous Glass Gem!
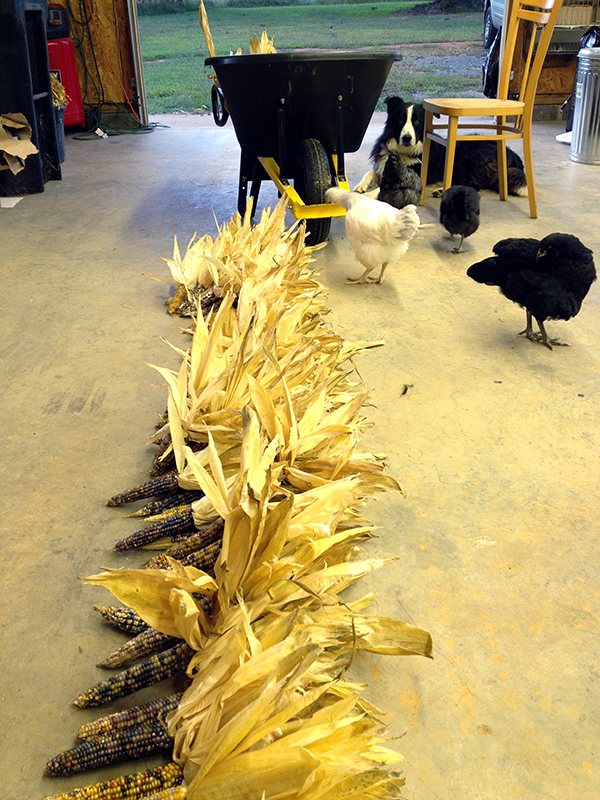
Up next, a closer look at the Glass Gem harvest…and all the pretty pictures you’ve been waiting for!
September 19th, 2013 §
Last weekend I cleaned out the chicken coop, a fairly onerous task that involves a tractor, snow shovel, air compressor, dust mask and goggles. Combine all those in your head with copious amounts of airborne chicken shit dust and pine shavings and you don’t need to see any photos.
The only reward for this task, other than the agrarian nerd pleasure I take in making a hefty deposit at the compost bank, is that once the coop has aired out for a day I get to fill it will two bales of clean pine shavings, scrub out the nest box, and return the bleached feeder and waterer to their chains, full of food, and well, water. It gives me no end of pleasure to make a beautiful, clean, and healthy home for all the creatures in my care. It’s something I remember from being a kid and having all sorts of pets that needed tending. It sure wasn’t pleasant to muck out the mouse cage, or the bird cage, or the fish tank. But once it was done the joy of seeing my animals in a fresh, clean home made all that dabbling in feces and urine pretty much worth it.
And today, I feel the same way. So I cleaned out the coop, and while I was at it I decided I was tired of the growing mess that was the broody coop in the garage. The six chicks were now chickens, and they made enough mess that the tray under their coop needed emptying every three days. And, in typical messy, wasteful chicken fashion, they’d spill their food out of the feeder, and it would fall under the screen only to incubate maggots. One day when I changed the pan it was so hot I couldn’t hold my hand to it—fermentation in action! Gross, right? So while the chicks were out ranging I broke down their coop and dragged it to the driveway, where I scrubbed it with hot water and bleach. And then I cleaned out my garage, vacuuming out feather dust and sweeping away spilled food and feathers.
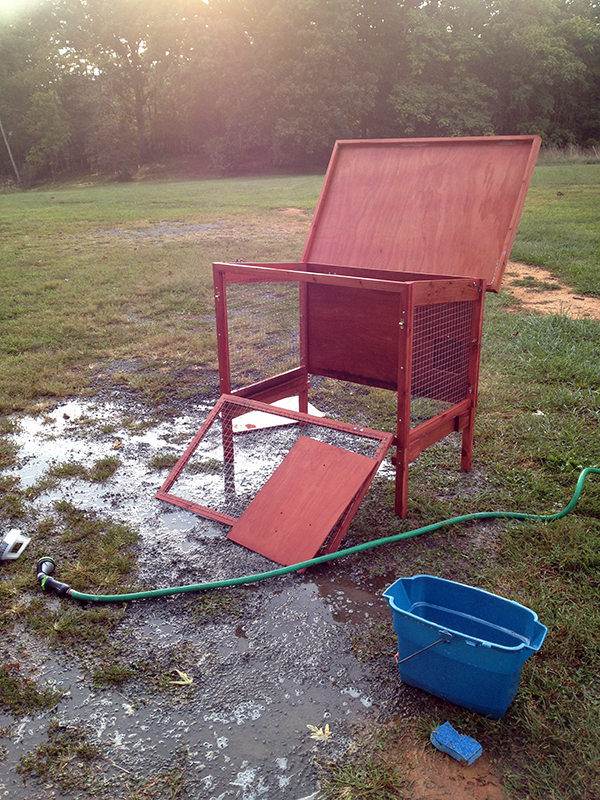
These ready-made coops were some of the best purchases I’ve ever made. They were picked up by my dad, out of desperation, for $99 each on sale at Tractor Supply, on the day the guinea babies hatched and started running out of the dog crate in which they’d been born. It seemed like an awful amount of money at the time, but they’ve paid for themselves in the use I’ve gotten out of them. I’ve used these small coops for injured birds, to separate fighting hens, for broody coops, and to raise chicks. The materials and construction are pretty cheap, and I can’t imagine them as full-time homes for any animals, but they are great for the short periods in which I tend to use them. The design is good, and I really recommend them.
Once the broody coop was drying in the sun, I set up the “annex” of the big coop to house the chicks. This is the area you first enter when you open the coop, and where I normally store the chicken food and various supplies. It has only one window, so it gets much hotter in the summer than the larger part of the coop, which has two big windows for good airflow. But now that the temperature has dropped it would be fine for the chicks.
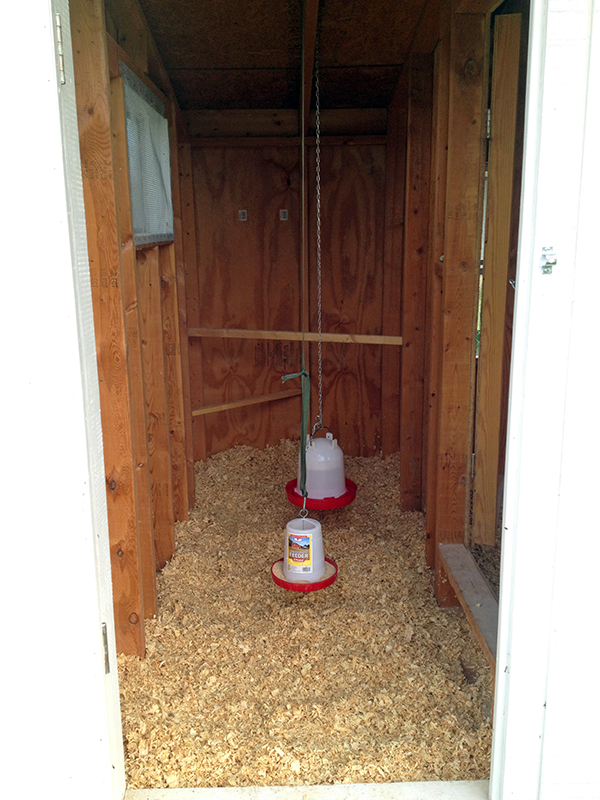
I spread pine shavings on the floor, nailed in a few roosts, and nailed up some chains to hold the feeder and waterer. Then it was all ready for the babies. Here you can see how the annex relates to the main coop. I figure it can’t hurt to have the older chickens getting used to the sounds of the chicks before I try to house them all together. It may stave off another bloody battle.
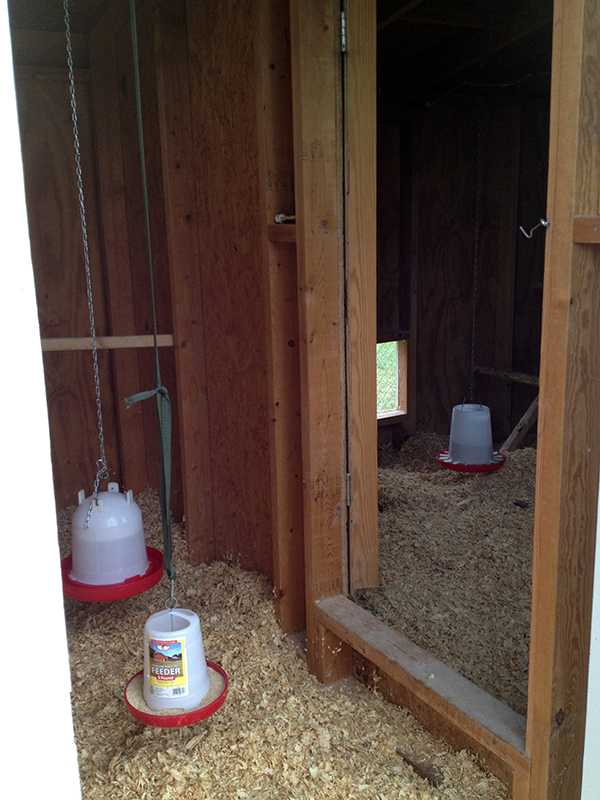
In their new home, the chicks were pretty unsure the first night. They kept trying to go back in the garage, where they’d been born. But I scooped them up and dumped them in their new home. Now, a few days later, they’ve figured out where the food is and are returning to the coop on their own in the evening. But there’s one problem: They don’t know how to roost.
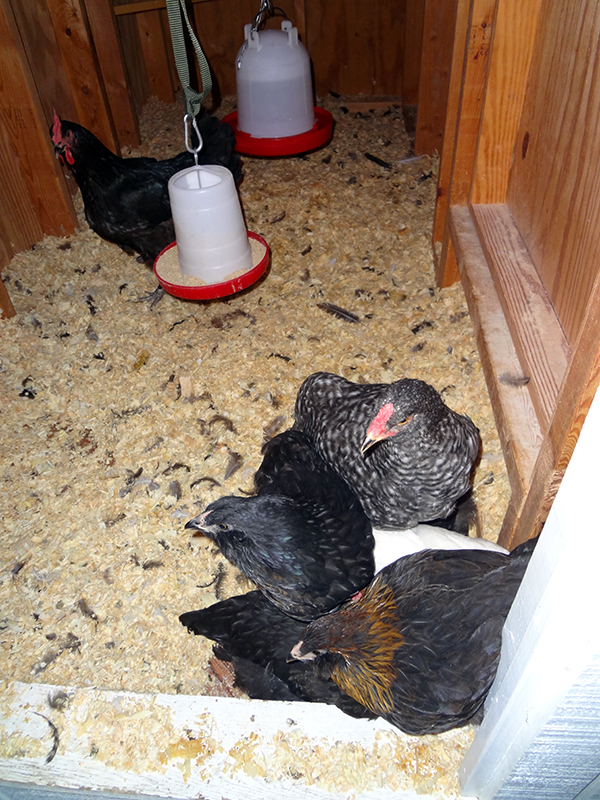
I figure that because there wasn’t a roost in their broody coop, where they lived with their mother, they never got this important chicken lesson. For the last few nights I’ve checked on them in the night, and they’re sleeping like a pile of puppies, on the ground wedged in a corner. It’s kind of adorable except that it’s really not in a chicken’s nature to sleep in a pile past the young weeks of chickdom.
So just for an experiment, tonight I caught Dahlia and put her in with her babies. That’s her above, looking at her kids like, WTF, who are you? Then, like a proper chicken she jumped on the roost to sleep. I am hoping that she will have a talk with her children and teach them how to roost. I am not super concerned—after all, chicks that aren’t raised with broody hens eventually figure out how to roost. I am more curious than anything to see if Dahlia’s behavior can influence her chicks at such a late stage in their development.
Speaking of development, this morning I awoke to Calabrese crowing, followed by his young son Griz crowing in response. This went on for a while, back and forth. I am sure my neighbors love me!
September 17th, 2013 §
This is what the backside of the coop has looked like since late winter.
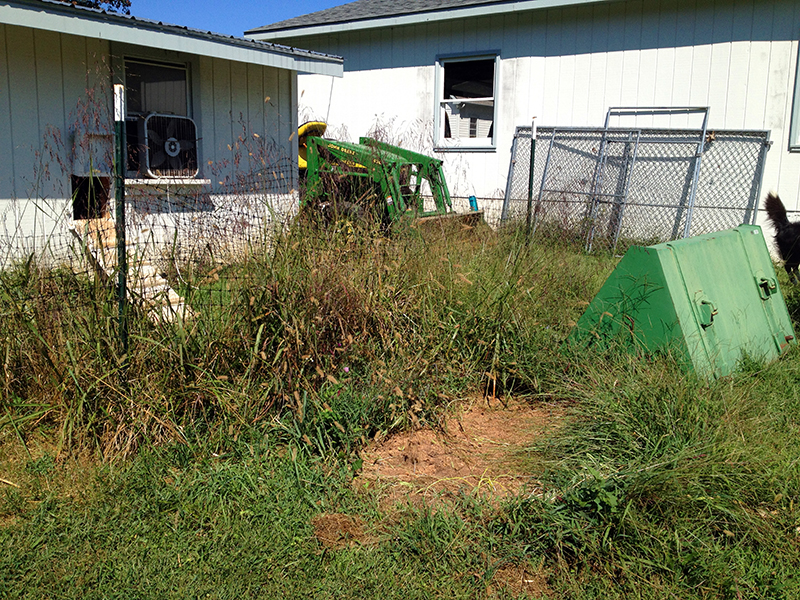
I’d thrown some netting up there when I decided to start free-ranging the chickens, and I wanted them to get used to being outside and coming and going through their chicken door before I let them totally loose. It worked, but since then this deer-netting and t-post pen has been used only to help capture the chickens to put them in the coop. Because the deer netting is plastic, I couldn’t weed-whack around it without destroying the netting, so the grass had grown up and through and sealed the net to the ground. Throw in a few tractor implements that I couldn’t move because the tractor was at my dad’s farm, and I had a real redneck mess and an eyesore that bothered me every time I looked at it.
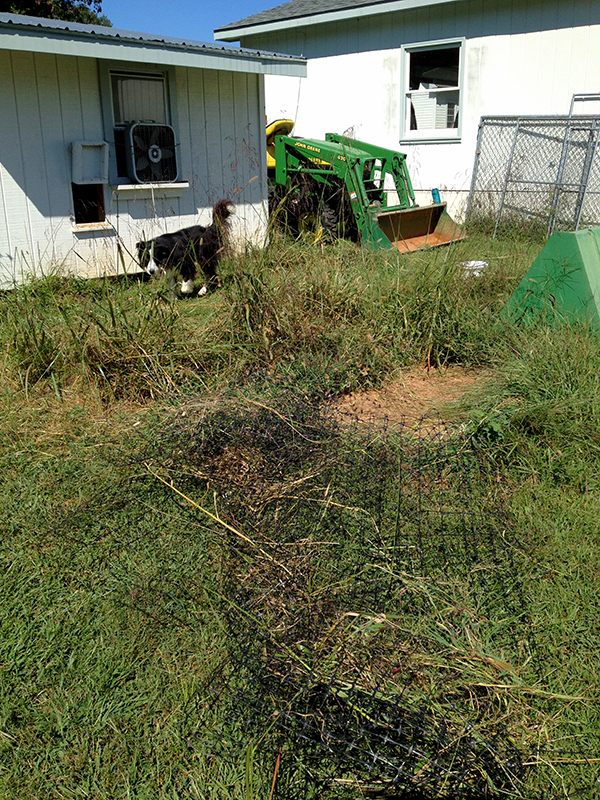
But on Friday the tractor came back, so I could finally move the forks and buckets and get to work cleaning up this mess. I removed the t-posts and then started pulling up the netting. It was so grown in that I had to use my scissors to cut the grass away from the bottom edge of the net. Not really a fun job. But I got it all up and then mowed the area.
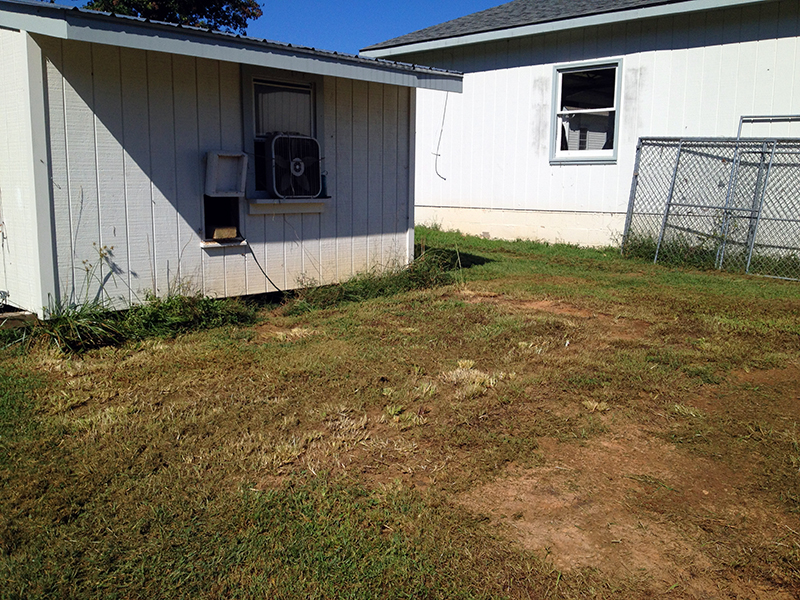
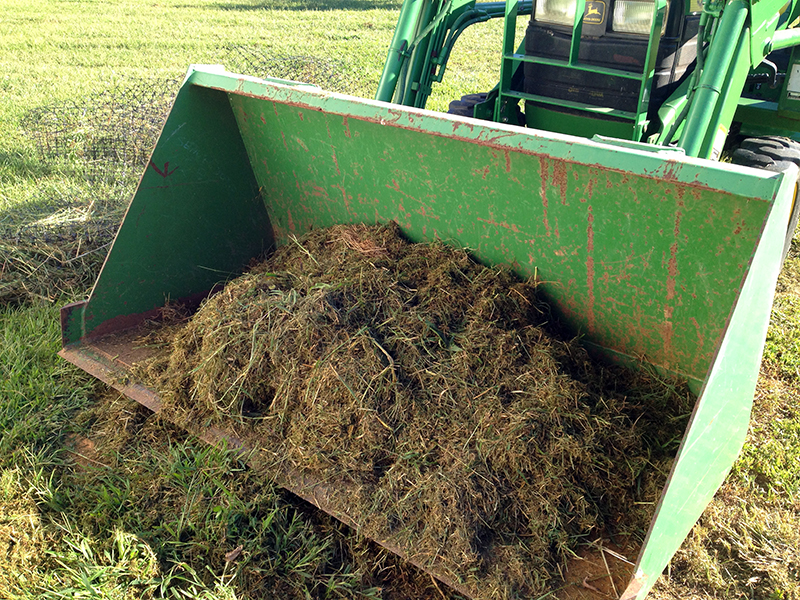
I couldn’t get my weed wacker started, so I had to cut the grass along the coop with scissors too. All this grass made for a nice tractor-bucket full of greens to juice the compost pile.
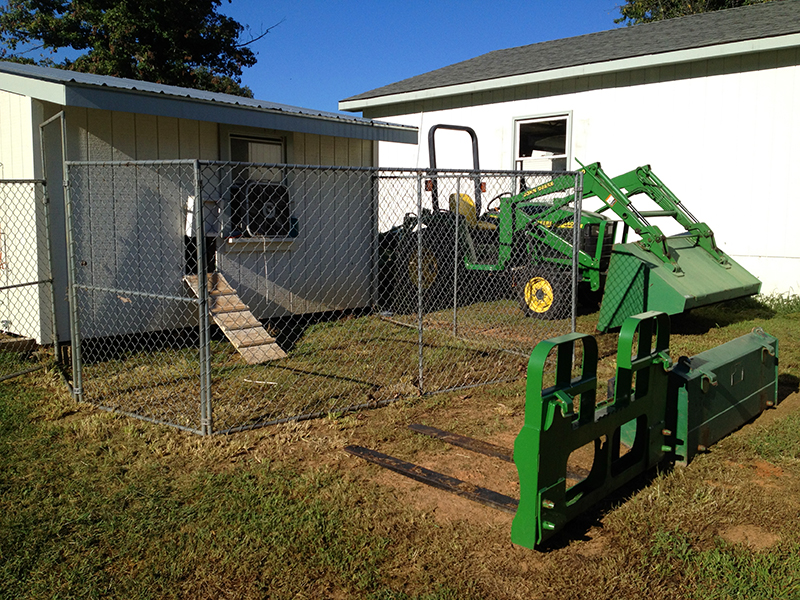
Then I had a clean slate to start setting up the dog kennel that’s leaning against the garage in the pictures above. I played around with a few configurations. Unfortunately I had two 10′ panels, and two panels that were only about 3.5′ wide. So a nice square pen wasn’t an option. Although the configuration I came up with bothers my sense of aesthetic order, the panels were free so I worked with what I had.
This was another one of the infinite jobs around here that would have taken two people about 20 minutes to do. But working alone I was at it for more than an hour, having to use shims and all sorts of other tricks to maneuver the panels upright and level so I could screw them together. And I totally torqued the tip of my thumb, trapping it between two panels while lifting them in to place.
But, injuries and annoyance aside, I got the pen up. I am living with it to see how I like it for a while, and if I decide it will stay I plan to dig some wire around the bottom so that I can have the chickens confined in there without worrying that they will be attacked. It’s not the most exciting or beautiful upgrade, but it’s an improvement that cost nothing but a few hour’s work and all sense of feeling in my left thumb.
September 5th, 2013 §
Well the day I was anticipating arrived. Free ranging chickens in fox country means accepting, and living with, the risk that they’ll not come home one night. I’m surprised it took this long, actually. Just yesterday I was saying I hadn’t seen a fox in so long…
All the chickens were out all day today, roaming around. I left for only a short while this afternoon to go to the grocery. The dog was in the house while I was gone. I got back and saw some chickens in the yard, and all six babies were fine by the bushes. I didn’t count the chickens because they often break up into little groups that hang out in different places.
Tonight I put the babies to bed in the garage, and then noticed that only a few of the big chickens were hanging around the coop. I didn’t think much of it, as I figured the others were elsewhere. But at dusk I went to close the coop and there were only five chickens in there: Calabrese the rooster, Cora, Oregano, and the two Black Copper Marans hens, one of which is Dahlia. It’s never a good sign when the chickens don’t come home to roost.
So I got a flashlight and poked around all their favorite hidey holes before steeling myself for a trip into the woods. I knew what I would find, in some state or another. The chickens had taken to raiding the compost pile, which is set just into the woods, which is technically fox territory. I tried to keep it hidden from the birds, but once they discovered the delicious worms and solider fly larvae and food scraps, it became a place they visited several times a day.
Along the path into the woods, right where the snake appeared Monday, I found my first clump of black feathers. Then many, many more all the way to the compost pile. So that’s either Lilac or Iris, or both. The two Lavender Orpingtons are missing as well, but I didn’t find any of their feathers yet. I called for them, hoping they’d be hiding or injured and I could get them home and patch them up. It was getting dark and I didn’t really feel like hunting for more feather piles after finding the first. I just can’t understand that if it was a fox, how did it get four birds at once? I don’t know if foxes hunt in packs—I didn’t think so but I could be wrong. I would have expected them to grab one bird while the others ran for cover. And were was my rooster in the fray? I have seen him run across the entire pasture in response to a hen squawk. Maybe he was too far away?
Like I said, I knew this was coming. It’s one of the reasons why I wanted to raise up some babies this summer, as replacements for the inevitable casualties. And part of me is glad to be rid of the Lavender Orpingtons, mean as it sounds. One didn’t lay reliably, and the other always lay on the floor of the coop (which meant the dog got those eggs) and both of these hens always looked dirty and scraggly (despite baths, the last of which I just gave two nights ago). So no big loss there. But my egg production machine took a big hit with this loss of 2-4 eggs a day. Now I have only the Black Copper Marans as steady layers, as Cora never lays and Oregano does only when the mood strikes her. And it will be next spring until the new hens start laying, provided they don’t get eaten too.
I am a bit sad about Lilac and Iris. They were my first hens and really steady layers of distinctive eggs. They always looked clean and healthy. At their last molt their facial feathers had grown in white, which gave them a cute elderly look. They were in their second year of lay, which means they weren’t spring chickens but they were keeping up with the younger birds. Iris raised a flock of guineas as her own. Lilac’s chick is one of the six babies. And they had good personalities, steady and friendly, and were always the first to come running for treats. They ate copious numbers of bugs and fertilized the gardens, all while getting to live in the fresh air and sun and do whatever they wanted during the day while being protected at night. They had a rooster who loved them. I guess they had pretty wonderful lives.
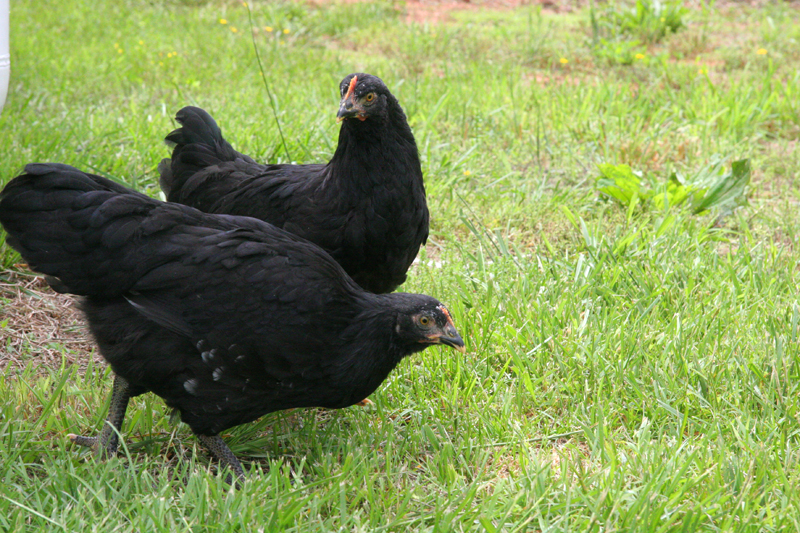
Here they are when I first got them. They were about the age of the baby chicks I have now. And here’s Lilac just two evenings ago, right up front, looking for handouts.
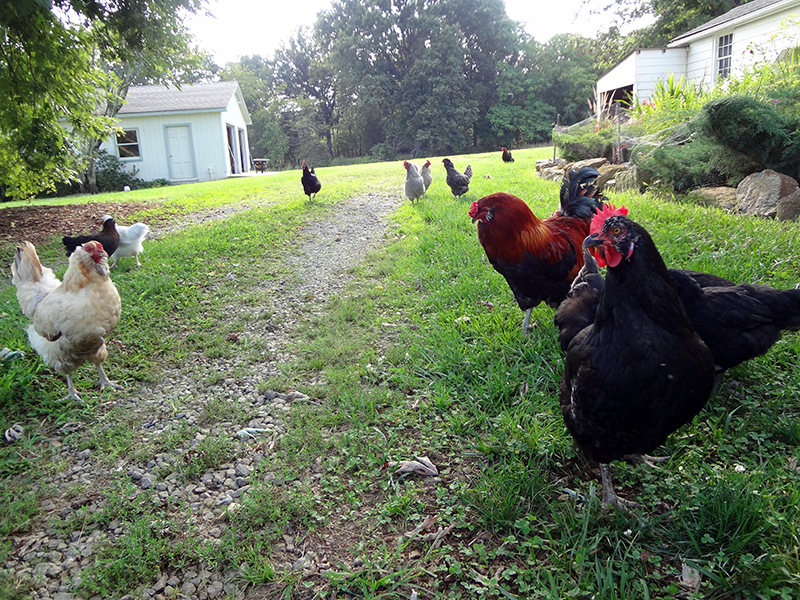
They were good chickens, but now they’re just stories and photos on the pages of this blog.
Goodbye, girls.
August 28th, 2013 §
I took my hops in to the house and divided them up onto two baking sheets. My oven has a pretty convenient dehydrate feature, so I figured I’d give it a try. It basically just maintains the oven temperature at 120 degrees while running the convection fan.
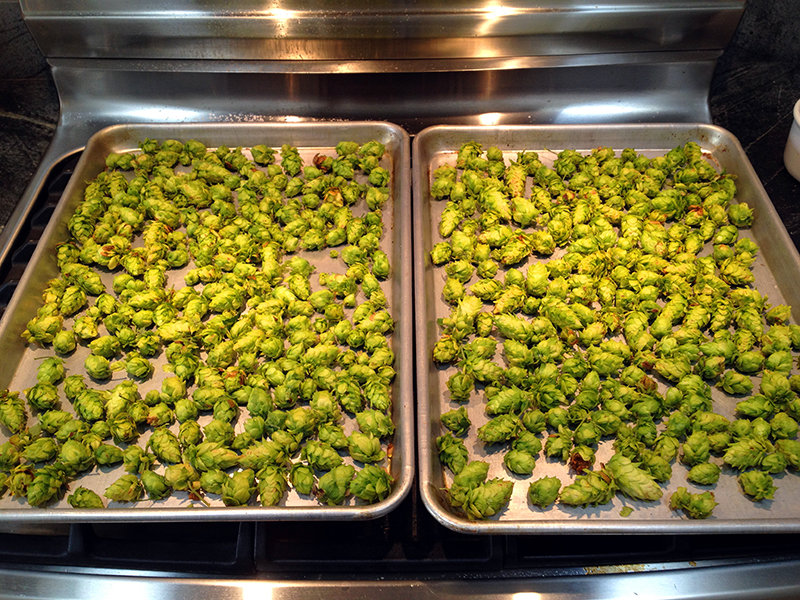
After I took this photo I slipped a couple of wire cooling racks under the cones to elevate them off the baking sheets. I figured it would improve air circulation and thus drying.
It took a couple of hours for the cones to get lighter and more crispy. During this time the house smelled so delicious.
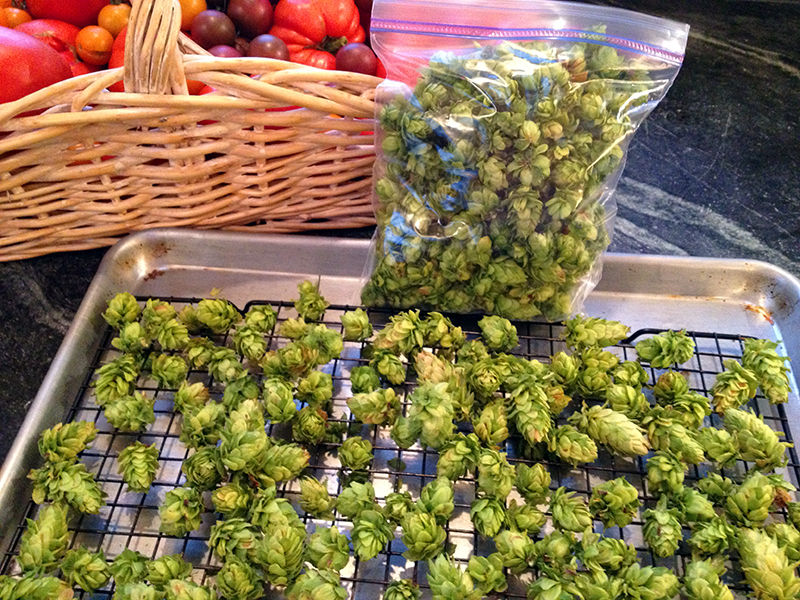
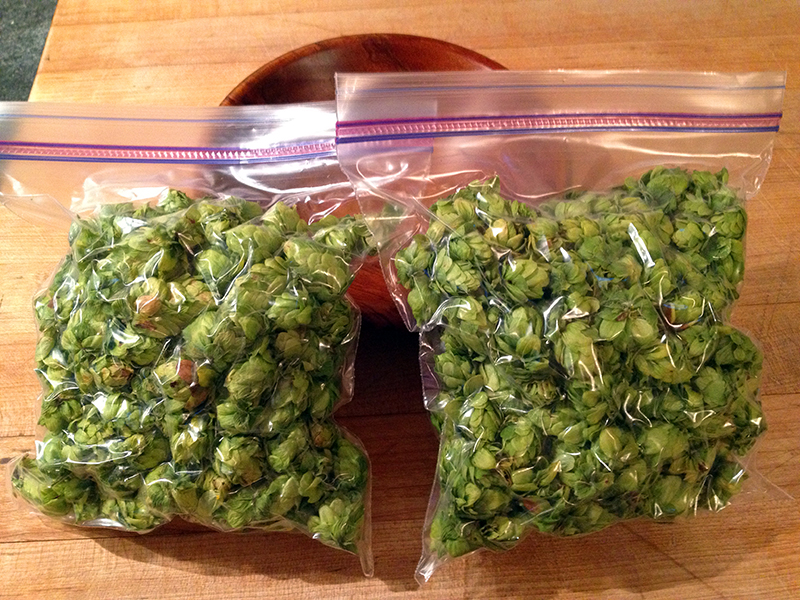
When I judged the hops dry enough, I packed them into quart zip-top bags and used the old straw trick to suck the air out around them. Then I tossed them in the freezer. I ended up with two quart bags of harvest.
I also took a few of the hops and packed them in a glass jar with 100 proof vodka to make a tincture. Hops tincture is relaxing, soothing to the digestive system, sedative, and good for insomnia. I will let the mixture sit for six weeks and then strain out the hops and bottle the tincture. This is the first medicine I have made from home-grown material, and it feels pretty wonderful to be working with plants in this new way.
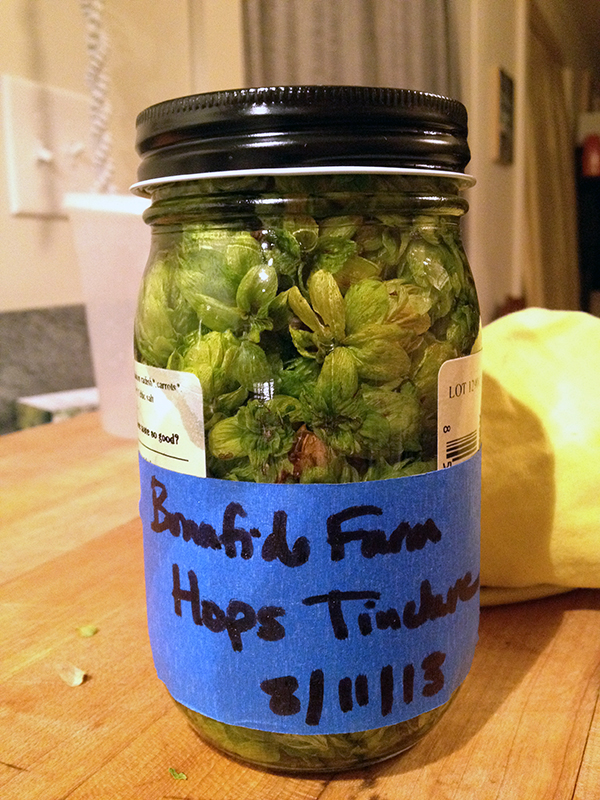
And that concludes the 2013 hops harvest. When the frost kills back the top growth on the hops plants, I will cut it off to compost and mulch the roots well. Then next year I will restring the ropes and expect an even bigger harvest if all goes well.
I found hops to be relatively maintenance free. I didn’t give them any supplemental water, thanks to our abnormally wet summer, nor did I give them any extra fertilizer. Deer left them alone. The hops did attract stink bug nymphs during the last few weeks, but the insects didn’t appear to damage the plants or the cones. I’m going to go ahead and call the first year of hops experiment a success.
I don’t have plans yet for the frozen hops. They may make their way into tea, or maybe beer. We’ll see!
August 27th, 2013 §
You may remember I planted my first Celeste hops back in April. It was pretty simple, involving amending some soil and running a couple of ropes from the ground up the the eaves of the garage.
It took a few weeks for the hops to emerge from the soil, but once they did they steadily grew until it was time to harvest two weeks ago.
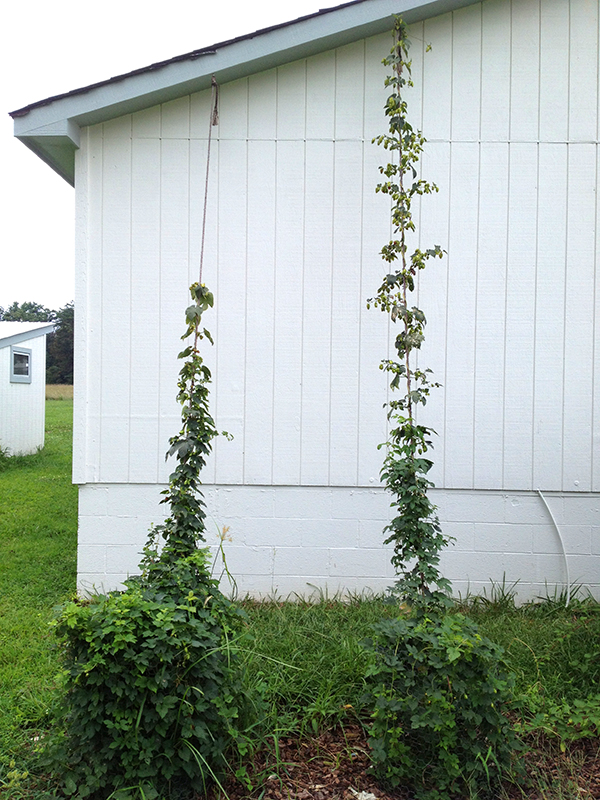
I watched a few online videos to figure out that the time was right, and even though my hops cones weren’t quite as large as some I’d seen online, other signs suggested they were ready. They felt crisp and springy to the touch, had deep golden lupulin glands within, and bits were starting to turn brown. And, I was due to leave the farm for a couple of weeks and knew that if I didn’t get them down, they’d all be ruined when I returned. So harvest time it was!
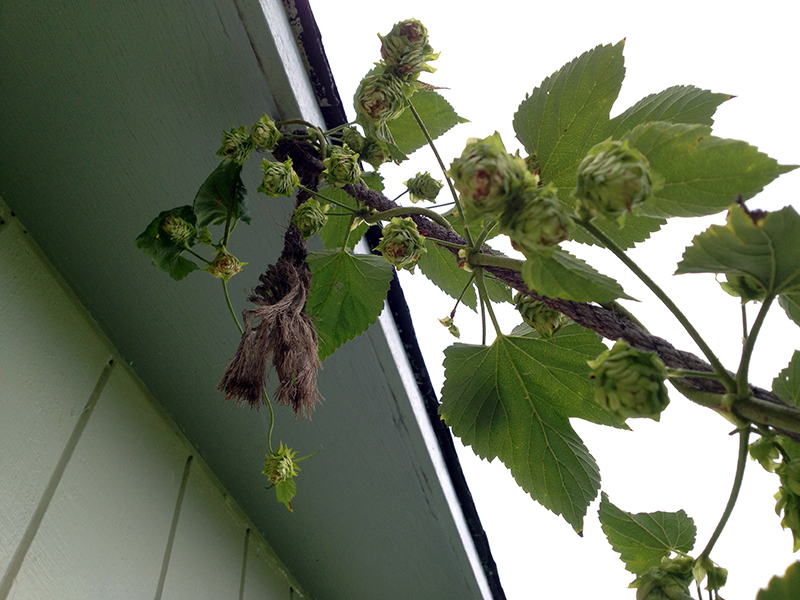
I gathered the ladder and my harvest basket and set to work cutting down the rope that held the more vigorous of the two vines.
Once I had it on the ground it was easy work to strip the cones off the plant, and they left telltale yellow resin (deliciously hop-smelling!) on my hands.
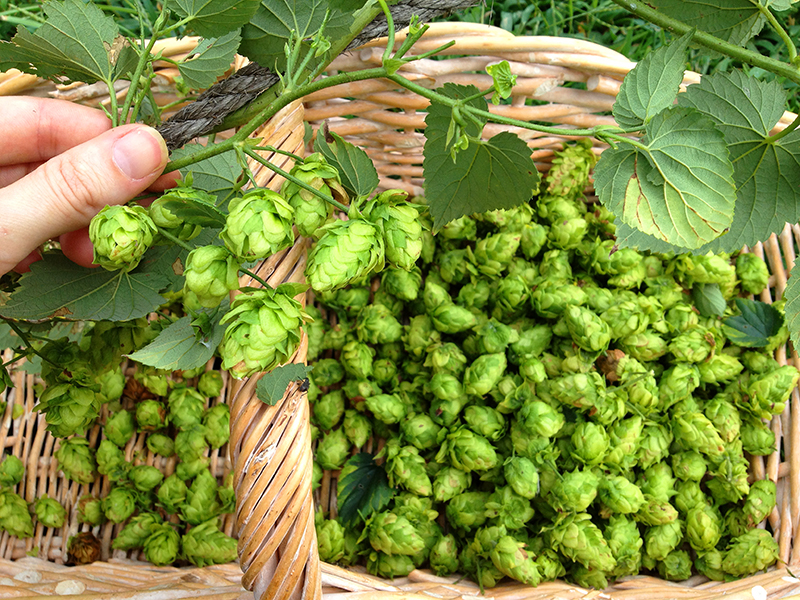
Remember that dogs will die if they ingest hops, so if you’re growing them around pets take extra care. I know my dog has pretty good judgment about what he eats, but even so I watched him closely while harvesting and I made sure to not leave any hops cones on the ground and picked up all loose leaves and plant pieces.
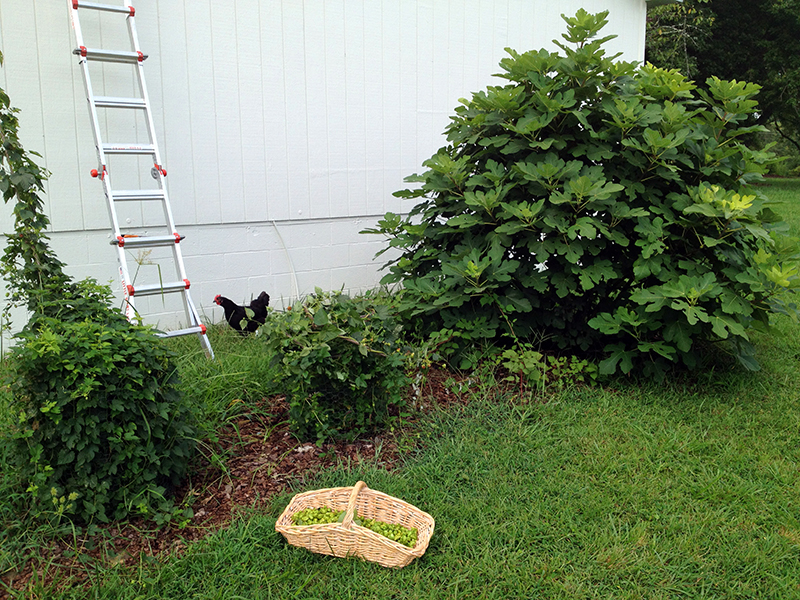
Once I had the cones picked off, I wound the bines up so that the leaves could continue photosynthesizing until frost. I figured that as the first year is really all about root development anyway, it didn’t make sense to chop the plants down yet when the leaves could still be helping the roots grow. A chicken photobombed this shot, which also nicely shows off my flourishing Celeste fig. This tree is in its third year in this location and very happy to be living on the south side of a white barn, soaking up light and heat. Soon its figs will be ready to eat.
Up next: What to do with your harvested hops.


