June 2nd, 2013 §
This spring I was lucky enough to get my hands on some “Glass Gem” corn seeds. Glass Gem is not a sweet corn. It’s an incredibly beautiful heirloom flint, or popcorn, and it’s quite a phenomenon in the gardening world, spurred on by photos like this that have been circulating online for a couple of years. You can read more about it here.

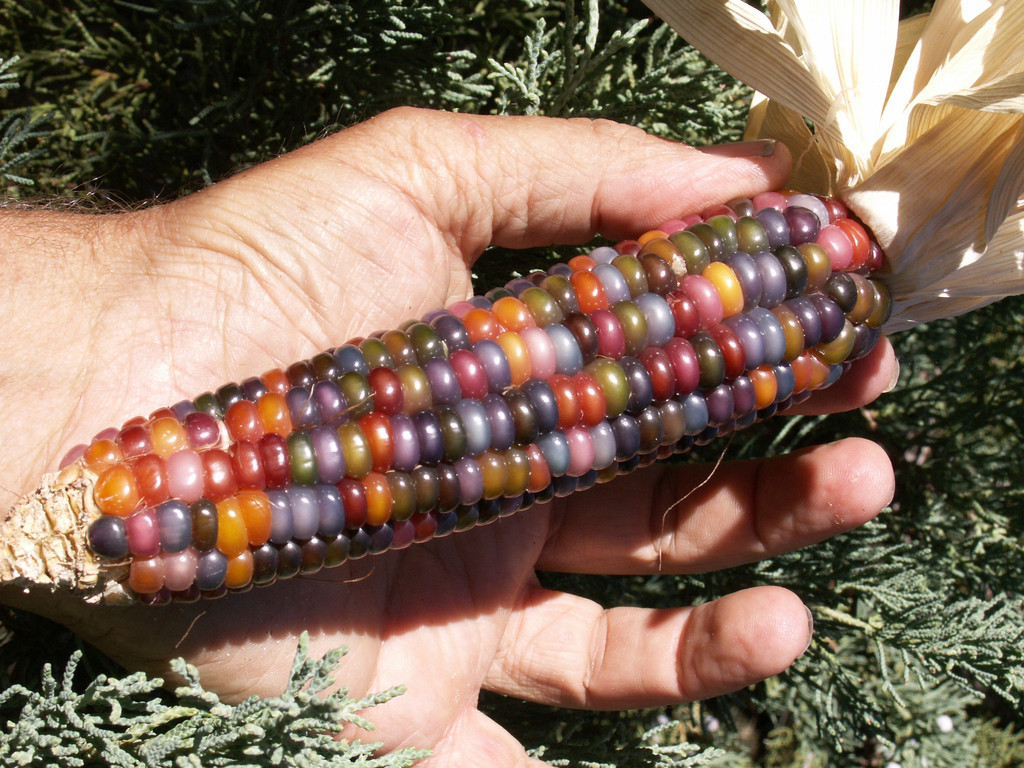 (Photo from Native Seeds/SEARCH)
Everyone was nuts to get some Glass Gem seeds, but they became available only this year from Native Seeds/SEARCH, a Tucson, Arizona-based nonprofit that works to conserve seed from plants of genetic and cultural importance.
I first discovered Native Seeds when I lived within walking distance of their retail store on Fourth Avenue in Tucson. It was one of my favorite shops in the city, filled with Native crafts and, of course, unusual seeds. One year I bought my dad a bunch of hot chile pepper seeds and sent them home to Virginia, where he planted a giant chile garden. For years my parents had hot peppers languishing in the freezer from that massive experiment.
I was on a waiting list for more than a year until I got an e-mail this spring saying I could purchase one packet of Glass Gem seeds. Which I did, immediately. People are so nuts to get this corn that I’ve seen online auctions and stores selling each seed for a dollar or more, which is crazy because it’s still for sale on the Native Seeds Web site. It’s also nuts because corn is wind-pollinated, which means you need a pretty sizable stand (at least 40 plants) in order for cobs to set, unless you want to hand-pollinate.
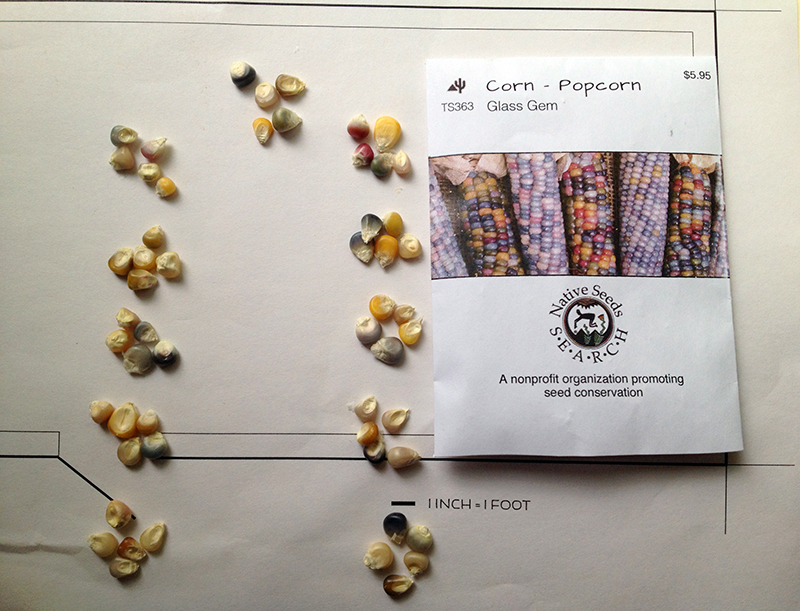
I received 65 kernels in my allotted packet of seeds. I have never grown corn before, so this experiment has required quite a bit of research as well as some garden plan drawings before I could start. And then I had to wait for the soil to warm up…
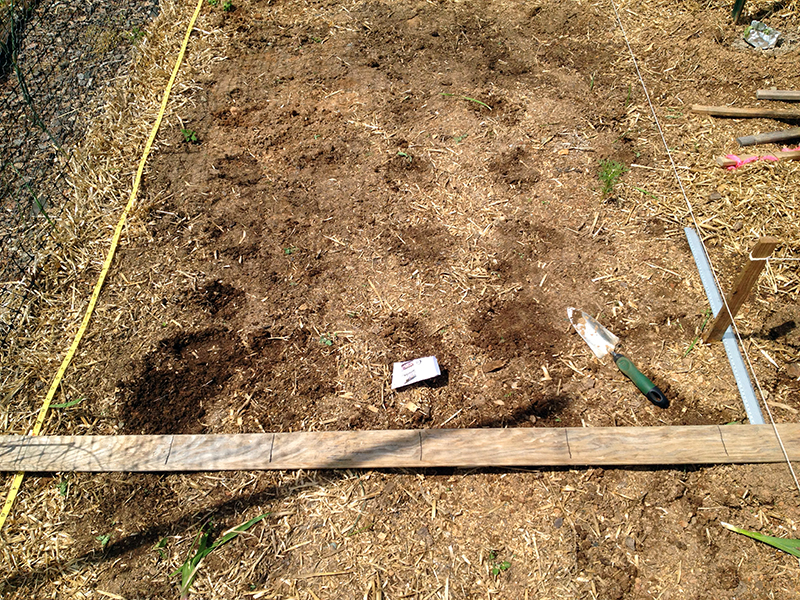
On May 11, I marked out the placement for each kernel using sophisticated measuring apparatus. Don’t laugh. It worked. I planted seeds one foot from each other in both directions, creating the suggested “block” configuration that helps insure pollination.
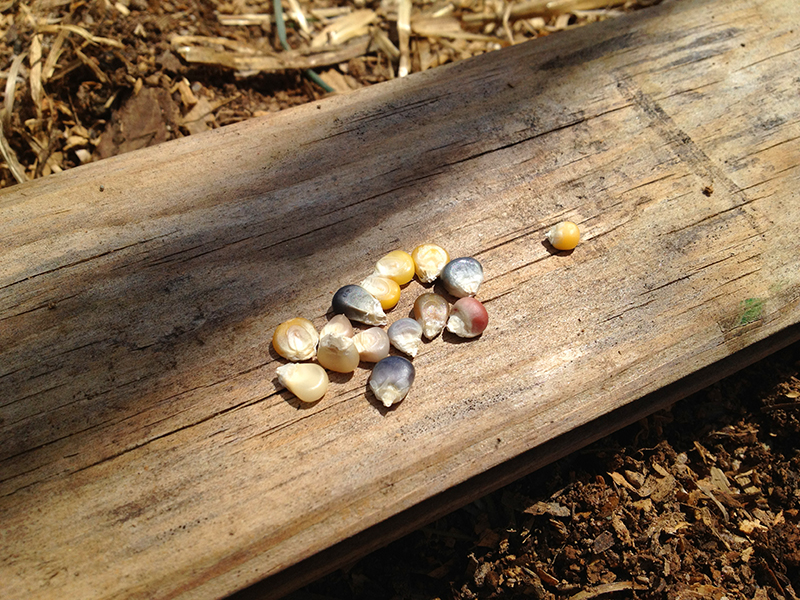
Glass Gem corn, ready to go in the ground. We had some nice rains in May and after about a week the corn germinated. Sixty-three of the sixty-five planted kernels came up, which is a pretty amazing germination rate: 97%!
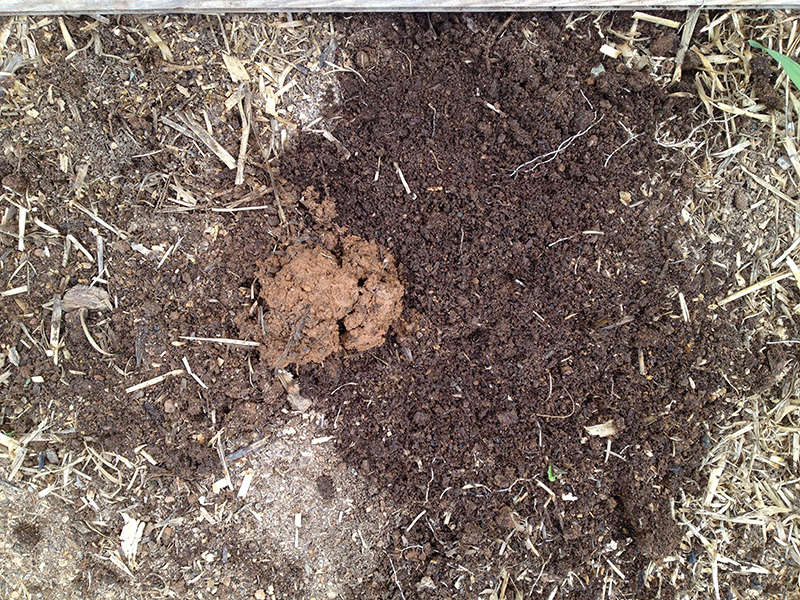
I’d like to take a moment now for some soil appreciation. The darker soil, above on the right, is what most of my vegetable garden looks like now, after three years of concerted effort to build soil tilth and fertility through sheet mulching, composting in place, running chickens in the garden, and adding homemade compost at regular intervals. The red clay blob is the native soil, dug from just a foot away at the edge of the garden. Quite a difference, huh?! I know it’s nuts to be proud of your soil, but that photo above represents countless hours of my life spent in research and hard physical labor, so it’s wonderful to see such an obvious improvement.
The corn is now about eight inches tall and this week’s heat wave (highs above 90 degrees) has had a noticeable effect. Corn loves heat, and just as I’ve heard in gardening folklore, you can watch it grow.
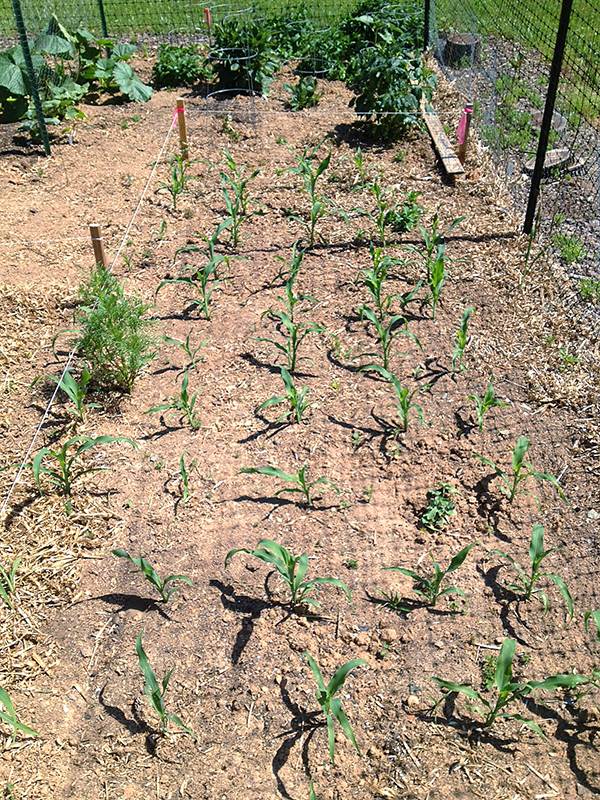
Many other bloggers are growing Glass Gem and writing about it, so it will be interesting to compare experiences. Some gardeners are really coddling their Glass Gem, but coddling isn’t really my gardening style and I am prepared to accept failure with this experiment. It’s a big risk as I devoted a relatively large section of my too-small garden to this corn, but I figured I had to at least give it a shot! We’ll see what happens!
June 1st, 2013 §
In late March I stayed with my friend Todd in Arlington, Va. Todd is a former neighbor, and I first spoke to him as I walked past his rented house on Barton Street toward the Metro. Todd was sitting outside on the front porch, reading the paper. I complimented him on the beautiful irises growing rampant in his front yard, which is how I earned his nickname of “Iris” before he knew my real name.
A while later Todd and I got to know each other more and became friends. He’s even made the trek down to visit me at Bonafide Farm. I very much appreciate his humor and intellectual curiosity as well as his willingness to pitch in with nonglamorous labor such as driving me to the airport and and helping me move. Which involved Todd carrying about a hundred heavy book boxes, one on each shoulder, two at a time out of my third-floor apartment—a sight and a kindness I won’t forget!
Well, this latest visit was no exception, as we dug an entire bed of irises and daffodils out of his back yard. These are old beds that were planted sometime before Todd moved into the property by someone who obviously loved gardening. It was hard to tell how old the beds were, but the irises had completely filled them with exposed rhizomes growing up and over the brick edges. Definitely good candidates for division!
Though Todd has been living in Barton Manor for many, many years, one day he will have to move out and the property will succumb to the new development that’s overtaking the Clarendon area. Todd wants to make sure every last useful piece of the house and yard, living and not, is salvaged before the demolition begins. Which is how I came home with this:
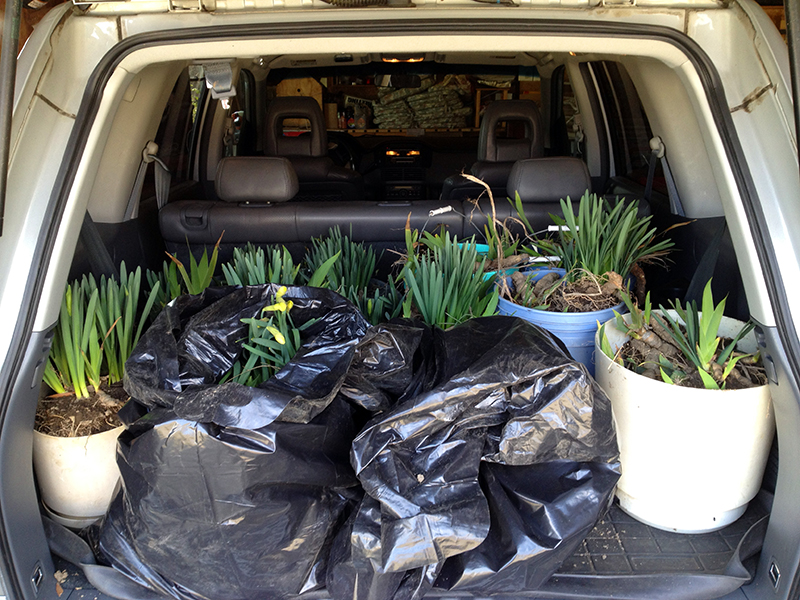
Those contractors’ bags were full of soil and plants. They were so heavy I had to call in reinforcements just to get them out of the truck. Thank goodness for the tractor!
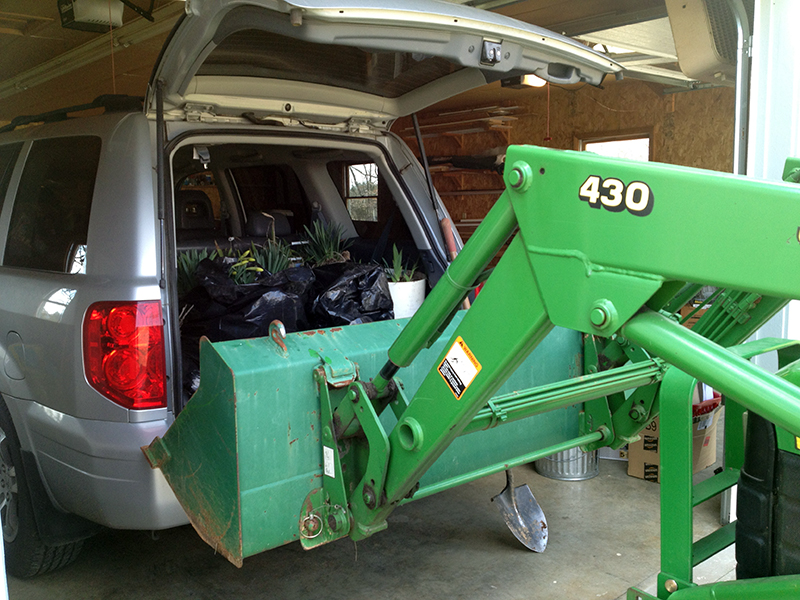
It took me an entire day to get these irises and daffodils planted in the beds around the house, below. By the end I was running out of spaces to put them, so I stuck a few clumps of daffodils around the giant oak tree at the wood line.
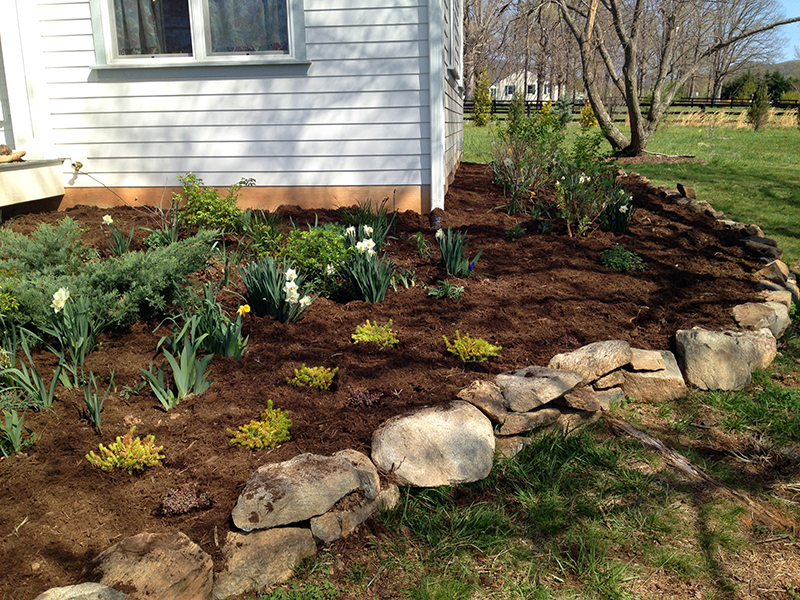
To my surprise the daffodils, which were in bud when we dug them, went ahead and bloomed as though their relocation had never happened. I was very thrilled to see that some of them are a fascinating type that bloom with a yellow corona (the center cup part) that then fades to a peachy pink as the blossom ages. Very cool!
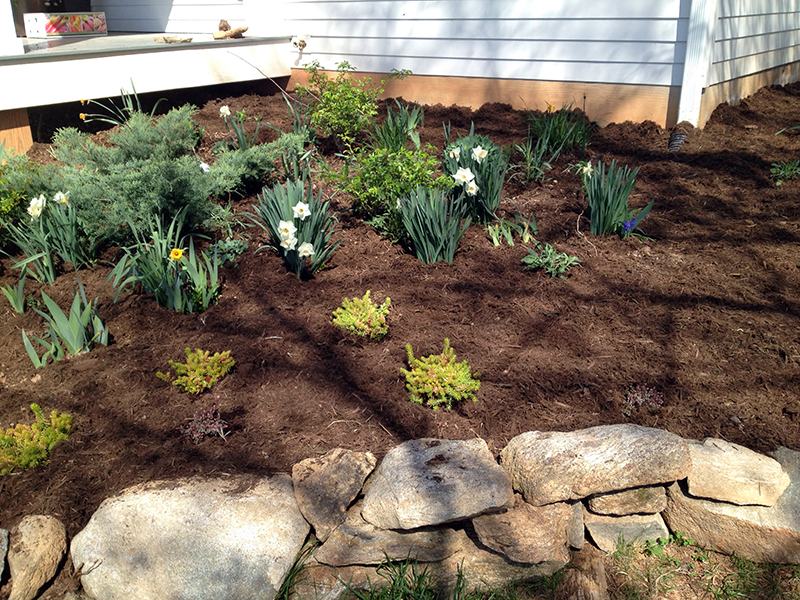
I totally didn’t expect it, given the late transplanting, but several of the irises also bloomed as though nothing had happened. I guess they like their new home.

I am very grateful to Todd for his gift and glad to see a bit of Barton Manor live on at Bonafide Farm. Seeing these plants remind me not only of my years spent living in the city but also of my good friend.
May 31st, 2013 §
In all the rush of cleanup and planting and hosting house guests, I failed to report on what was blooming in the gardens in April and May. So here are a few of my favorite shots from the last two months. Now I can start fresh with June and hopefully do better with posting what’s blooming as it happens! Not only is that the more newsy approach, it also helps me keep a record of what happened when in the garden.
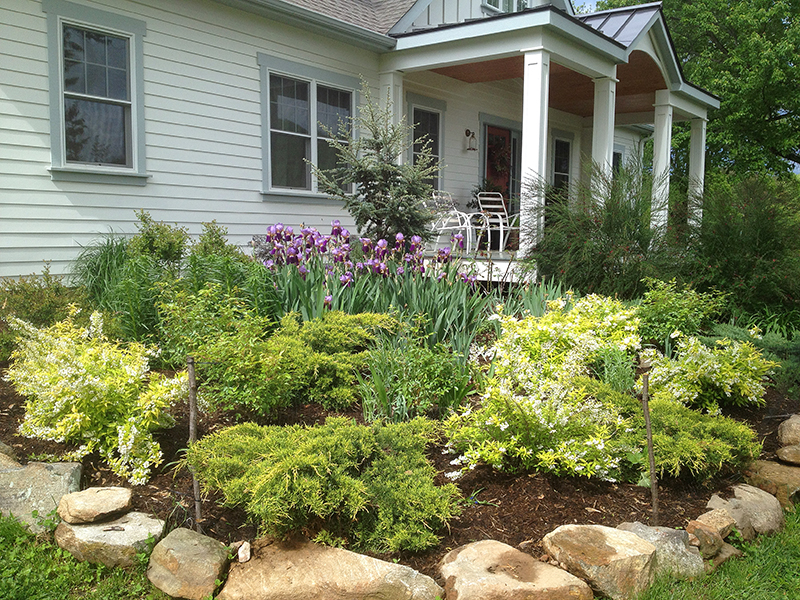
Purple irises, “All Gold” juniper, and “Chardonay Pearls” deutzia (with white flowers).
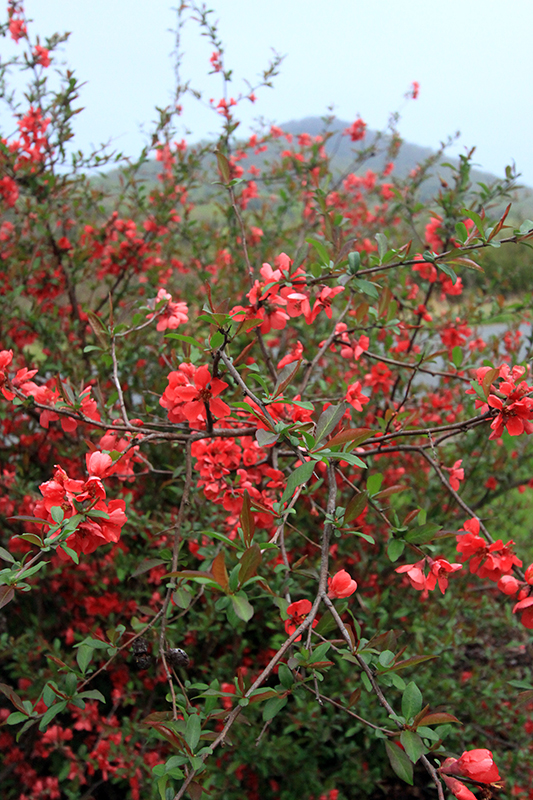
Quince by the mailbox. It bloomed beautifully this year, finally displaying the effects of four years of delicate rejuvenation pruning!
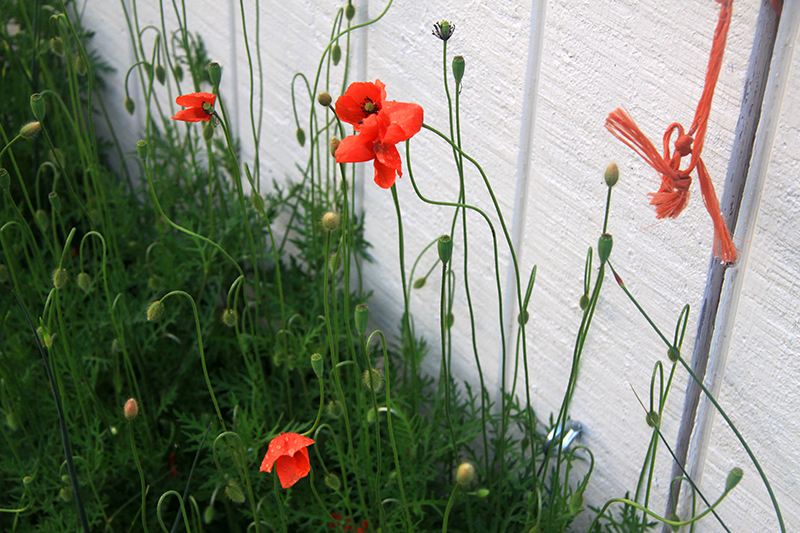
Volunteer poppies by the chicken coop. These appeared last year right by the clean out door—I have no idea where they came from. This year they really went nuts. I love how they match the baling twine.
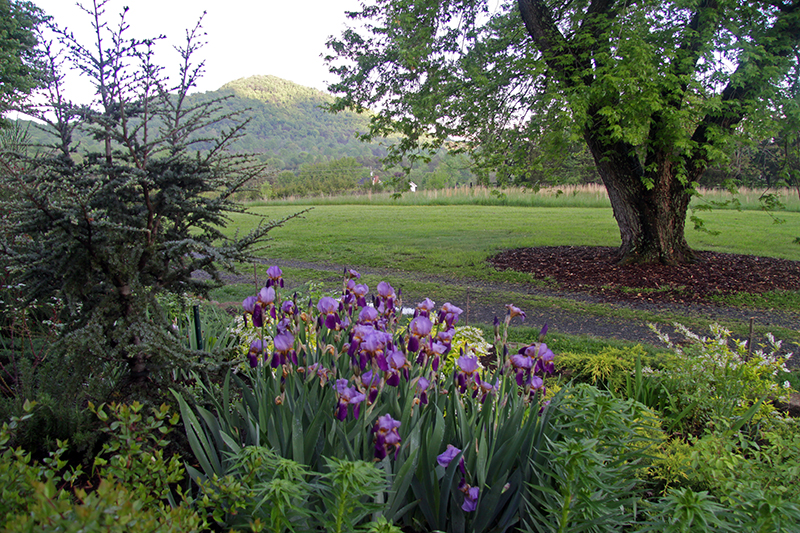
Buck mountain sunset over the front garden.
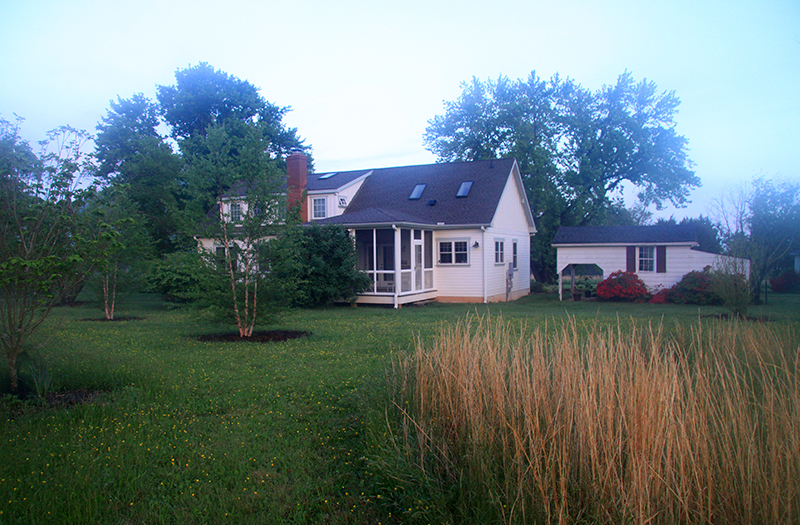
There was lots of grey, foggy weather in May.
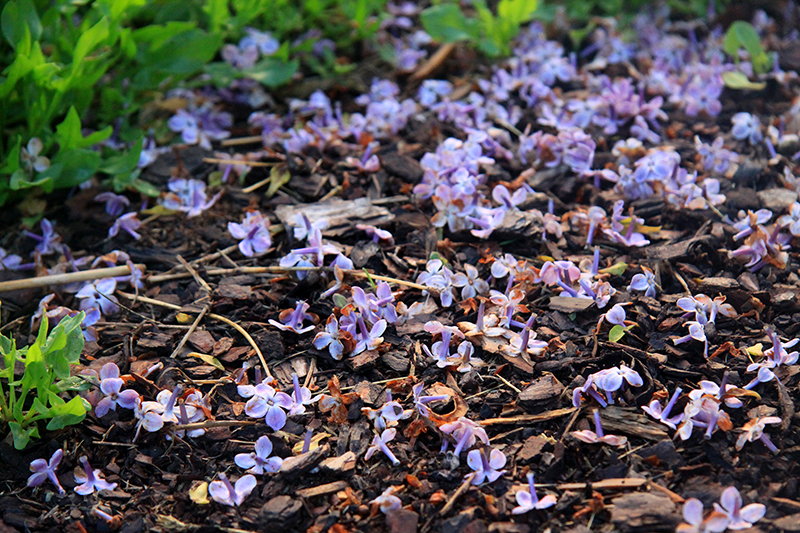
Fallen flowers from one of my newer lilacs, “Declaration,” which is planted in the new forest. It was covered in blooms this year, unlike the old lilac by the porch and a newer bush, “Paul Thirion,” also planted in the new forest (which didn’t flower at all!)
May 30th, 2013 §
Ever since I moved to Bonafide Farm, I’ve wanted to grow hops. But the infrastructure always stopped me. Hops are vines (actually, botanically they are bines) that will grow 20′ or more, and need trellises that I just didn’t have the energy to conceive and build.
But in mid-April I was down in Nelson County, which is now regionally acclaimed for its breweries (Devil’s Backbone, Blue Mountain, etc.) enjoying a post-hike flight at Wild Wolf with some friends. A sign at a shop across the patio advertised hop rhizomes. I couldn’t resist. Turns out I had discovered HomebrewZ!, a delightful little shop stocking all your homebrew essentials.
A very lovely woman sold me her last seven Cascade rhizomes and instructed me to “go across the way” to speak with another woman who would impart all the secrets of hops culture to this neophyte. I got the skinny from this sage and rejoined my friends and our dogs on the patio.
The rhizomes,which are nothing more than 3-4″ twigs, languished in a paper bag until I could do a little research and make a trip to the hardware store for supplies. Then my friend Simon and I spent an evening hauling forest topsoil and compost to the site of an old berry patch by the south side of the garage. Once we had the soil nice and juicy (hops are heavy feeders with an extensive root system), I mounted the ladder, drill in hand.
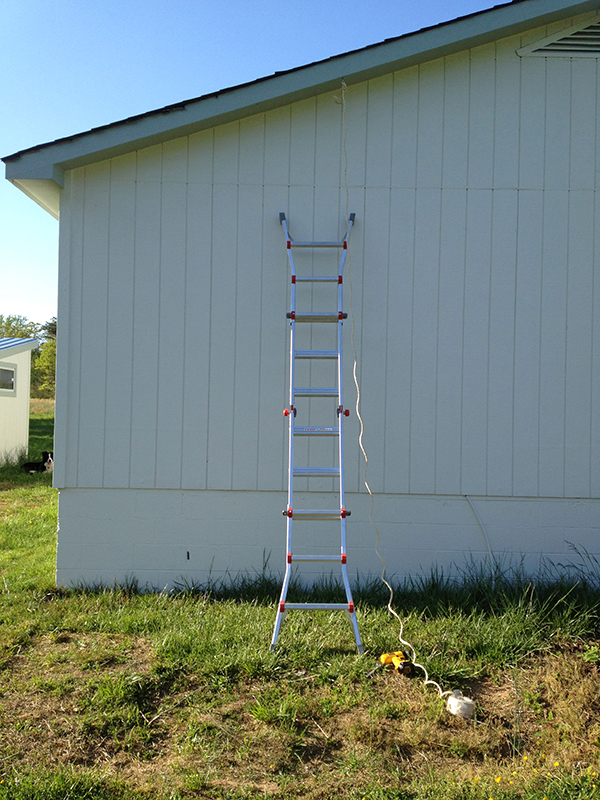
Right up under the eaves I installed two stainless steel eye-bolts. Then I ran 3/8″ sisal rope from them down to dog tie-outs that I’d screwed in to the growing bed. And this was the extent of my trellis system. One of the best things I have learned from living here is that sometimes things work out best when I am just pushed to react to what a situation demands, instead of obsessively planning to the point of inaction.
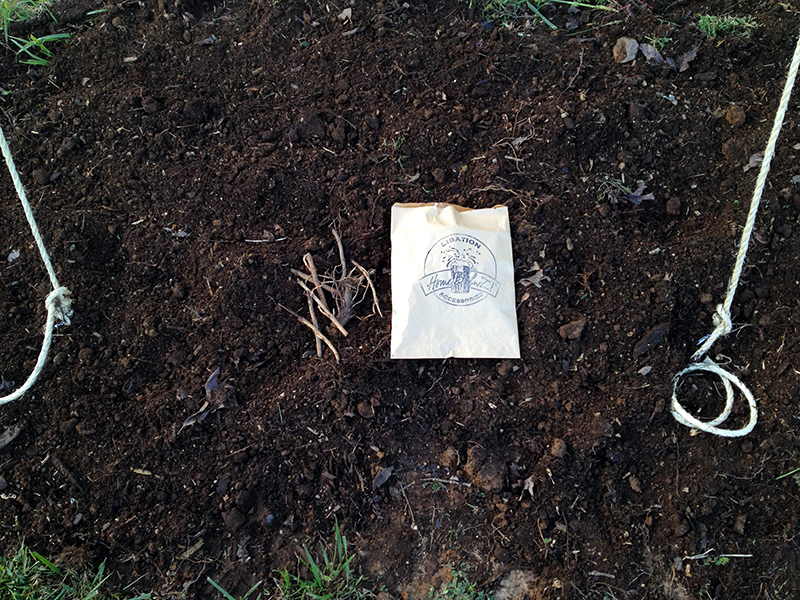
I arranged the rhizomes in the soil around each tie-out, covered them over, and hoped for the best.
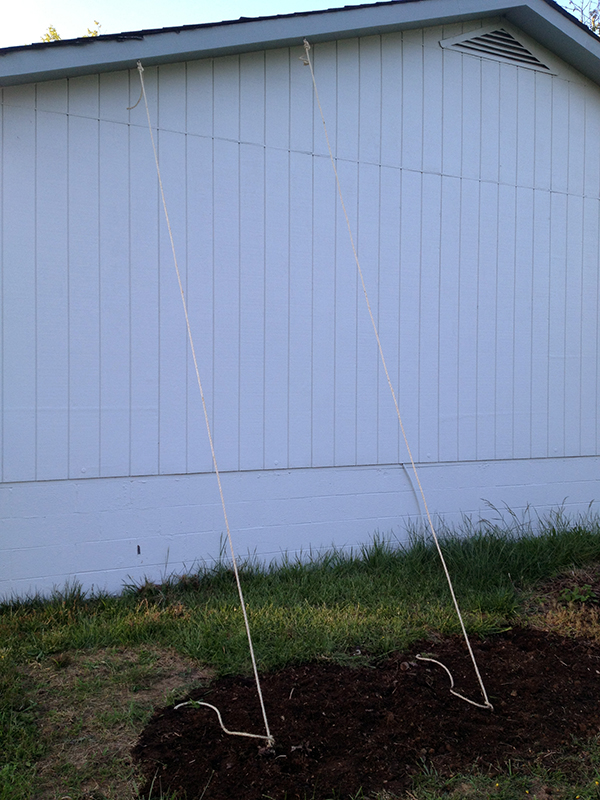
A few weeks passed with no change. Just as I began to worry that I’d gotten some dead rhizomes, tiny leaves appeared. And then there were more. I made chicken wire cages to keep the chickens from eating the hops, and in a few days more sprouts appeared. And then I went away to the beach for eight days, and when I returned my little hop babies had found their ropes and started to twine. So precocious!
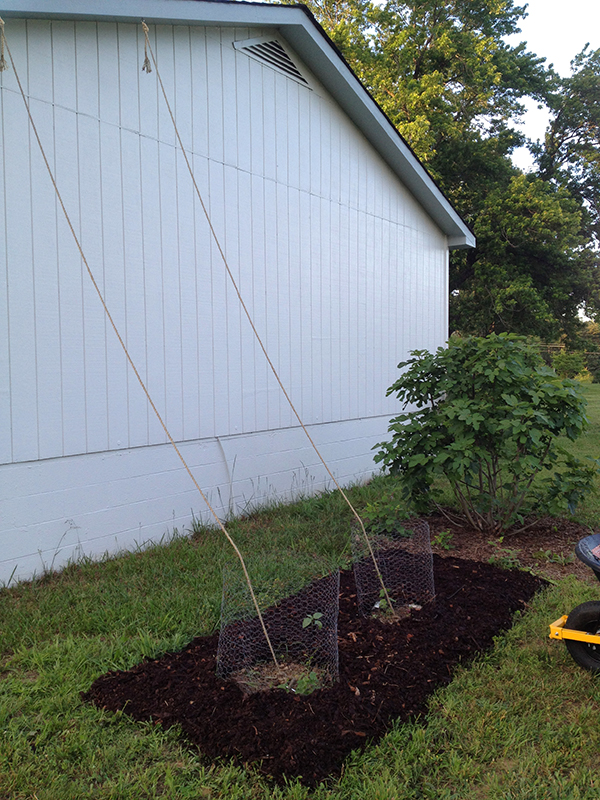
Unfortunately the pasture was fast overtaking this nice, rich new bed, so last weekend I dug out all the weeds, laid down newspaper, and piled mulch on top. This will keep the weed pressure off my hops so they can grow to their max. That’s my Celeste fig next to them, which came through this winter without any intervention from me and is on its way to becoming a beautiful asset.
I found another little snake in the mulch. This is the second “mulch snake” I’ve encountered.
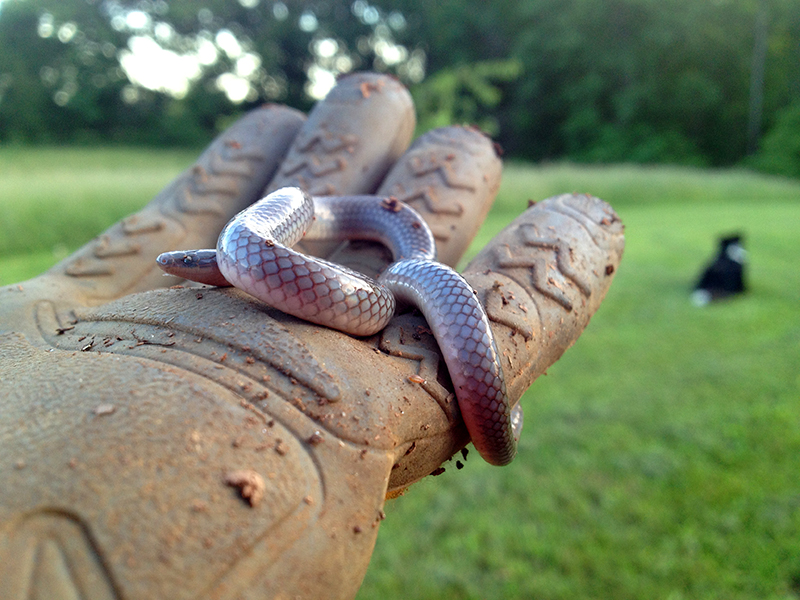
I placed him next to the growing hops. I figured twiney things belonged together.
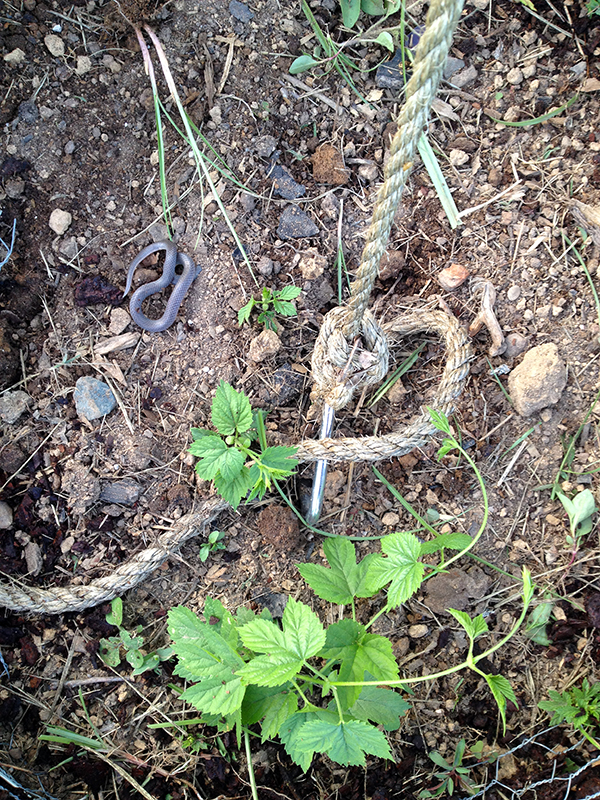
I am very excited to see what my hops do. Maybe someday I’ll be making a Bonafide Brew with my own homegrown hops! And if not, hops are a wonderful herbal sedative often used to induce sleep. A girl can dream…
May 28th, 2013 §
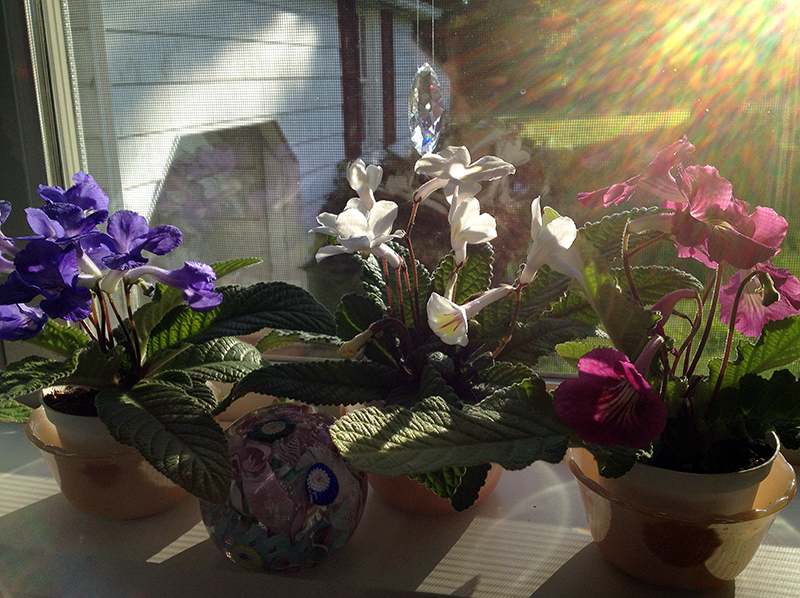
What a busy Memorial Day Weekend!
On Saturday I visited a friend for a look inside his new beehive. We’d taken an into to beekeeping class together this spring, and he won the class drawing for a complete hive with bees. After taking the class I decided against adding bees to the farm this spring, figuring that the roughly $600 outlay to get started with two hives was too much at this time. Further, there are so many things that can go wrong with a bee colony, from diseases to pests to the vagaries of weather and wildlife, that I got nervous I would screw it up and didn’t want to add that stress right now.
However, after seeing Aaron’s beehive, I am totally smitten and kicking myself that, as usual, I over thought it and didn’t jump right in. With complete sincerity I have to say that opening that hive and seeing thousands of beautiful creatures busy creating their perfect home was one of the most miraculous things I have ever seen. The precision of each cell of honeycomb blows my mind, as does the order the bees demonstrate as they go about separating comb into areas to raise brood and store honey.
We added a super (outside box), fed the bees, and inspected each frame of the hive. I learned how to hold a bee-covered frame without dropping it or crushing any bees. We found the queen, distinguished by a red dot of paint on her back, busy in the lowest super. Through this whole experience the bees buzzed about around me and I didn’t feel scared once. I was wearing overalls, my wellies, and a borrowed bee jacket and veil, along with rubber kitchen gloves. I think this delicate armor helped to alleviate any fear of being stung, but I also felt entirely calm around the bees. An inner voice told me that calmer I was, the calmer the bees would be (which is a mindfulness technique I have learned from working with all sorts of animals), and it seemed to work. I just focused on assisting Aaron and my mind was entirely present. It was strangely meditative, actually, moving slowly and deliberately so as not to kill the bees or panic them.
If anything, I’d get a beehive just to feel that peacefulness again. But I have been doing this farm thing long enough to know that the flip side of that wonderful feeling is the sadness that comes when living things in my care get sick, or injured, or fail to thrive.
I spent Sunday working in the garden, planting out a bunch of plants that Aaron sent home with me. I also fabricated more than twenty dahlia supports from 42″ tomato cages. I cut the legs off each cage, bent those wires into u-pins, and brought them to the garden, where I secured them, upside-down for stability, over the more than twenty dahlias that I planted out. I had started these dahlias in pots, some as early as March and others in April, hoping to get earlier blooms than usual. We’ll see if it works. Regardless, I will have very neatly supported plants!
I’ve also been busy tucking zinnia seeds around the house garden, and minding the blossoming veg garden. Lots going on—the growing season is upon us and I can be outside from morning until sunset and not run out of things that need tending.
Then on Memorial Day I went to a cookout hosted by new master gardener friends. When I got home, around 8:30 p.m., I bottled the beer that I made when my friends Brad (my homebrew mentor) and Amy visited in early May.
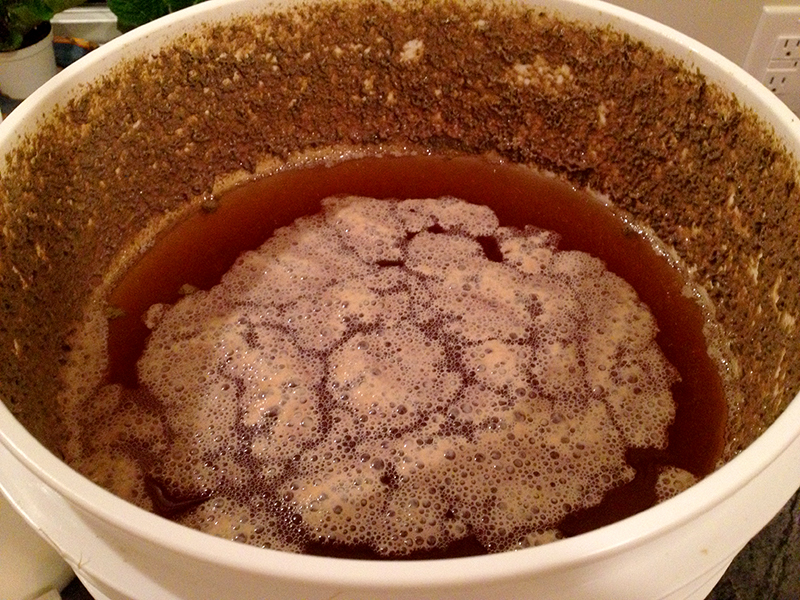
It’s a kölsch, a nice summer sipper, and I am pretty excited about it. I was nervous as the top blew off the fermenter its first day out, but that didn’t seem to negatively affect the beer.
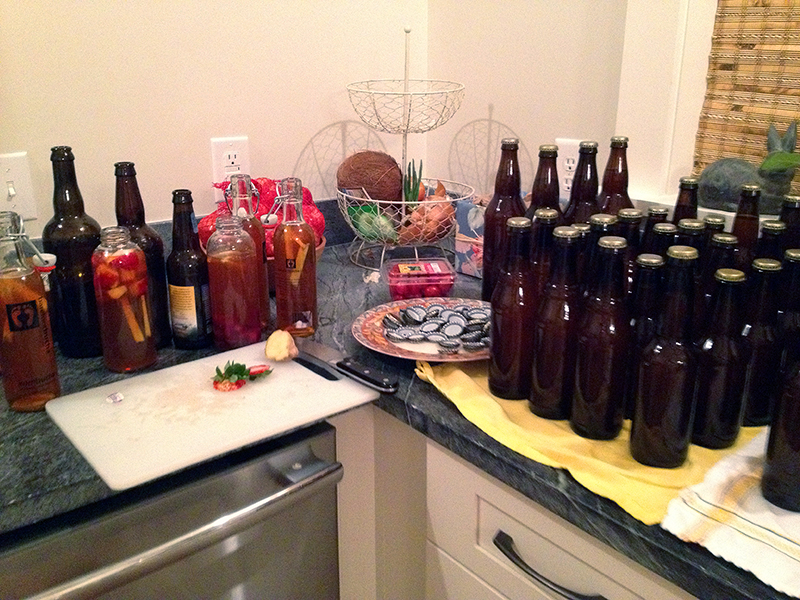
As the kitchen was already a mess, I went ahead and bottled up some of my kombucha. This is the first batch I have made in four years, and it’s delicious. I spiked a few bottles with ginger, cherries and strawberries for a secondary fermentation. And then at nearly midnight I started soaking some wheatgrass seeds, which is a new experiment. I plan to grow them out to add to my green juices.
And so things continue on: growing or not growing, fermenting, decomposing or dying. It’s all happening here, all around me.
May 14th, 2013 §
The average last frost date in Free Union usually occurs between April 11 and 20. This year, however, we’ve had a cool, long spring, and last night were hit with what I suspect will be our last frost of the year.
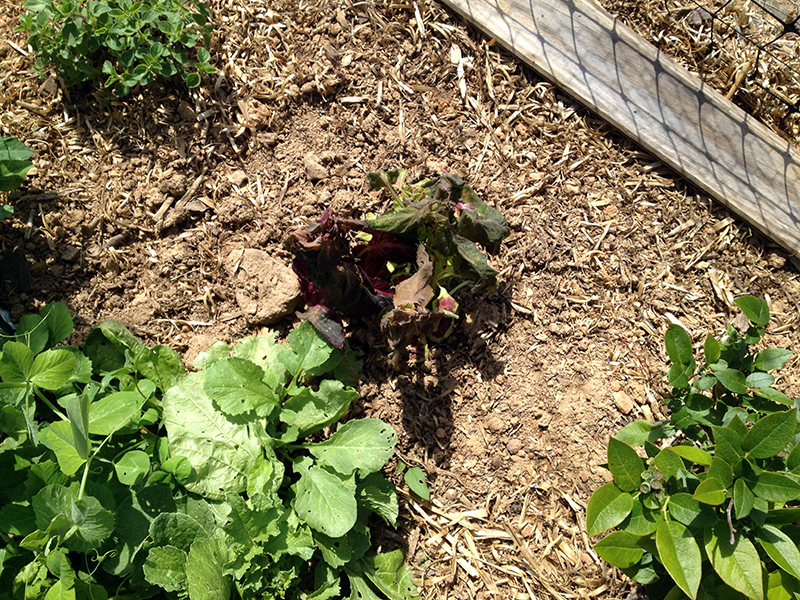
My only frost victims in the veg garden were a couple of coleus I’d stuck in over the weekend. I like to grow coleus to add to cut flower bouquets. There are the dead plants above, nestled among some oregano, radishes, peas, and a blueberry bush—all of which made it through the night just fine.
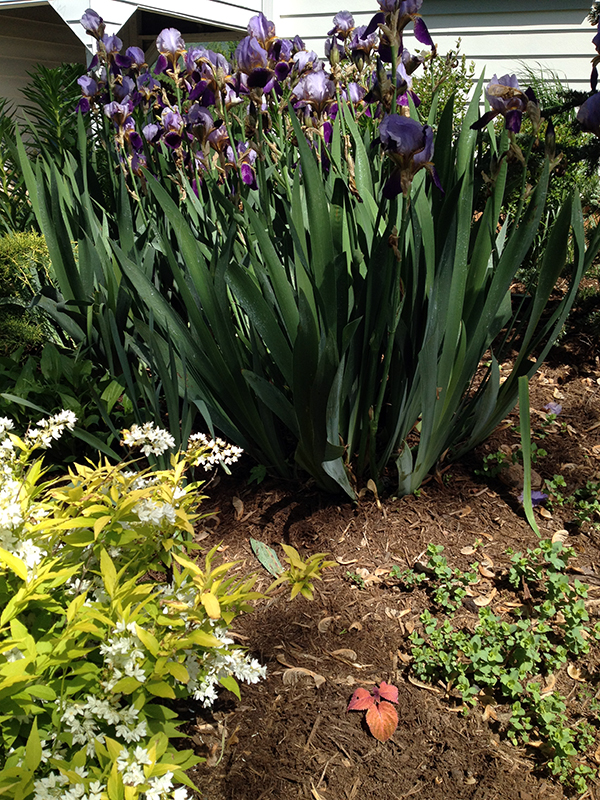
Interestingly, the even smaller coleus starts—above, in red—I’d stuck around the house garden escaped frost damage. Of course it makes sense that the south side of the house would be warmer than the exposed garden out in the field, but I continue to enjoy discovering all the different microclimates on this property.
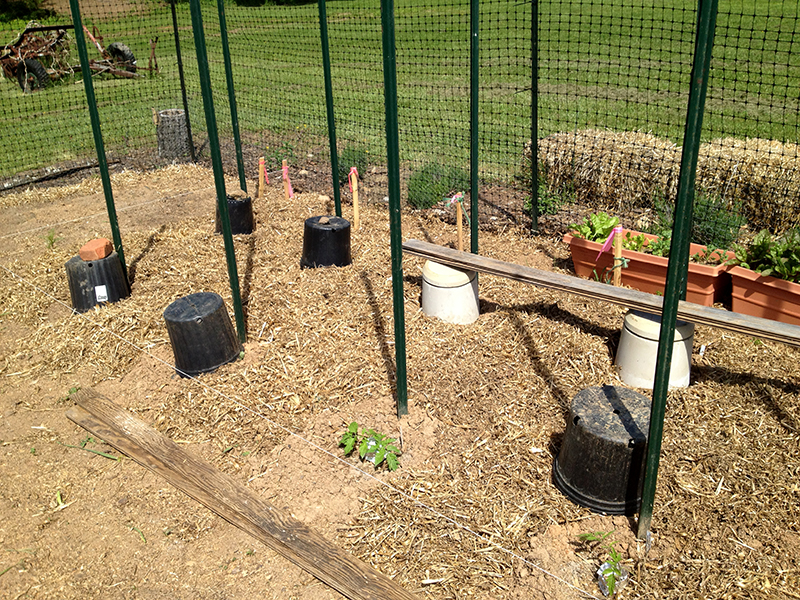
Of course I covered the new tomatoes for the night, and they were okay, as were all the pots of started dahlias and other vegetables I stashed in the well house overnight. I wonder how the local vineyards and orchards and other farmers fared—I read news stories last evening that it was going to be a stressful night as many growers watched the mercury with their livelihood on the line.
Looking at the upcoming forecast, in which temperatures are supposed to shoot up to near 90 degrees tomorrow, I am just going to go ahead and call it. Winter is over, let the (frost-free) growing season begin!
May 9th, 2013 §
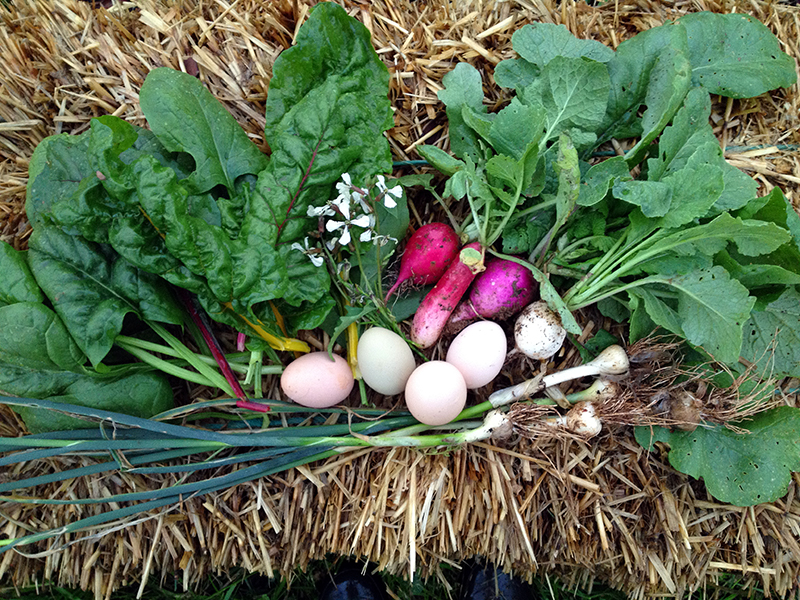
We’re in it now, thank goodness, the season when dinner is picked straight from the garden. Tonight’s salad will be spinach and Swiss chard, both overwintered, and this year’s first radishes along with some wild onions growing around the garden fence. I’ve never eaten wild onions, but they grew tall and lusty while my seeded spring onions failed to thrive, so I sliced them up tonight when I composed my salad. The onions have a very delicious, pungent flavor that I can only describe as “wild lawn-like.” They tastes like the smell of a freshly mown pasture. They may overpower the salad, but I stacked their flavor against a hefty homemade balsamic and dijon dressing and we will see where it goes. The greens were a bit sturdy so they’re all getting happy in the dressing, wilting a bit before I dig in.
And of course, today’s eggs are in there along with some arugula flowers, which are a beautiful, peppery garnish. All together, this would make a slamming fritatta. And not only does this feed me—the radish and onion tops, chard stems and egg shells go straight to the compost, where they feed the worms that enrich the soil that goes back in the garden. A closed system, and a beautiful one.
You may note the slug on the chard leaf. We’ve had two days of rain and the slugs are out in force. You may either eat or discard the slug when you make your own version of this salad!
May 8th, 2013 §
Once all the rocks were in place, I covered the turf that extended into the bed with newspaper several sheets thick. This grass-killing trick had been effective when I used it under the mulch rings I placed around my trees. Then I went in to the woods and dug up bucket loads of loamy topsoil, mostly with a shovel so I could pick out the rocks, sticks and vines as I went.
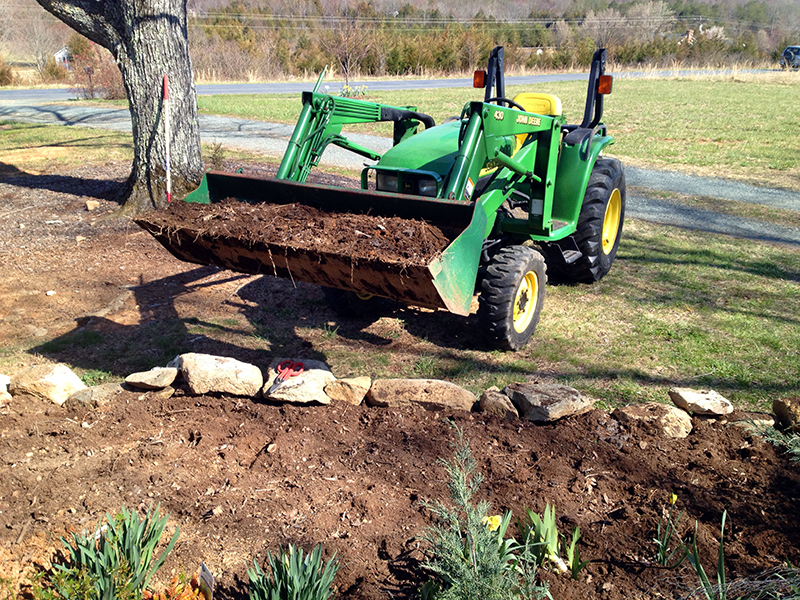
I dumped this topsoil into the new bed space, on top of the newspaper and up against the back wall of rocks, in effect forming a raised bed around two sides of the house.
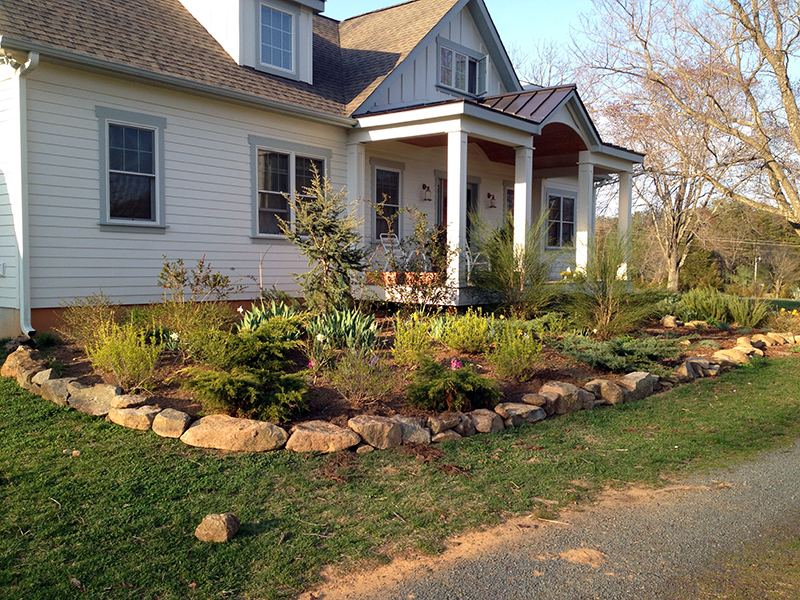
Then on April 10 I called my favorite mulch guy and had ten yards of double shredded hardwood mulch dropped near the woods. This is prettier—and more expensive—than the pine bark nuggets I buy for mulching around my big trees (below, on the ground). It will also break down much faster, helping to enrich the soil as it does.

I spent a day hand-forking the aforementioned ten yards of mulch into my garden. It was super-tricky, delicate work as many of my perennials were just starting to emerge and hard to see, and I didn’t want to smother them.
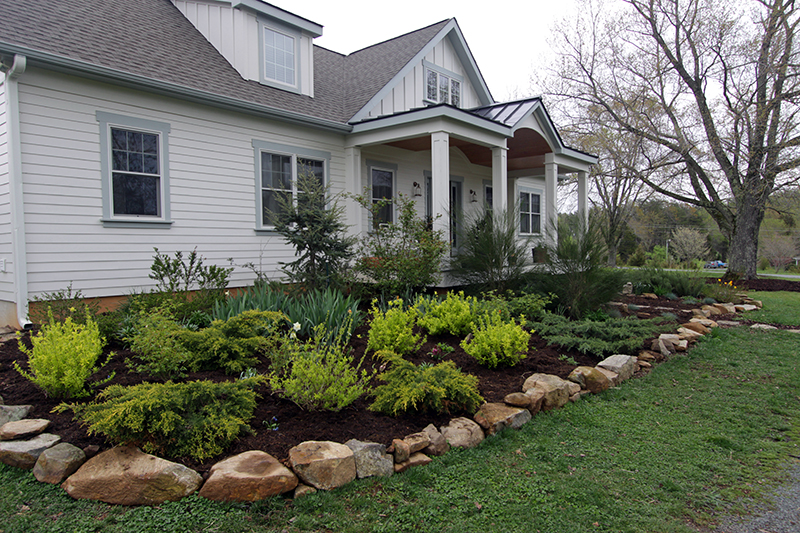
But after eight hours of mulching and only a few blisters across my palms, it was done. And looked pretty nice, I thought. There are a few spots that can use another stone or two, but I will fill those in once I’ve fully recovered.
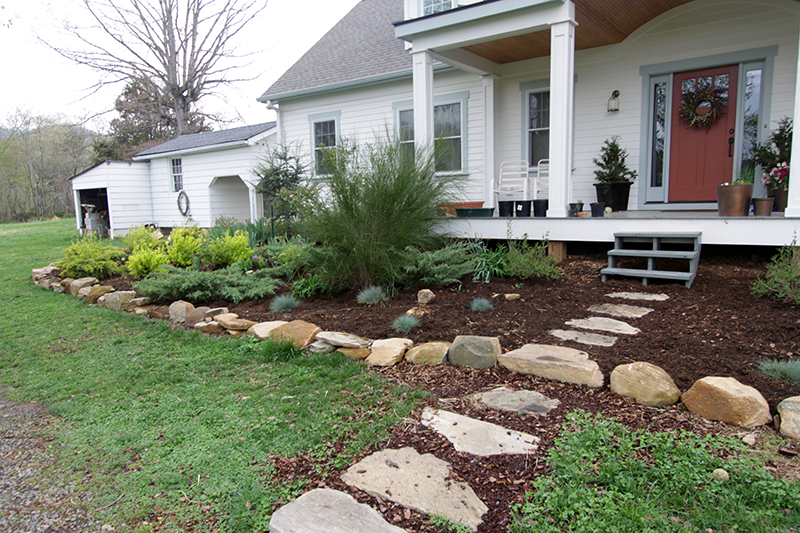
It’s not the fancy hardscape I’d most love, but for $285 worth of mulch and untold hours of bodybreaking labor, I finally have some decent-looking garden beds that are in keeping with the informal, cottage nature of the house. What’s more, this project massively contributes toward my goal of making maintenance around here as easy as possible. Now I just run the string trimmer right up against the rocks—which means no more futile hours spent hacking enroaching turf out of the beds. Plus, the mulch will help keep weeds out and moisture in during the hot summer while feeding the soil and coddling the earthworms beneath.
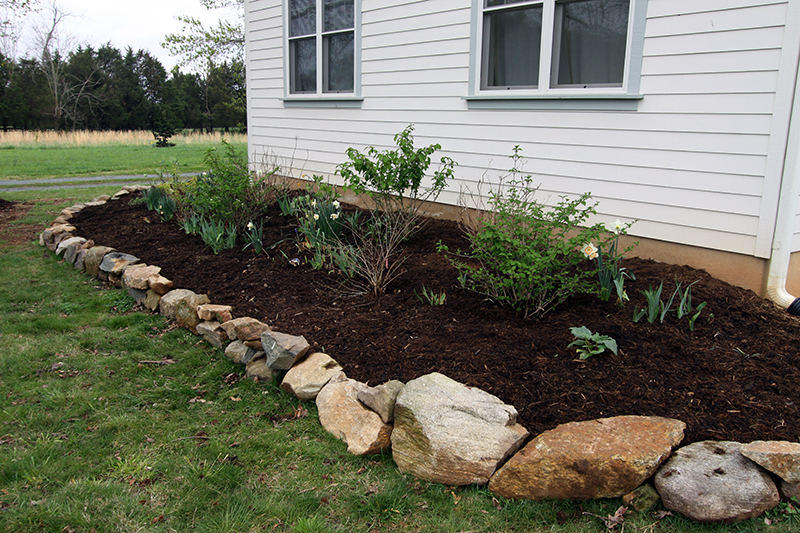
And, I am really excited to have gained a bit more extra bed space, complete with pretty decent soil—thanks, forest! I have already started planting some fun new additions, including peonies for the shadier areas and sedums for the sunny front corner. My plan is to eventually colonize the rock wall with sedums growing over it and through the spaces between rocks.
The garden has really come on in the weeks since these pictures were taken, so a little virtual plant walk will be coming soon.
May 7th, 2013 §
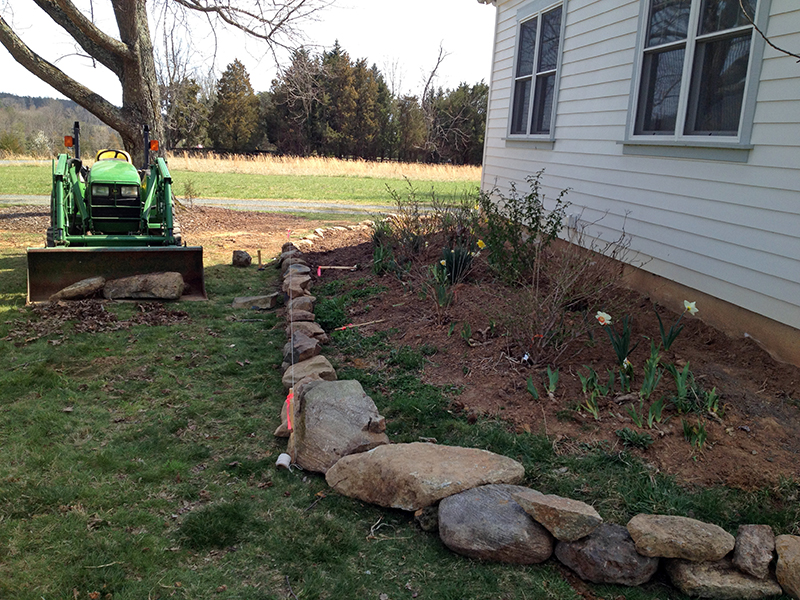
Much of March and April was devoted to building a rock wall around the front and road-facing side of the house. I’d grown tired of hacking turf out of the unedged beds, and the bed on the side of the house that faces the road was too steep to hold water on the plants in it. As you can see below, within the stone wall, it wasn’t a good look. Last summer I’d gotten some quotes to build a nice stone retaining wall around this end of the house and around the front, with a flagstone front walk and stairs. The quotes ranged from $8,000-$18,000, which just wasn’t in the budget at this time in my life.
So I started pulling rocks out of piles in the woods and used the tractor to get them near the house. Some of these rocks were the foundation of the house I tore down to build mine, and others no doubt came from clearing the pastures way back when. All winter long I played around with the rocks, moving them many times until I got them arranged in a line I liked and that would almost double the depth of the bed on this front corner of the house.
I had really low expectations for this project, as I think rock-edged beds can be pretty stupid looking. And I know that a proper rock wall is dug into the ground for stability and protection against frost heave. But I made peace with the idea that this didn’t have to be a perfectly permanent solution, and I figured that if I used rocks that were as large as I could handle the installation would appear more like a rock wall and less like a line of rocks, which is exactly what it looked like below, during the head-scratching phase of this project.
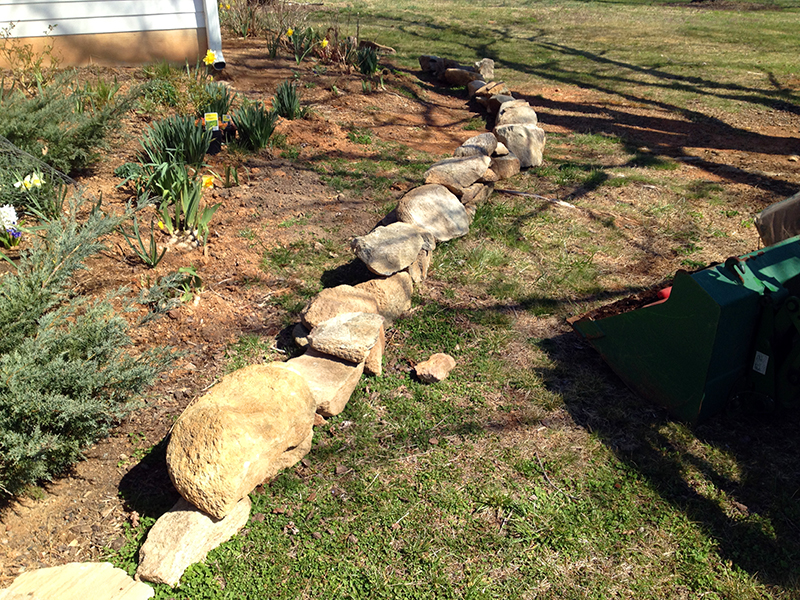
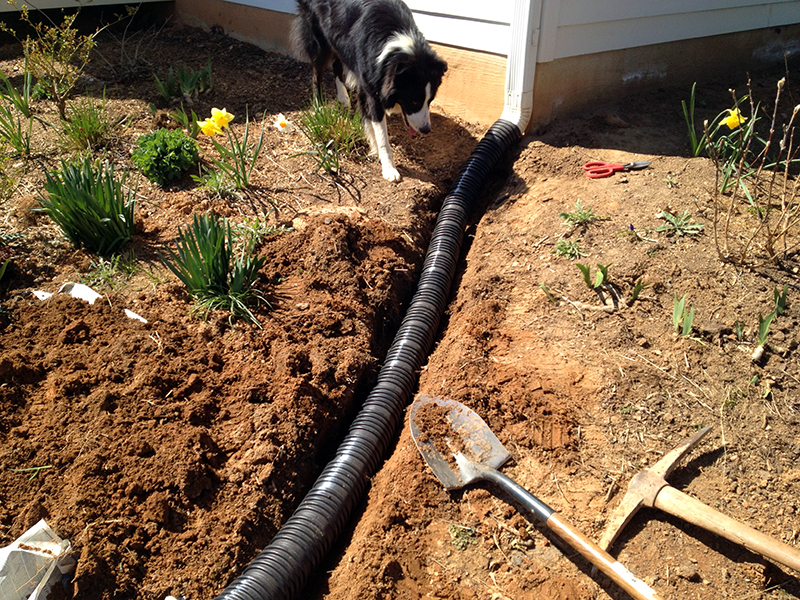
I’d been having trouble with runoff from the downspout in the above photo. Every time it rained, water ran down the bed and pooled near a maple tree in the yard, messing up its mulch ring and eroding the bank. So I figured that I’d take care of this issue by burying a drainage pipe under the bed I was expanding. It was easy to dig it in and hide its opening at the inside edge of the new wall. The bottom of the pipe is dotted with quarter-sized holes that let water escape as it flows away from the downspout.
Then I went back to the woods for more rocks, some of which took every ounce of my strength and willpower to budge into the tractor bucket. I don’t remember how many trips it took, but there are 173 rocks in this installation and many are not insignificantly sized.
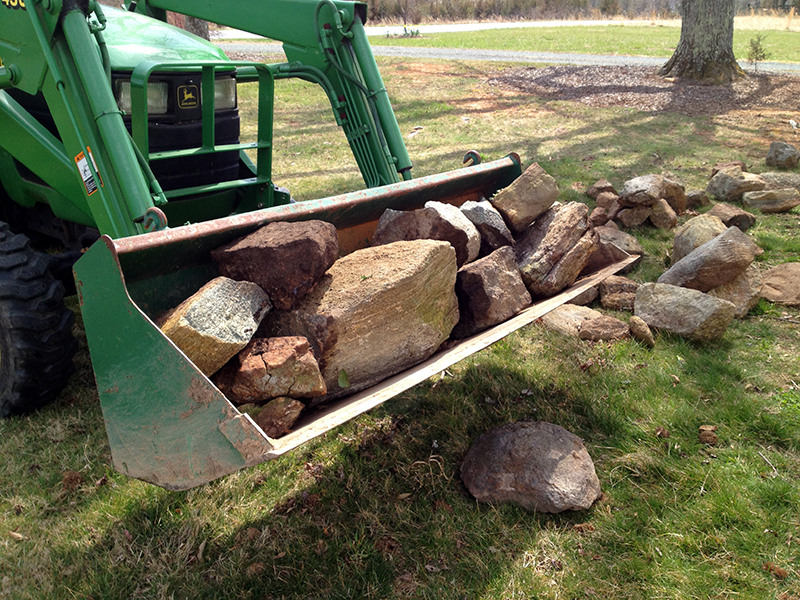
I spent days fiddling with rocks, turning each this way and that, trying my best to fit them into a wall-like configuration. Of course this week coincided with our freak 90-degree April heat wave. Let’s just say I got tan and back to my summer weight during this heavy-labor boot camp!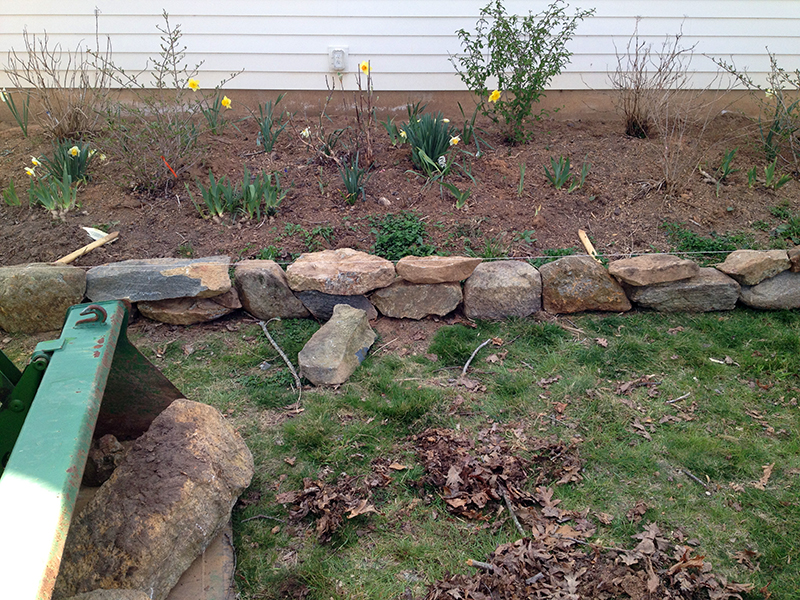
Up next, the wall continues…
May 3rd, 2013 §
Recent creatures found around the farm:

A little snake making its home in the newly mulched front garden.

Tuck dug this mole out of the ground near the chicken coop. I was too proud of his hunting skills to be mad about the holes in the yard.

Periodical cicada nymphs discovered whilst digging in the garden. This is the year Brood II of the 17-year cicadas will emerge as soon as soil temperatures hit 64 degrees. They hatched from eggs laid when I was in high school, which makes me feel old! I need to get some netting up soon to protect my smallest trees and woody ornamentals. For more on the periodical cicadas in Virginia, click here.

 (Photo from Native Seeds/SEARCH)


