October 16th, 2013 §
I found this lone monarch feasting amongst the zinnas last week. Given all the trouble monarchs are in, I was very happy to see it and to know I’d done my part to cultivate a delicious banquet of nectar-rich flowers. I wonder if this butterfly was refueling on its migration to Mexico?
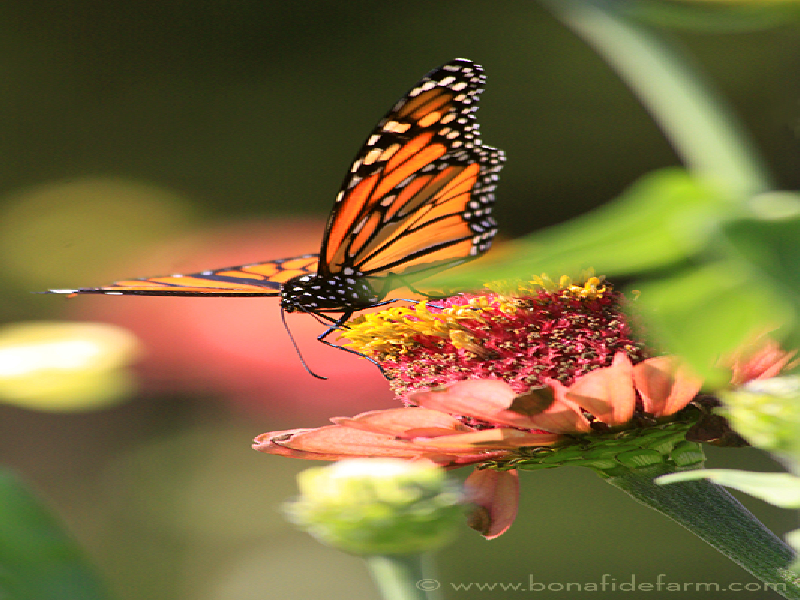
Monarch butterflies are decreasing at an alarming rate: 59% in the last year according to a survey carried out during the 2012-2013 winter season by the WWF-Telcel Alliance, and Mexico’s National Commission of Protected Areas (CONAP). The numbers of monarchs are at their lowest numbers in 20 years. According to the same organization:
The latest decrease in monarch butterflies is likely due to a decrease in the milkweed plant (Asclepias) – a primary food for monarchs – from herbicide use in the butterfly’s reproductive and feeding grounds in the US, as well as extreme climate variations during the fall and summer affecting butterfly reproduction.
Why should you care if monarch numbers are decreasing? Because monarchs, like all insects, are pollinators. In simplest terms, without pollinators we won’t have any of the foods that require pollination, no fruits or vegetables, and these are the healthiest foods we can eat. And even a food that doesn’t appear to be a vegetable, such as bread, starts life as a plant that probably needs to be pollinated.
So if we want to keep eating, we have to cultivate what pollinators need to thrive and eliminate the use of what’s killing them—pesticides and herbicides. In the case of the monarch, their most important food is milkweed. There are some native milkweeds in this area, and one of the reasons I don’t mow some of my fields is to let these “weeds” flower to feed the monarchs. Even so, these butterflies need more milkweed. It’s one of my goals to some day make a formal monarch garden, rich with milkweeds, to try to encourage monarchs to breed and cocoon right here.
If you’ve never seen a monarch cocoon in person, it’s worth planting a butterfly garden just for a chance to spy this treat. The cocoons are the most beautiful color of Jadeite green and are decorated with spots of pure, shining gold. They look like precious jewels. When the monarch is about to hatch, the cocoon turns translucent and you can see the orange and black butterfly folded up inside. When it emerges, it’s all wet, sticky and deflated, and it must sit and slowly pump its wings until its blood inflates them. Truly fascinating and beautiful to watch in person.
For even more on the monarchs, visit monarchwatch.org. And for a scientifically literary take on the monarchs’ plight, read Flight Behavior, by Barbara Kingsolver, one of my most favorite authors.
October 15th, 2013 §
After harvesting more than 100 ears of ‘Glass Gem’ corn, I needed to do something with it. A harvest wreath was the perfect project. I love to make wreaths—I love the seasonal symbolism of them and the way they act as jewelry for the house, dressing it up in a way that shows that the person who lives there cares enough to make the public face of their home pretty and welcoming.
However, the wreaths one most often encounters in stores are all too frequently plasticly hideous, reminding me of cheap gravestone decor, while being simultaneously, ironically expensive. It’s very hard to find a good wreath, which in my definition is one that looks natural and fairly understated, while also having enough going on to be interesting. The wreath should also be complementary to the home that it’s decorating.
Because I am picky about wreaths, I tend to make my own each season. I’ve done fall fruit wreaths, winter greens wreaths and spring wildflower wreaths, but I’d never before attempted an Indian corn wreath. It was a bit of a learning curve, but here’s how it all went down.
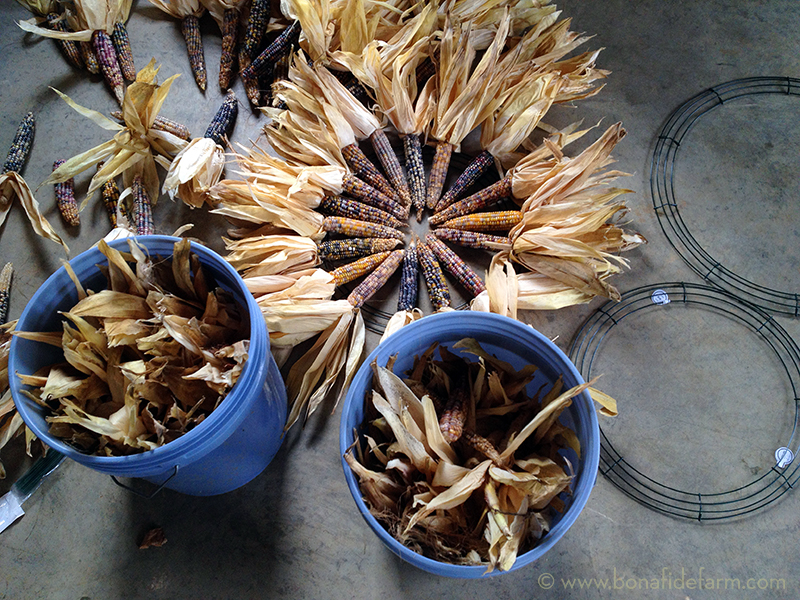
I got a few cheap wire wreath frames, and then I set to work sorting my best-looking ‘Glass Gem’ corn by length into separate buckets. I figured I had enough good corn for two fairly substantial wreaths. Then I did a test fit for the first wreath, choosing the ears for the four cardinal directions and then filling in between them with a nice balance of colors.
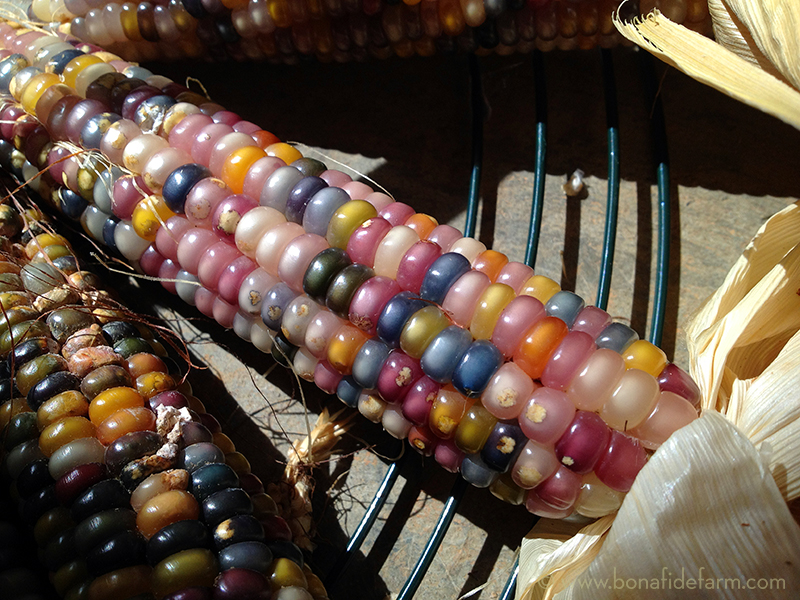
I soon realized that the corn wasn’t thick enough to totally hide the wire frame. I did two things to fix this issue. First, I wired some pieces of rafia sheeting, which were actually cut-up IKEA window screens that I’d had for many years, to the wire base. Second, I folded a few pieces of corn husk back behind each cob, trimming the husk that stuck out past the end of the cob.
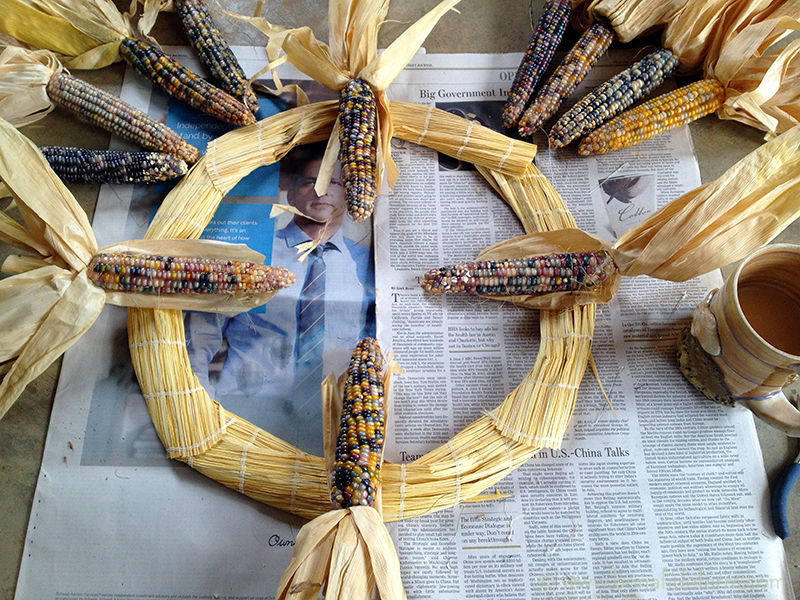
After I hot glued each ear down, they still needed more support to stay on the frame. I had to make two points of connection on each ear to keep them from flopping around or falling off when the wreath was hung. I got a big needle and some very fine gauge wire and sewed each ear onto the frame, going around twice. The silver wire blended in pretty well and wasn’t too noticeable. I tied the wires off in the back of the wreath, leaving them long enough that I could tighten them again should the corn shrink as it dries.
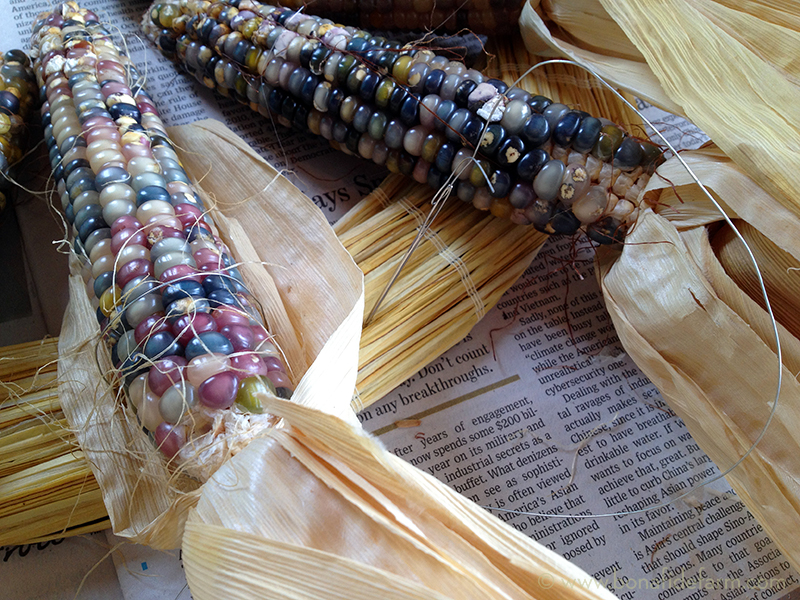
And then I just kept going, glueing and wiring the corn in place, all while sitting on the floor of the garage.
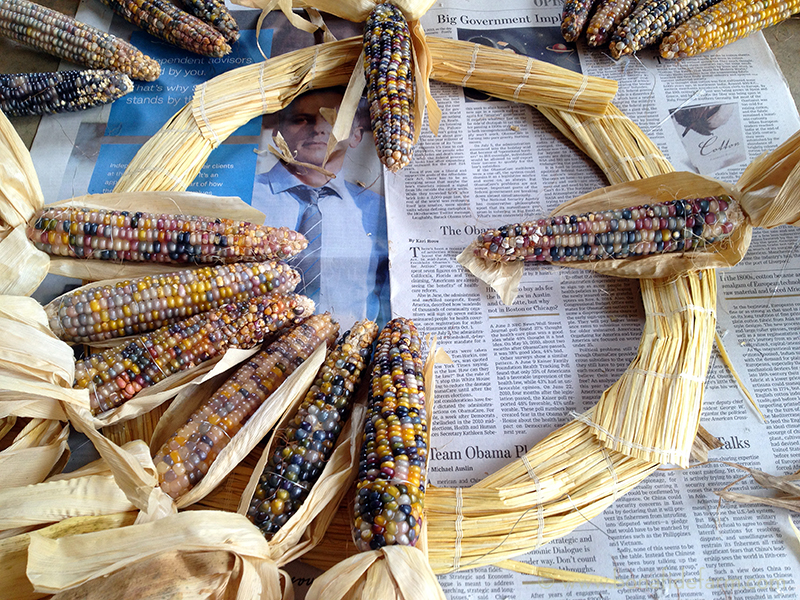
It took a long time to fuss with each piece to make it look nice, but I had lots of company.

In fact, the chickens seemed pretty happy to be snacking on runaway ‘Glass Gem’ corn kernels. What a gourmet treat!
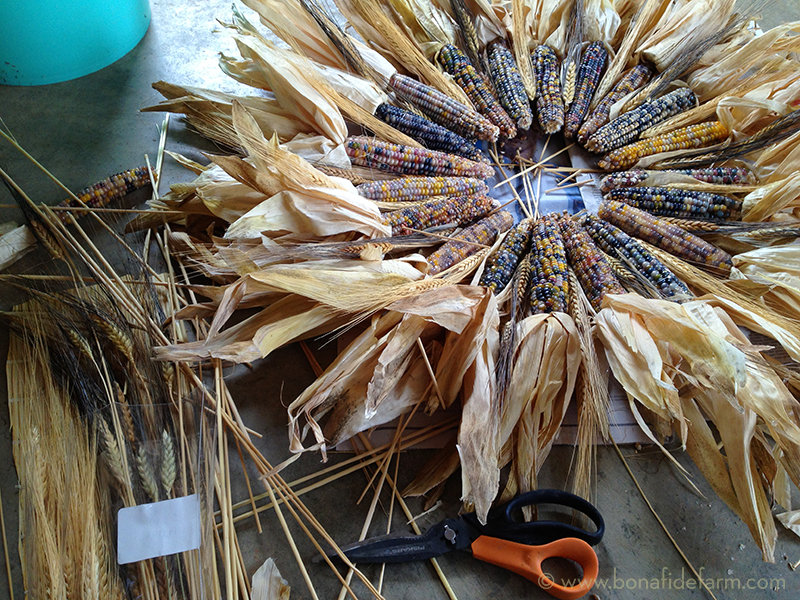
Once I got all the corn cobs attached, I went back and filled in some thin-looking spots with extra corn husk. Some of cobs had lost their husks entirely, so I hot-glued prosthetic husks to them. And then I got some wheat stems (picked up at the craft store) and glued them in between each cob for another layer of interest. I trimmed the tips of some of the cobs with my pruners to help make the negative space in the center of the wreath as even as possible.
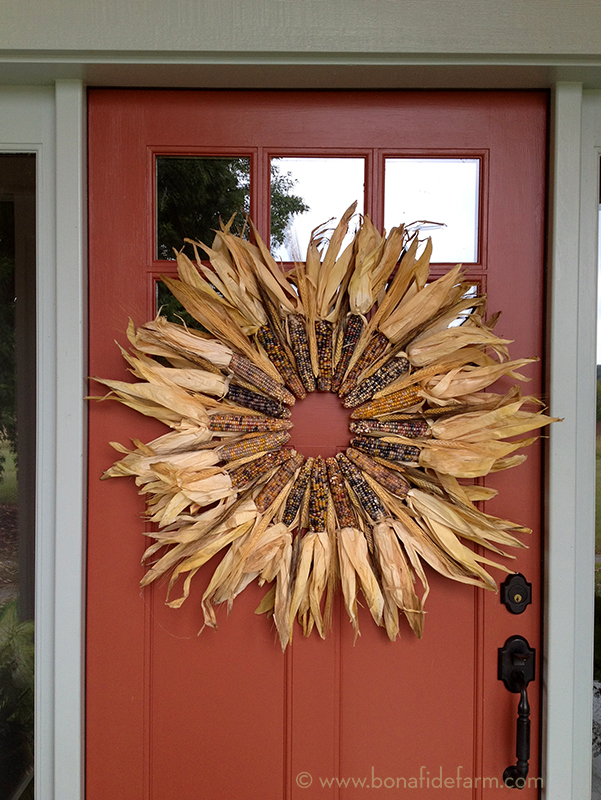
After a test-hang to check for any weird-looking spots, the wreath was ready for the front door. I couldn’t have picked better corn colors to go with my house!
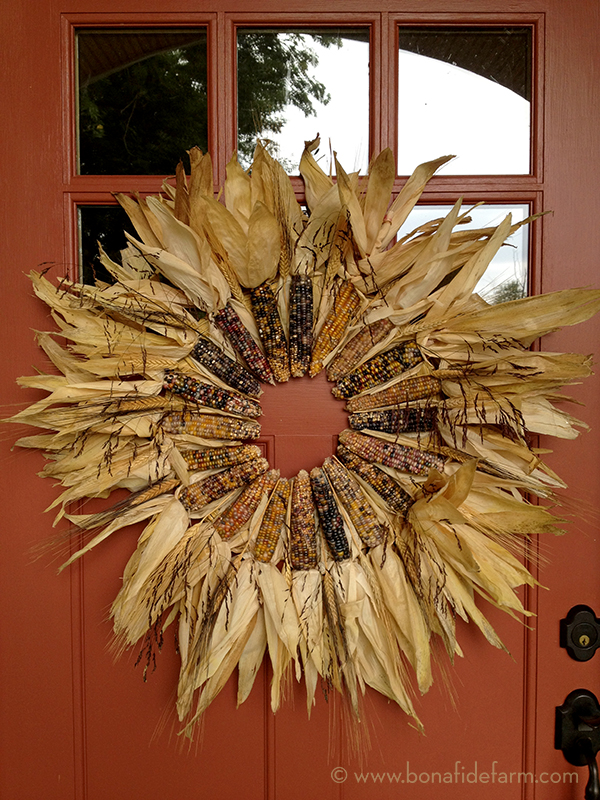
And then I made another for wreath for my mom’s front door. The wreaths have been hanging almost a month and seem to be holding up pretty well. They’re both on protected porches, which I am sure helps to extend their life. But if they should decide to take a turn for the ugly, I know a bunch of chickens that would be pretty thrilled to help dispose of the remnants of my harvest wreath.
October 14th, 2013 §
It’s been raining and grey here for about the past week. There are three inches of rain in the gauge, all collected during the last few days. It feels like the sun will never shine again.
So, let’s look at something bright and colorful today. My dahlias are coming into their prime season, mid-October, and the extra rain is making them especially happy. I picked an assortment a few days ago to make a record of how these named varieties performed in my garden.
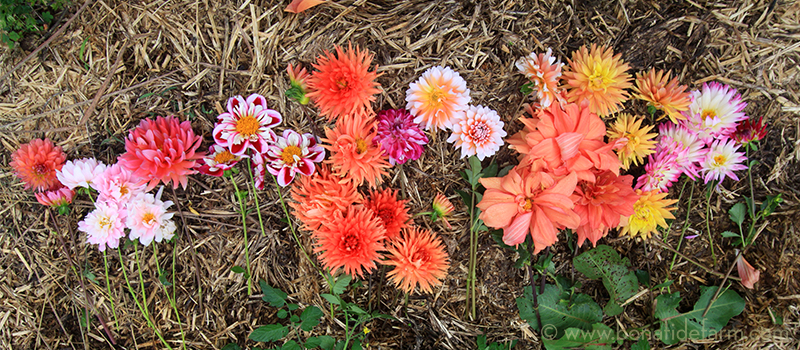

Above, from left to right: ‘Fire Magic,’ pale pink and white ‘Chilson’s Pride,’ Unknown—possibly ‘Fire Magic’ again, the very cool raspberry and white collarette ‘Bumble Rumble’
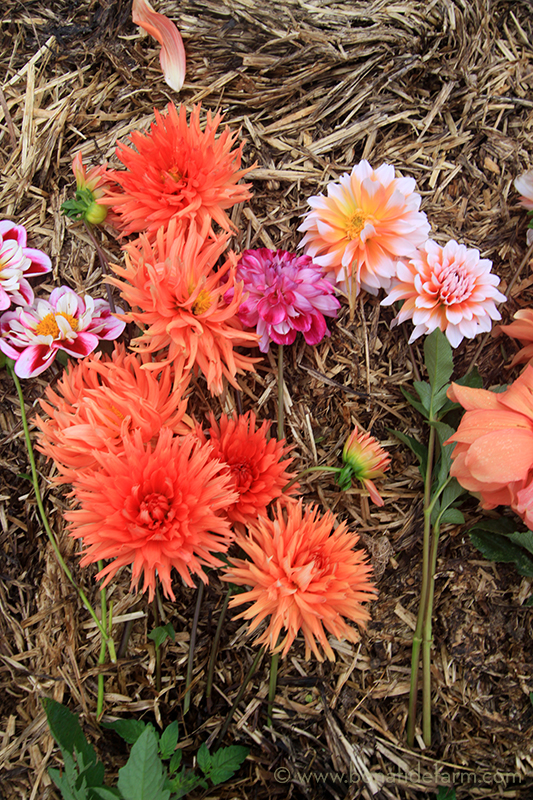
Above, from left to right: ‘Bumble Rumble,’ orange ‘Kabloom,’ purple ‘Optic Illusion,’ orange and white ‘A la Mode’

Above, from left to right: ’A la Mode,’ huge coral ‘Mango Madness,’ unknown yellow and unknown purple and white from hardware store grab bag
‘Kabloom’ has really stood out this year. Not only did it overwinter from last year, it was the first to flower and grew taller than me. Of course I should have pinched it, but I didn’t. Thus, it’s fallen over now but still continues to pump out these spiky orange blooms.
I really love the color, size (11″), and blowsiness of ‘Mango Madness,’ but its blooms are quick to fall apart.
Although all these dahlias are pretty, in general I think the previous two years were better dahlia years. Perhaps dahlias, being native to Mexico, didn’t appreciate our very wet, humid and relatively coolish summer. I had my first case of powdery mildew show up in the dahlias this year. And, I know they were too crowded in the garden. Everything was—that’s what happens when you decide to grow a corn patch and expand the dahlia planting in the same year. Some of my favorite dahlias from year’s past didn’t make it through the winter—their tubers got too dried out and died. So, I missed those this year but one of the most exciting things about growing dahlias is trying new varieties each season.
I am torn about whether to dig up these tubers and overwinter them indoors (properly this time, so as to not lose as many as last year) or let them overwinter in the ground. I suspect that if they stay in the ground they will get growing sooner next spring, but I also run the risk of losing them to the damp and cold. And, if I run the chickens in the garden again this winter, the birds may scratch and peck the tubers into oblivion. I haven’t decided yet—we’ll see. But in the meantime, and for these last few weeks before the first frost, I will be enjoying these bright and favored flowers.
September 25th, 2013 §
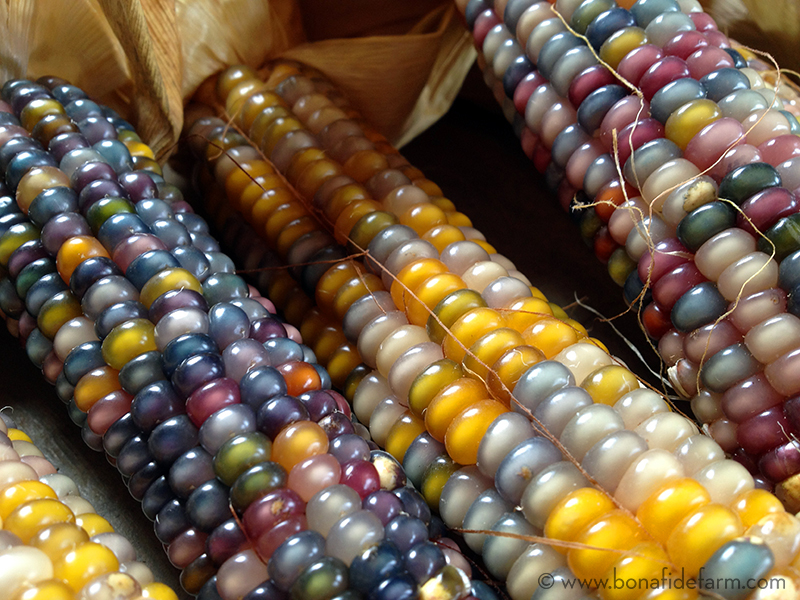
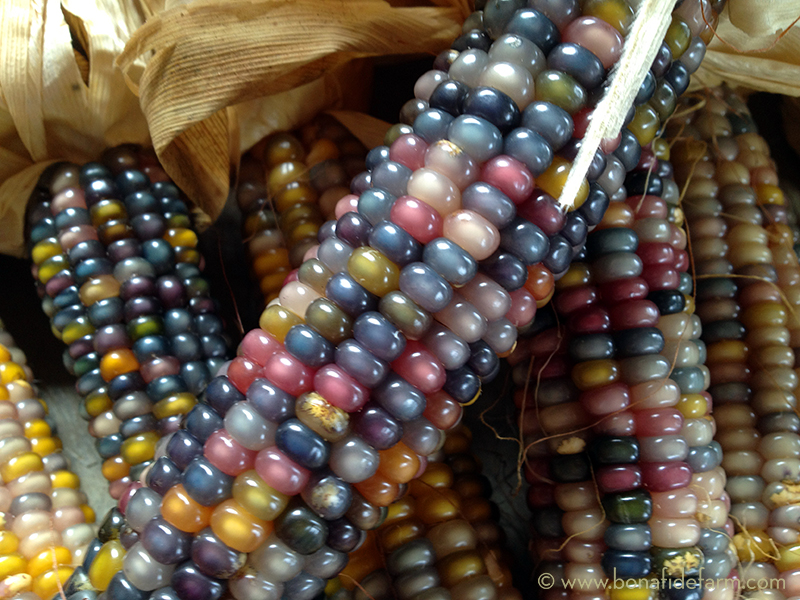
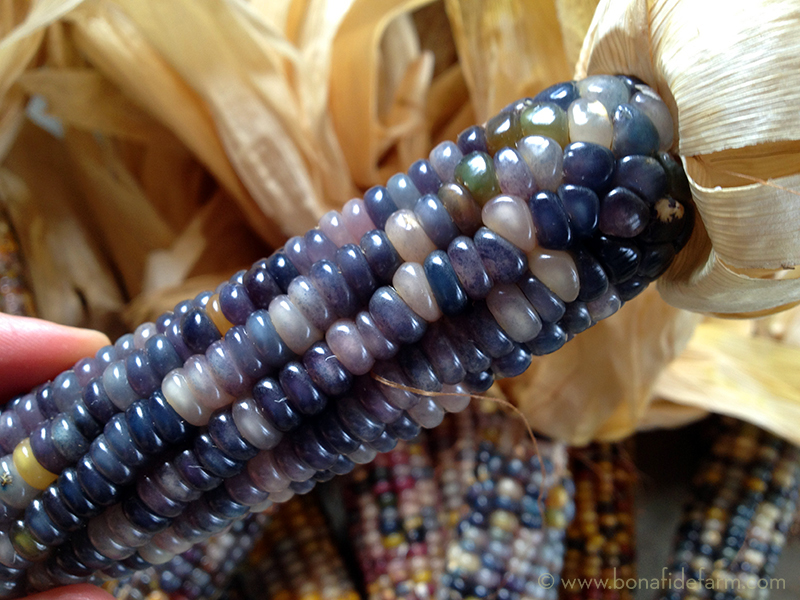
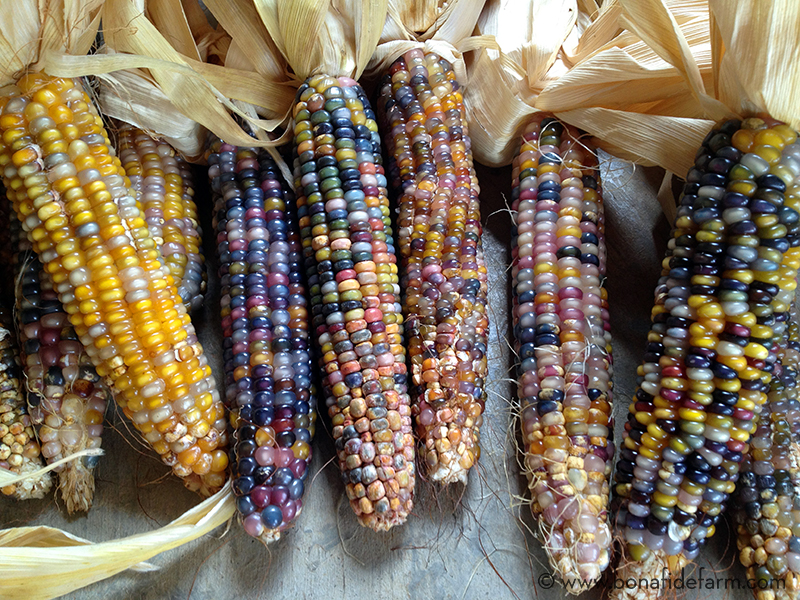
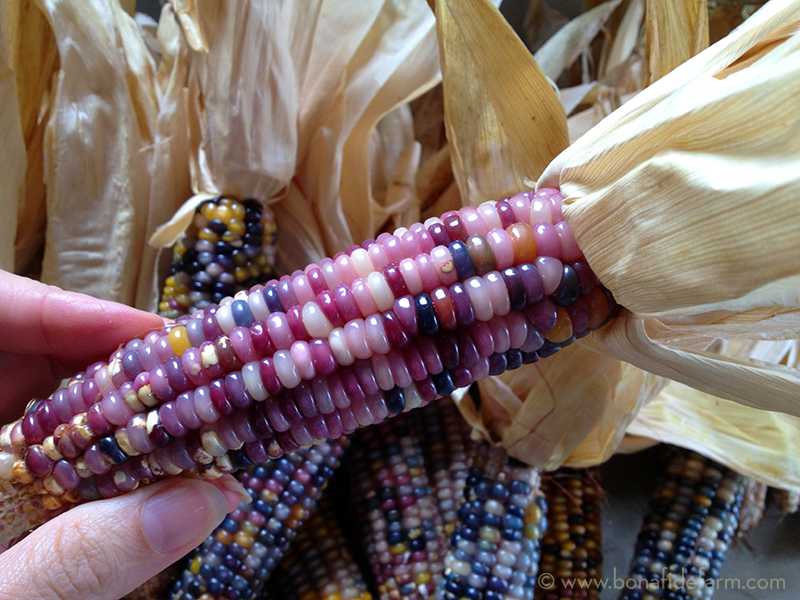
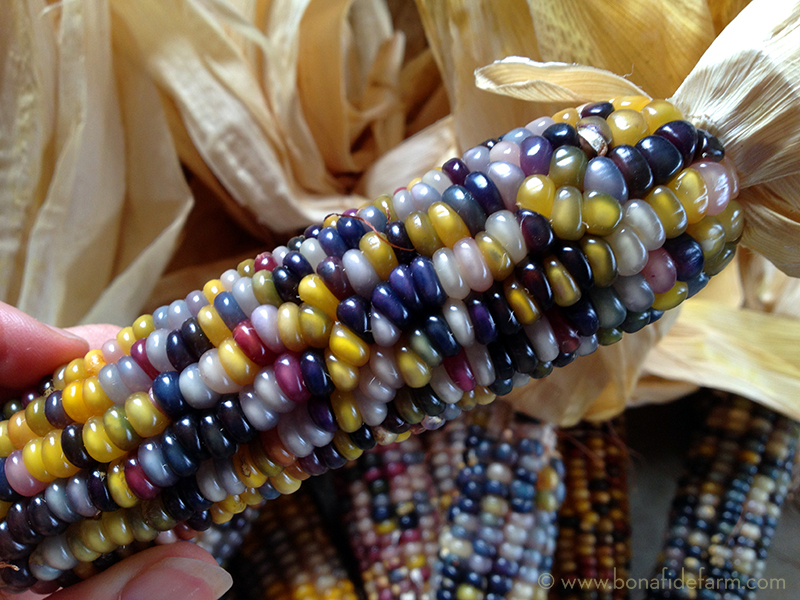
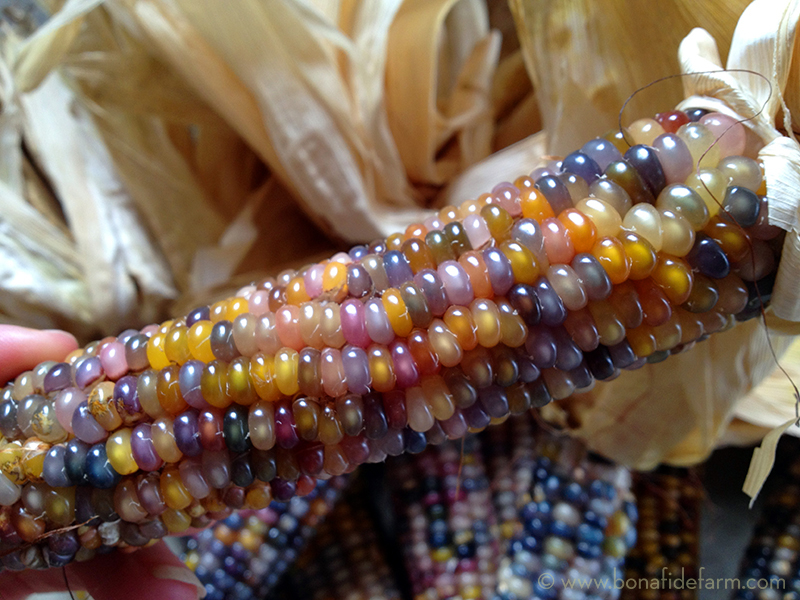
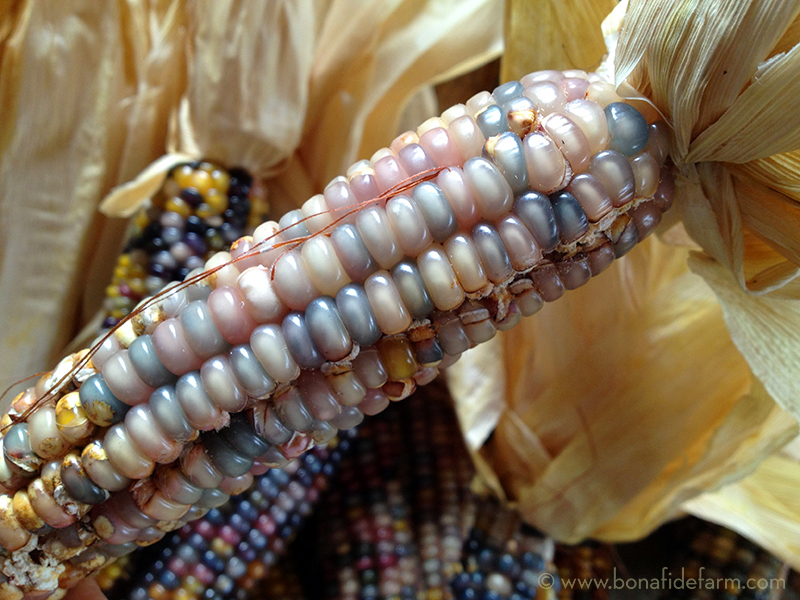
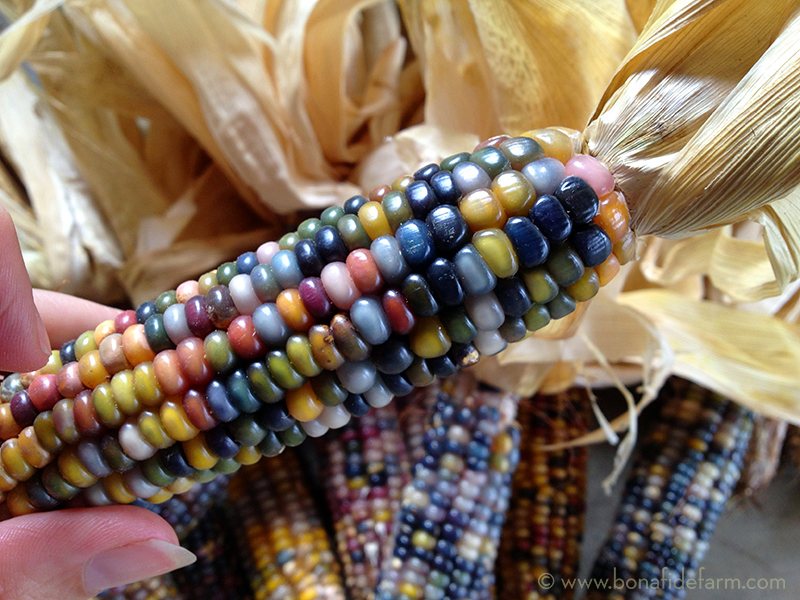
Here’s just a selection of the Glass Gem corn I grew this summer. As you can see, the range of colors is incredibly wide, both within each cob and between different ears. Glass Gem is a color lover’s dream. There’s something here for everyone, whether you prefer your corn in nursery pastels, sophisticated navy, screaming magenta, classic yellow, or my favorite, all mixed up teal green, purple, turquoise and pink.
These photos aren’t digitally altered, nor did I use any special shooting setup—this really is what this corn looks like. I just snapped a few shots with my phone as I lay the corn out on the garage floor after shucking.
To read about the entire 2013 Glass Gem corn experiment, please visit:
September 24th, 2013 §
Once I had all the Glass Gem corn picked, it was time for the best part: opening each ear to reveal the multicolored kernels held within. I set up a little shucking station in the garage and got to work. It was kind of like Christmas as each ear exposed a new and different surprise. I separated and saved the best looking corn silk, in the basket below, for tea.
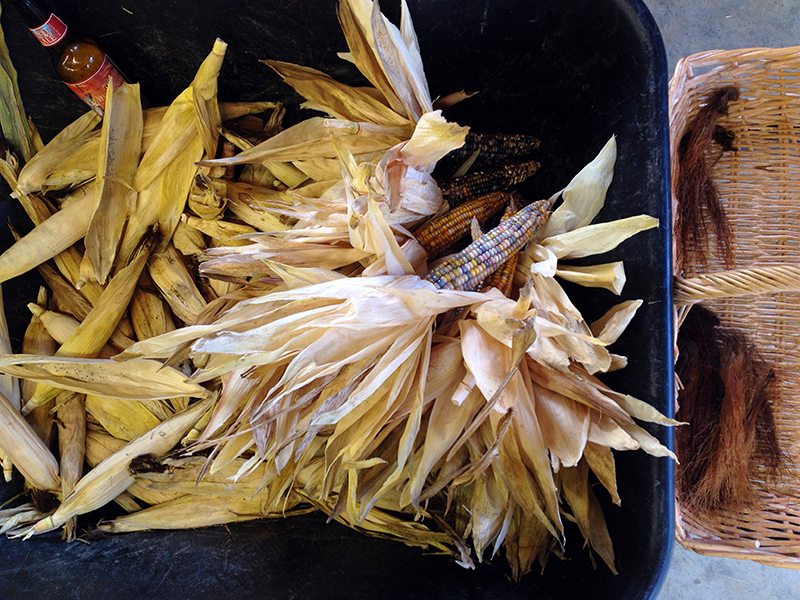
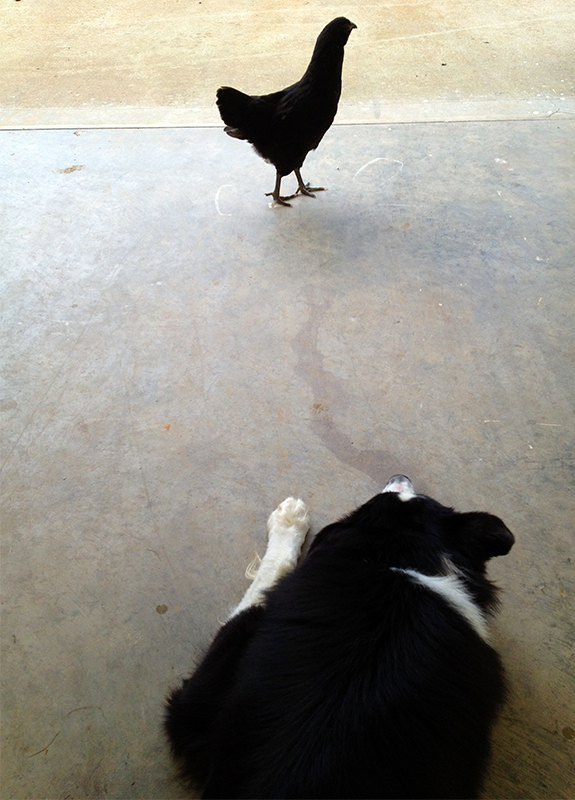
Of course I had company, though one companion grew pretty bored when the shucking stretched into a multihour endeavor.
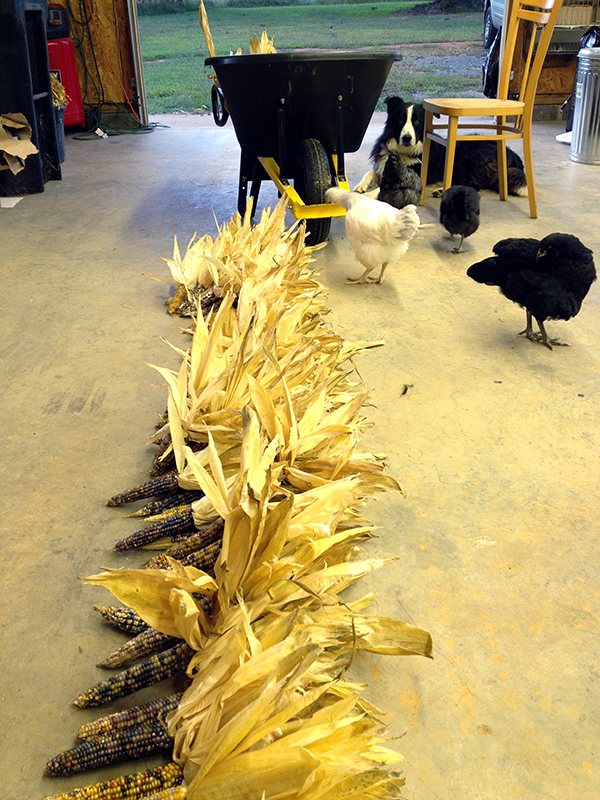
Shucking more than 100 ears, plus the time required to marvel at each beautiful ear, added up as I worked through sundown and into the evening. The rest of the crew got more and more curious as I lined the shucked cobs up on the garage floor, sorting them by size and condition. I was very pleased to see what I consider to be pretty good pollination and kernel set in most of the ears. I found only one insect, a little worm, in all 100+ ears, which seems remarkable to me given how much I struggle with bugs on some of my other crops. Perhaps I have the bluebirds and their nightly visits to the corn patch to thank?
A few of the ears contained kernels that looked as though they were starting to pop. I will have to do more research to figure out what causes that. But in all, I was pretty pleased with my harvest. Maybe it’s just beginner’s luck, or the blessing of an unusually rainy summer, but it’s not too bad for my first corn-growing experience!
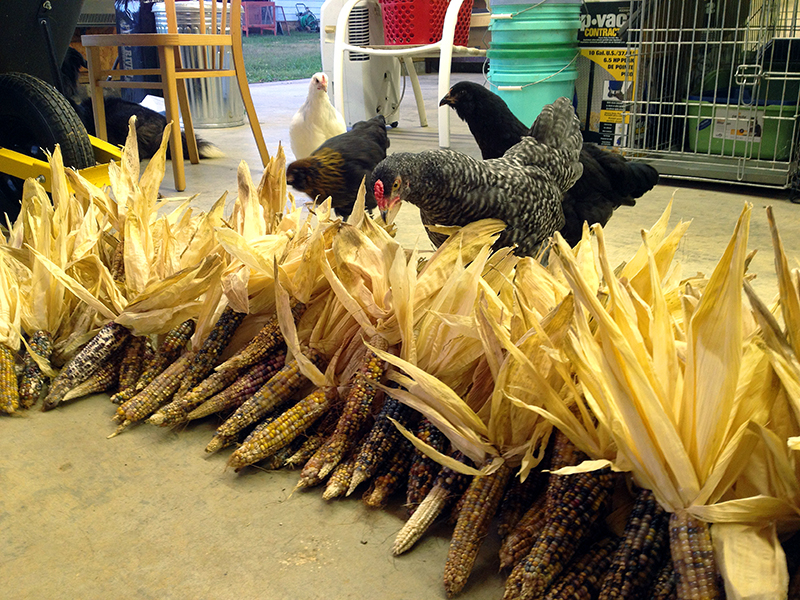
Though they were intrigued, the chicks hadn’t yet figured out that corn is one of the most delicious chicken treats around. And this wasn’t just any corn—it was the famous Glass Gem!
Up next, a closer look at the Glass Gem harvest…and all the pretty pictures you’ve been waiting for!
September 21st, 2013 §
During the last few weeks, the Glass Gem corn—my summer experiment—has begun to dry out and turn brown.
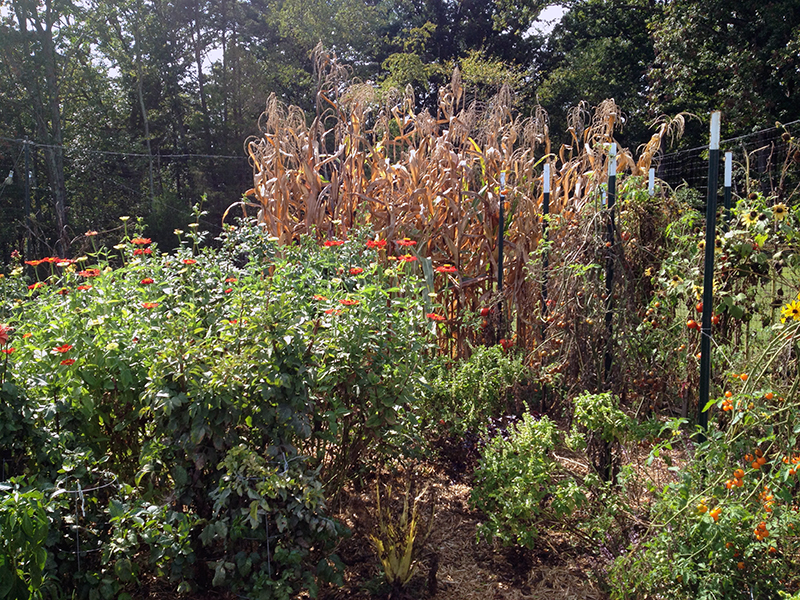
I picked a few test ears and determined that it was time to harvest. But first I needed to fight my way through a wildlife gauntlet to claim my jewel-toned treasure. First, a black widow protected the garden entry, tucked up inside her cinderblock lair.

Not only was she guarding the garden, she was also guarding a few egg sacks. Mother and young were slayed with scissors and wasp spray.
Then I re-engaged a known enemy. A couple of weeks ago, while harvesting my test ears, I was stung on the right wrist by a wasp. Turns out it was one of a gang that had built a little fortress hidden on the underside of one of the corn leaves.
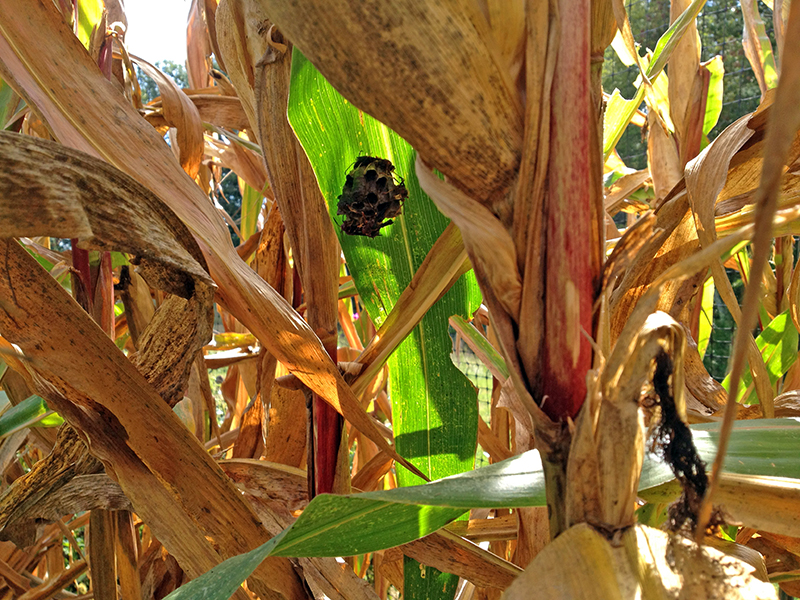
With throbbing wrist I had hastily retreated to ice packs and antihistamines, conceeding round one to the wasps. My entire arm ached for a week, feeling like it was broken deep inside.
But now I was back and better prepared. Before the wasps could mount a defense, I shot them all with a strong stream of wasp spray. They fell to the ground, writhing. A quick perimeter check found no more wasp nests, and the coast was clear for me to begin my plunder.
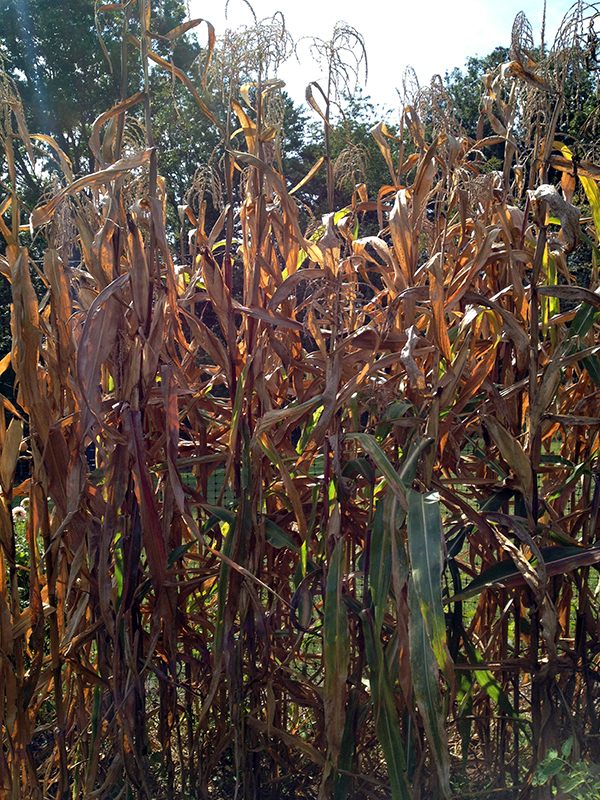
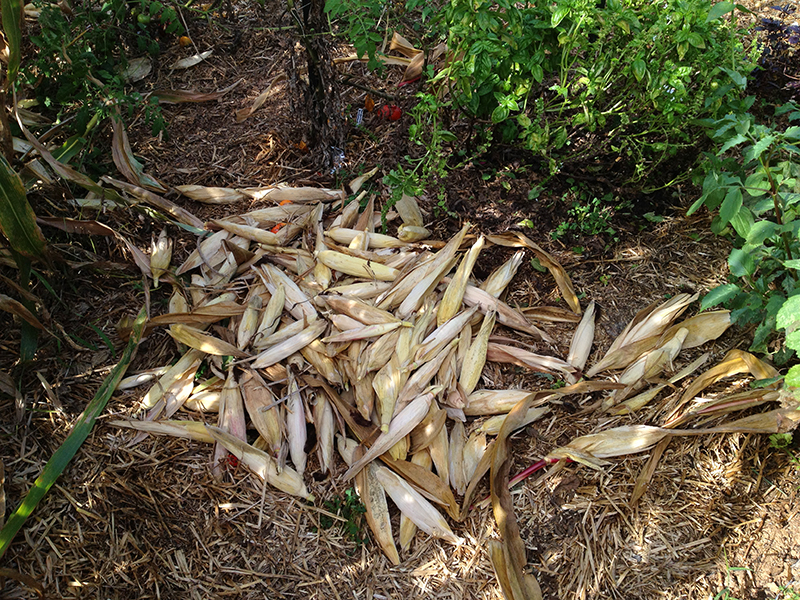
Harvesting corn is no fun. Between the fear of more hidden stinging creatures, and the claustrophobic feeling induced by threading myself amongst the close-spaced cornstalks, I wanted to get it over with as soon as possible. I wrenched the ears off the stalks, and cut the ones that didn’t come away easily with my pruners. I tossed them all in a pile to be sorted later.
Just when I was about done and feeling like I was home free, I encountered my final challenger. I reached into the stand of cornstalks and as I did felt a burning, stinging sensation travel up my arm from wrist to elbow. I screamed and flipped over a leaf to see this guy, just before I ran to the outside hose to douse my arm in cold water.
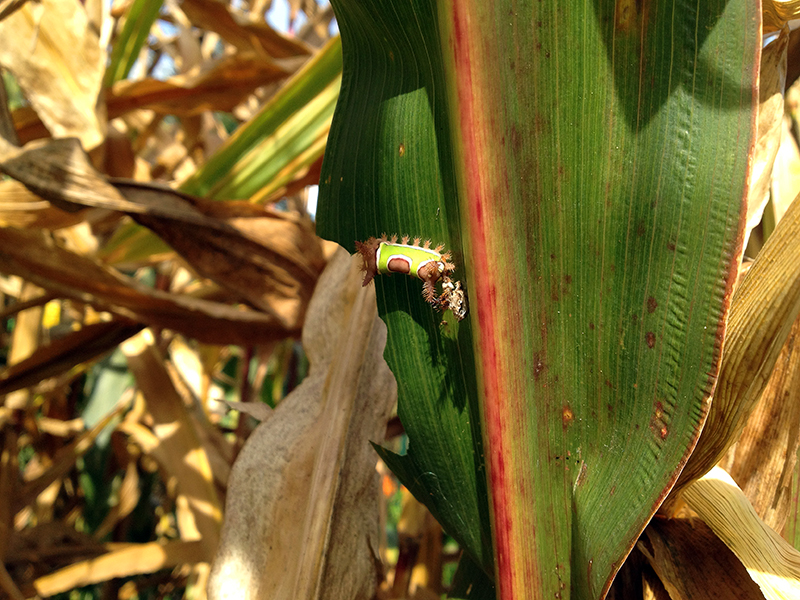
Meet my Cerberus, a saddleback caterpillar, its spiked protrusions covered with urticating hairs that had just set my arm on fire. A fitting final foe for what had been a hellish harvest.
But now came the fun part: opening each ear to see the multicolored surprises held within…
September 13th, 2013 §
The angle of the sun has lowered in the last couple of weeks, and each sunset spills syrupy golden light across the farm. The garden that I could barely stand to look at a month ago has been reborn in this new light, and every cloudless evening it stuns me. That’s one of the lessons I’m learning as I work this garden—if I don’t like the view, wait a few weeks for some variables to shift and it will be different. I suppose that applies to life in general as well as gardening!

The Albelia ‘Rose Creek,’ above, in front, is covered in blooms. Each year I wonder why I keep these shrubs around, especially in winter when they’re lumps of leafless sticks. And then in early fall I remember how much I like them during this time of year.
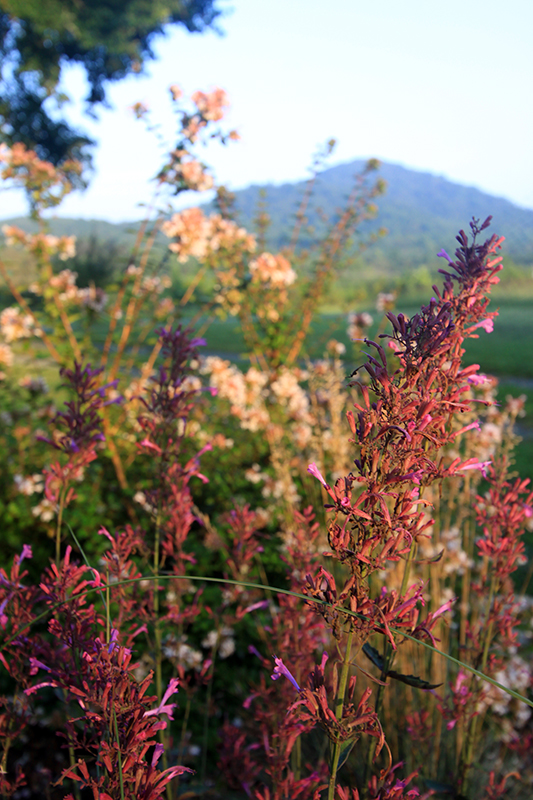
Here is is again, behind the Agastache ‘Bolero.’ The brown grass in between the two is blue fescue. I suspect that as the new perennials begin to fill in, this early fall picture will be even prettier.
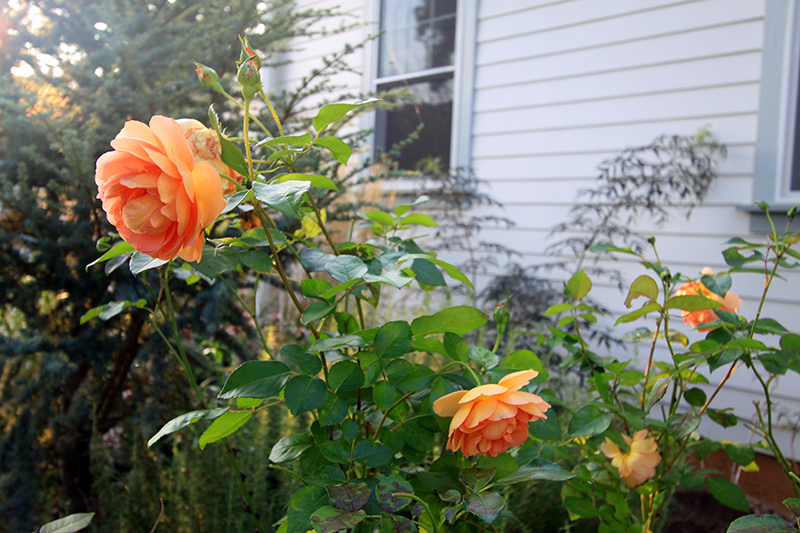
My David Austin rose, ‘Pat Austin,’ has recovered from her summer slump to proffer fresh foliage and fall blooms. I guess she liked that generous heap of homemade compost I piled around her ankles last month!
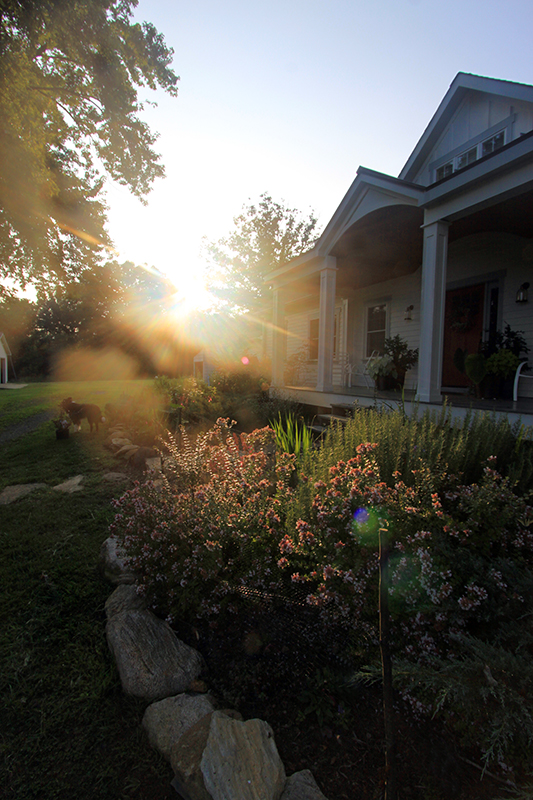
More backlit albelia
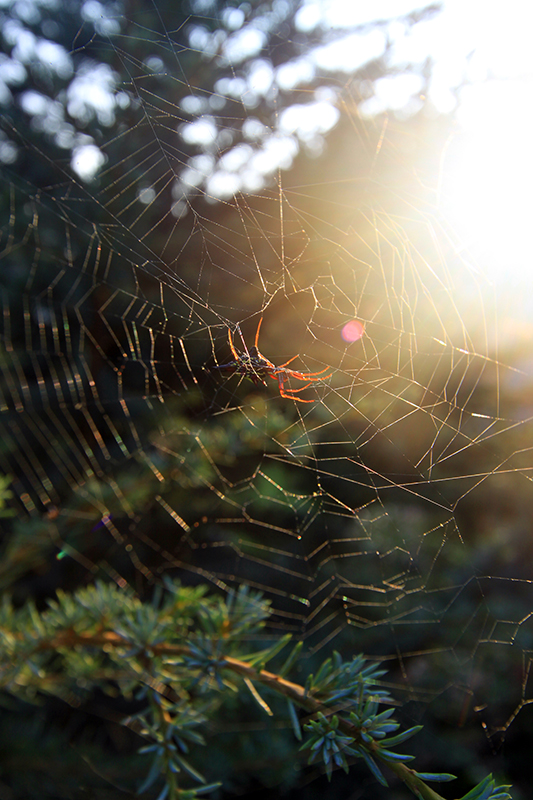
And finally, another one of the many spiders that are around this time of year. Here, one makes a home in the blue atlas cedar.
September 12th, 2013 §
In early August I was pretty sick of the house garden. Despite all the wonderful rain we’ve had this summer, which is unusual as we’re typically in a drought this time of year, the garden was looking tired. All I had going for me were some pretty garish purple phlox, which I appreciate as they bloomed for weeks and weeks.
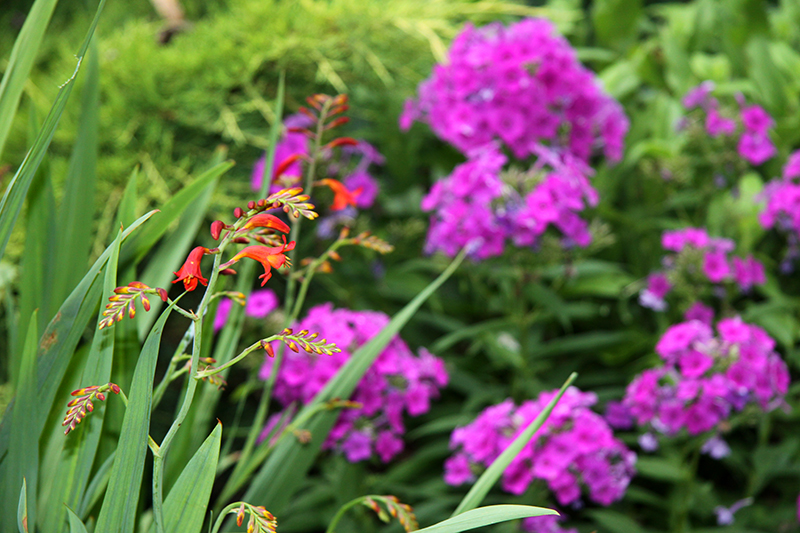
However, with no other purple plants in the garden to play off, they looked lonely and out of place. And they were clashing with some ill-placed Crocosmia ‘Lucifer,’ above. All around town I kept eying beautifully blooming gardens, and from studying them I realized I hadn’t planted any mid-to-late-summer flowering perennials.
So off I went on a search for some of the hardiest of these standbys, including echinachea, agastache, coreopsis, monarda, and salvia, among others. It was late enough in the season that I managed to score some of these for 50% off, filling my car with ratty-looking twigs on faith that they had enough life left in them to establish in my garden.
To gain space for this minimakeover, I did some pretty major surgery on some of the existing garden plants. I dug out an entire colony of purple German bearded irises that nestled beside my blue atlas cedar. I was torn about it, as I’d rescued these as just a couple of tubers tossed in my brother’s backyard, and for the past few years they’ve bloomed beautifully each spring and grown into a sizable feature in the spring garden, playing beautifully with the Deutzia ‘Chardonnay Pearls,’ which bloomed at the same time.
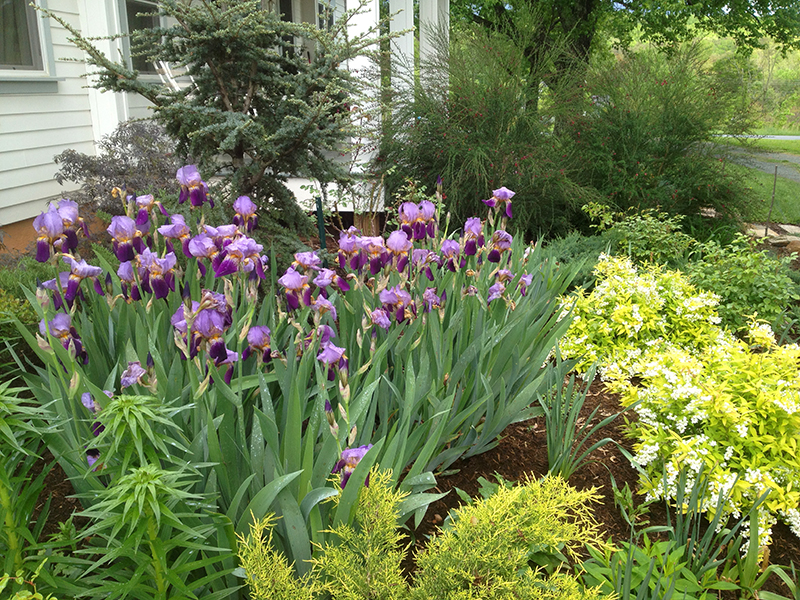 April 2013
But this spring they were aflicted with iris leaf spot, and despite a couple of treatments, they weren’t able to shake it.
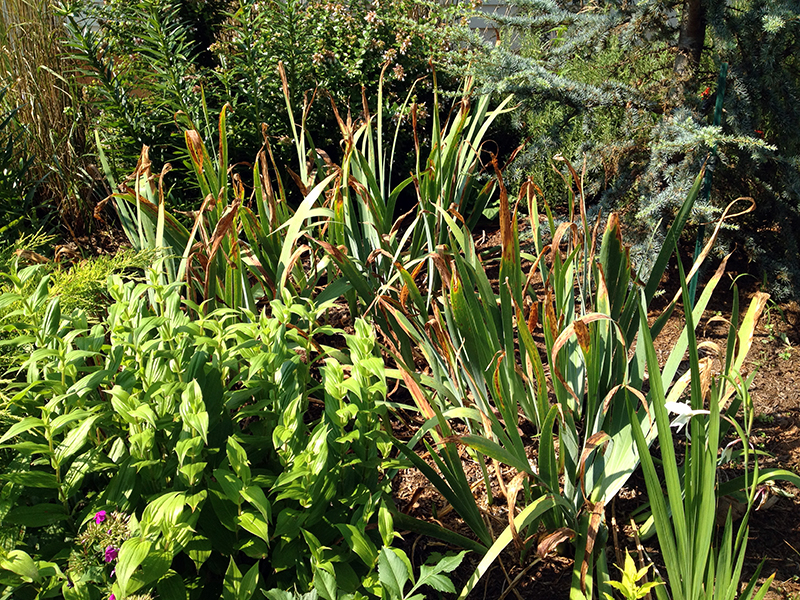 August 2013
Iris leaf spot won’t affect blooming until late in the game, but it makes the foliage look so ratty that I couldn’t stand it, especially in such a promintent place in the garden. And I am not interested in spraying anything in my garden to keep it looking good. So out they came.
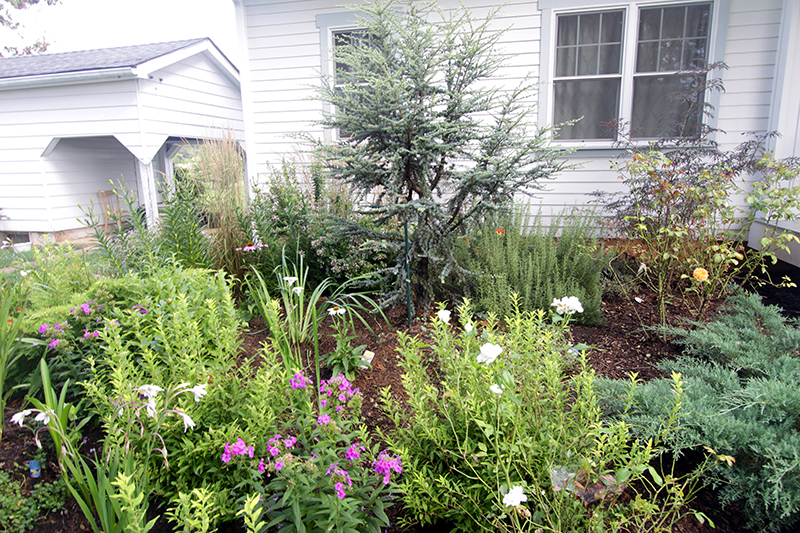
I replaced them with some echinacheas, which won’t give me the same spring bloom but should go crazy all summer. I chose Echinachea purpurea ‘Primadonna Deep Rose,’ for its relatively compact size and gorgeous flower color (not washed out and bland as I find some echinacheas to be) and ‘Primadonna White.’ I added a pot of Siberian iris (Iris sibirica ‘Ceasar’s Brother’). I know it’s a gamble to plant an iris back in the same soil afflicted with a soil-borne disease, but my trusted perennial guide Tracy DiSabato-Aust suggests that Siberian iris are less susceptible to iris leaf spot. I figured it was worth a gamble to return a purple-blue bloom to this place of honor. We’ll see. I also stuck another Siberian iris elsewhere, in unafflicted soil, and added a Japanese Iris (Iris ensata ‘Caprician Butterfly’) just for grins.
While I was on a tear, I also dug up another beloved bearded iris, ‘Precious Little Pink.’ This is a magical plant to me, and blooms in such a weird blue/purple/brown/pink color that’s just indescribable.
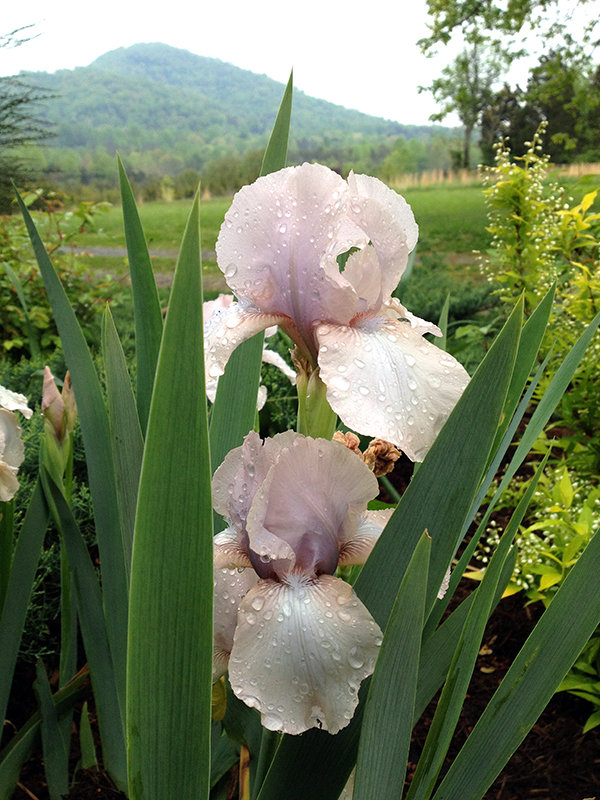 April 2013
But it too was afflicted with iris leaf spot, so out it came. When it was out of the ground I discovered it also suffered from some rot and possible iris borer issues. And while I was in the mindset to dig irises, I rectified this unfortunate situation:
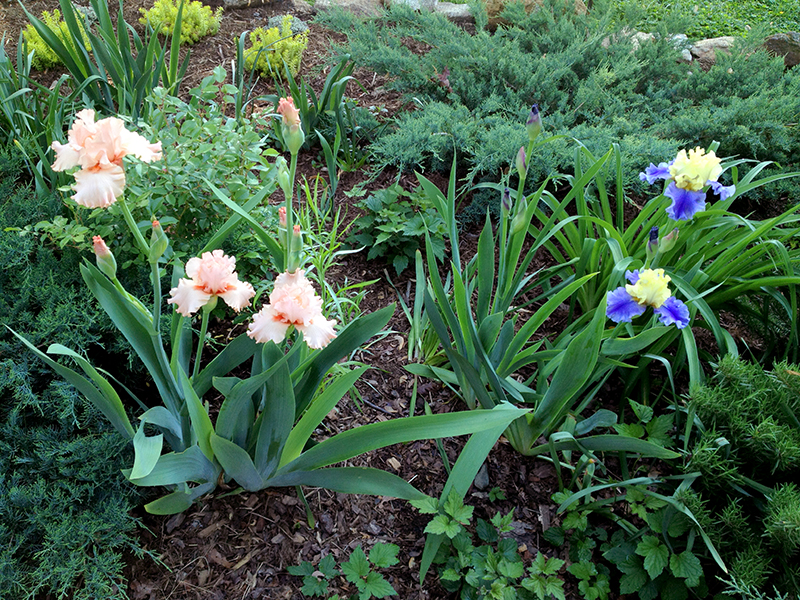
The horribly clashing blue and yellow iris (’Edith Wolford’) was relocated to the drainage ditch along the road, where I hope it will brighten the spring commutes of passers-by.
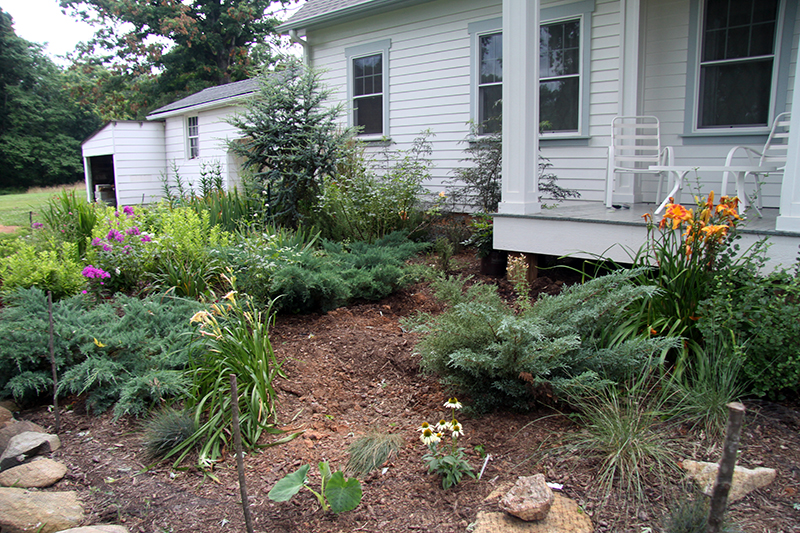
I also dug out all six of my daylilies, shown above along with the holes left from removing the Scotch broom. I had purchased the daylilies before the house was finished, again on deep clearance in the fall, and randomly plopped them in the ground to fill space. This year I finally realized that for the week or so that they bloomed, they took up too much space and looked boring. Plus, I am not a fan of bright orange and schoolbus-yellow blooms in this garden. So the daylilies had to go.
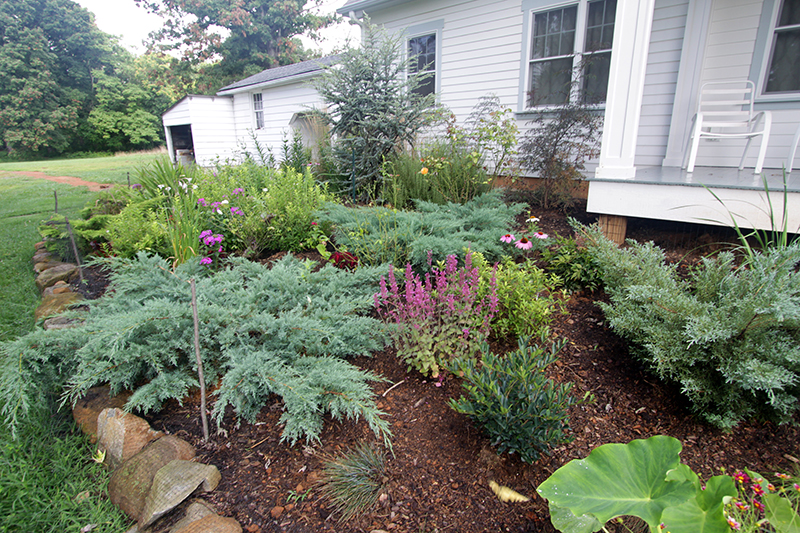
Looking better already! I added a few small evergreen shrubs to replace the Scotch broom. New additions are Nandina ‘Obsession,’ for red fall/winter color (near the porch corner) a relocated Deutzia ‘Chardonnay Pearls’, and a new plant to me, Distylium ‘Blue Cascade.’ (up front next to the elephant ears leaf). I’d been sold on the distylium’s virtues (uncommon deer, drought, clay and insect-resistant evergreen with small red winter flowers) while talking to a plantsman at our local fancy nursery, but he wanted $90 a bush. A few weeks later I found them at the local big-box hardware store for $25. Smaller plants, but that’s okay with me. I am curious to see how it does—it’s being marketed as a new foundation plant. Then I filled in around the new shrubs with a few perennials, including that purple spiky plant, Agastache ‘Bolero.’ It’s just gorgeous–with bronzy foliage and purple-blue blooms. The hummingbirds go nuts for it too. This an the new echinacheas help carry the purple phlox color across the garden.
I’ve still got all the removed iris and daylily tubers resting in the garage, and I plan to plant them back along the woodline. There they can bloom in the spring if they want and I won’t have to be worried about their disease-afflicted foliage later in the season.
It seems as though everything I planted got well-established. I realize things are planted pretty tight, but as you can see I am quite happy to thin and divide if the gardening gods bless me with successful growth. I can’t wait to see what the garden will look like as these flowering perennials begin to fill in and I find out if I was successful at addressing the issues I set out to fix.
August 28th, 2013 §
I took my hops in to the house and divided them up onto two baking sheets. My oven has a pretty convenient dehydrate feature, so I figured I’d give it a try. It basically just maintains the oven temperature at 120 degrees while running the convection fan.
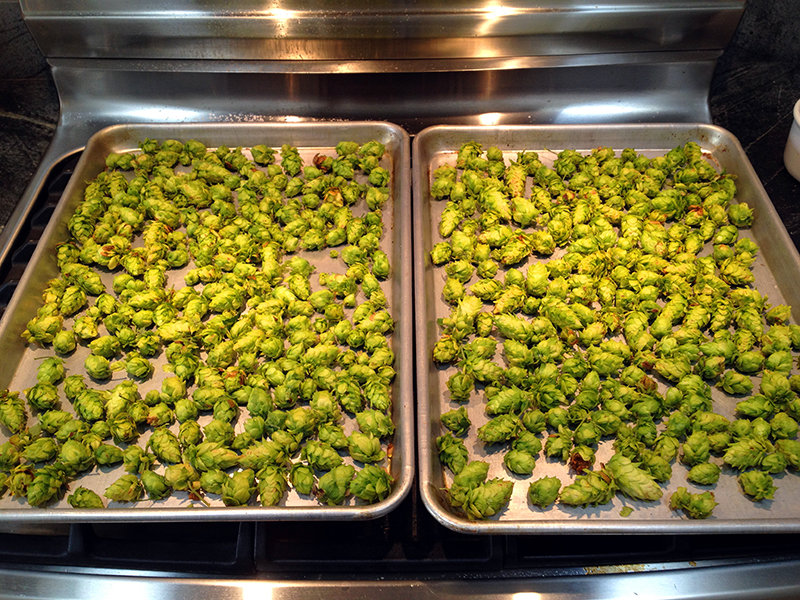
After I took this photo I slipped a couple of wire cooling racks under the cones to elevate them off the baking sheets. I figured it would improve air circulation and thus drying.
It took a couple of hours for the cones to get lighter and more crispy. During this time the house smelled so delicious.
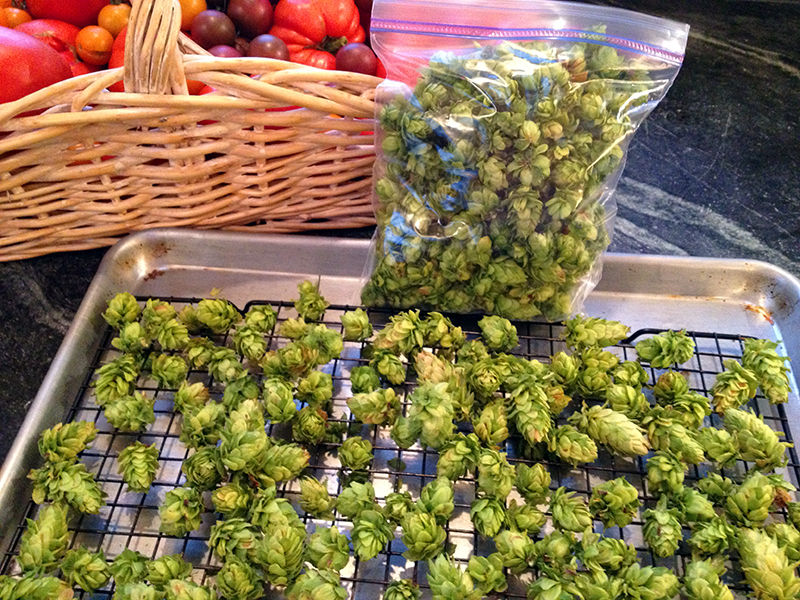
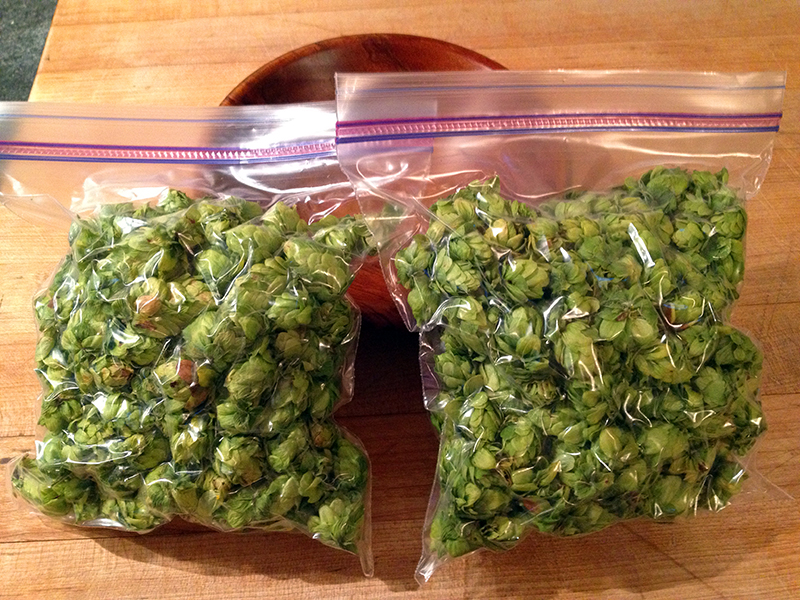
When I judged the hops dry enough, I packed them into quart zip-top bags and used the old straw trick to suck the air out around them. Then I tossed them in the freezer. I ended up with two quart bags of harvest.
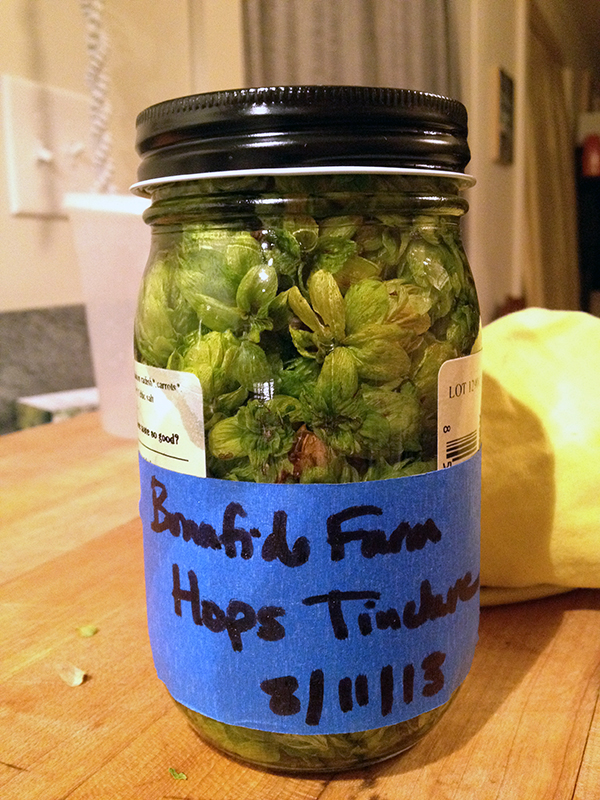
I also took a few of the hops and packed them in a glass jar with 100 proof vodka to make a tincture. Hops tincture is relaxing, soothing to the digestive system, sedative, and good for insomnia. I will let the mixture sit for six weeks and then strain out the hops and bottle the tincture. This is the first medicine I have made from home-grown material, and it feels pretty wonderful to be working with plants in this new way.
And that concludes the 2013 hops harvest. When the frost kills back the top growth on the hops plants, I will cut it off to compost and mulch the roots well. Then next year I will restring the ropes and expect an even bigger harvest if all goes well.
I found hops to be relatively maintenance free. I didn’t give them any supplemental water, thanks to our abnormally wet summer, nor did I give them any extra fertilizer. Deer left them alone. The hops did attract stink bug nymphs during the last few weeks, but the insects didn’t appear to damage the plants or the cones. I’m going to go ahead and call the first year of hops experiment a success.
I don’t have plans yet for the frozen hops. They may make their way into tea, or maybe beer. We’ll see!
August 27th, 2013 §
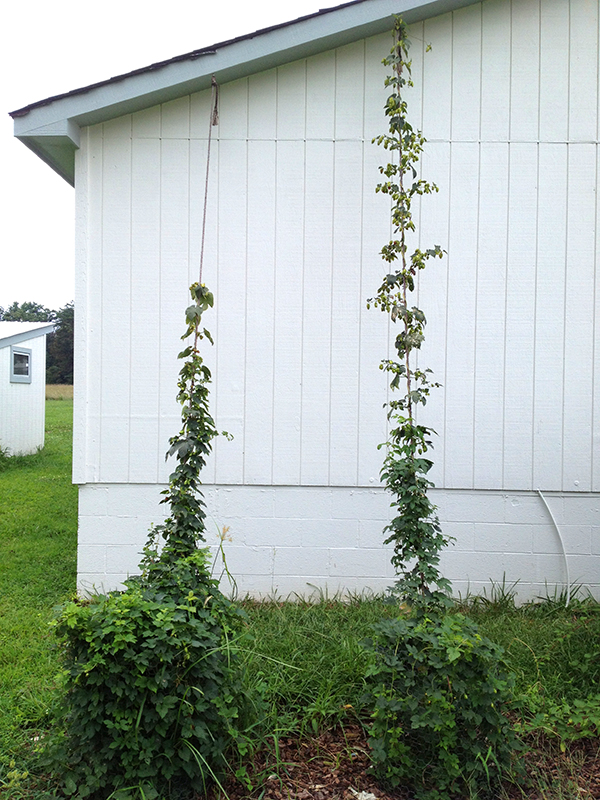
You may remember I planted my first Celeste hops back in April. It was pretty simple, involving amending some soil and running a couple of ropes from the ground up the the eaves of the garage.
It took a few weeks for the hops to emerge from the soil, but once they did they steadily grew until it was time to harvest two weeks ago.
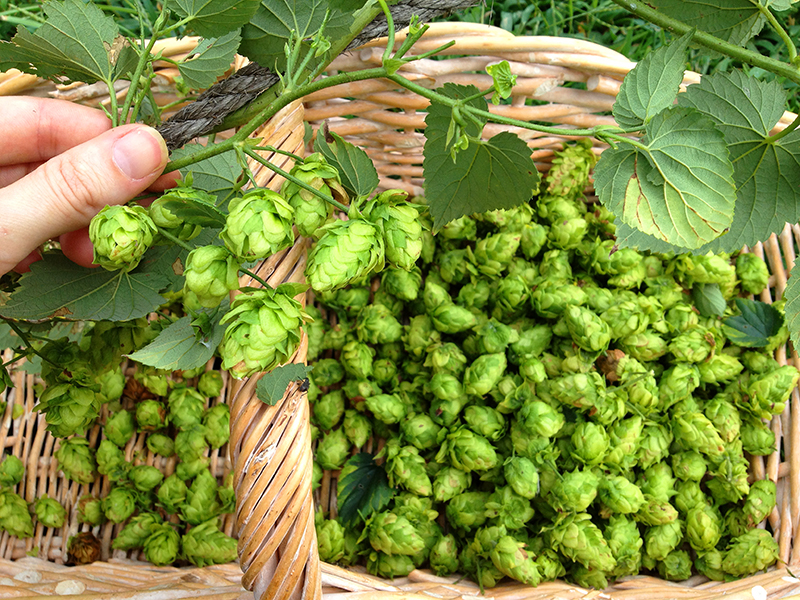
I watched a few online videos to figure out that the time was right, and even though my hops cones weren’t quite as large as some I’d seen online, other signs suggested they were ready. They felt crisp and springy to the touch, had deep golden lupulin glands within, and bits were starting to turn brown. And, I was due to leave the farm for a couple of weeks and knew that if I didn’t get them down, they’d all be ruined when I returned. So harvest time it was!
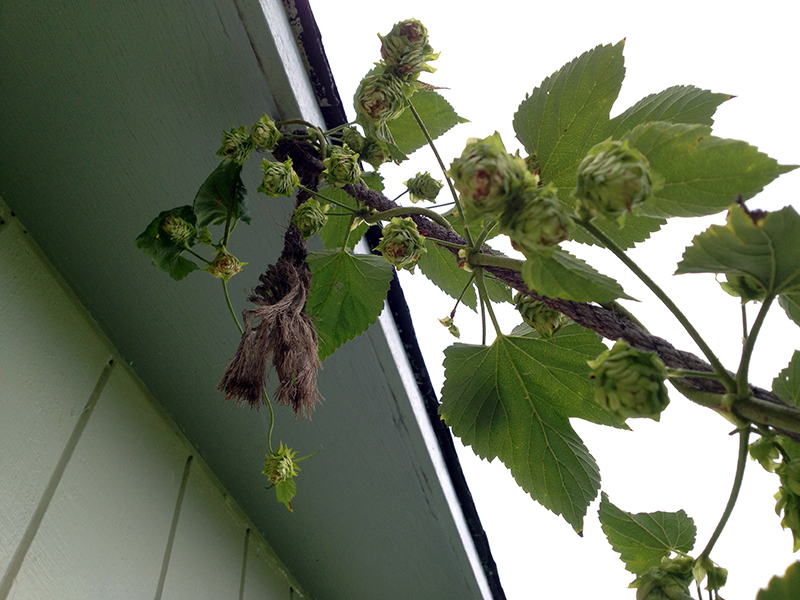
I gathered the ladder and my harvest basket and set to work cutting down the rope that held the more vigorous of the two vines.
Once I had it on the ground it was easy work to strip the cones off the plant, and they left telltale yellow resin (deliciously hop-smelling!) on my hands.
Remember that dogs will die if they ingest hops, so if you’re growing them around pets take extra care. I know my dog has pretty good judgment about what he eats, but even so I watched him closely while harvesting and I made sure to not leave any hops cones on the ground and picked up all loose leaves and plant pieces.
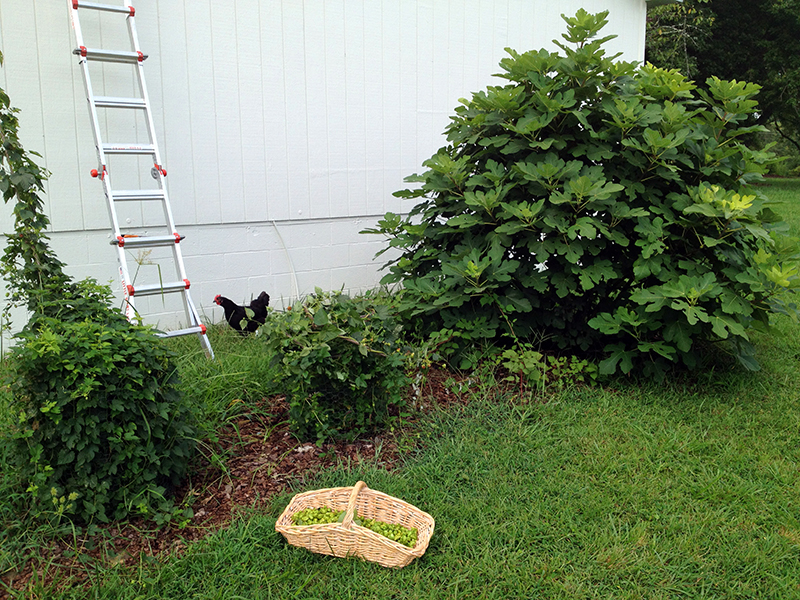
Once I had the cones picked off, I wound the bines up so that the leaves could continue photosynthesizing until frost. I figured that as the first year is really all about root development anyway, it didn’t make sense to chop the plants down yet when the leaves could still be helping the roots grow. A chicken photobombed this shot, which also nicely shows off my flourishing Celeste fig. This tree is in its third year in this location and very happy to be living on the south side of a white barn, soaking up light and heat. Soon its figs will be ready to eat.
Up next: What to do with your harvested hops.




 August 2013


