April 26th, 2014 §
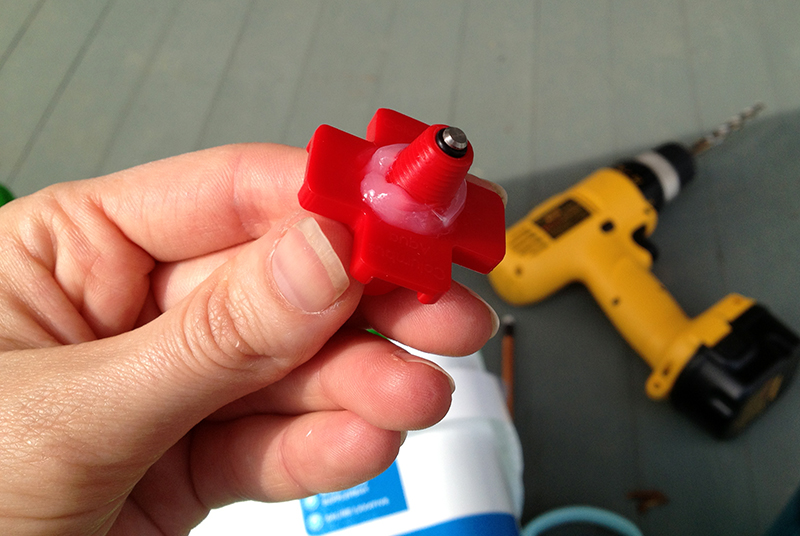
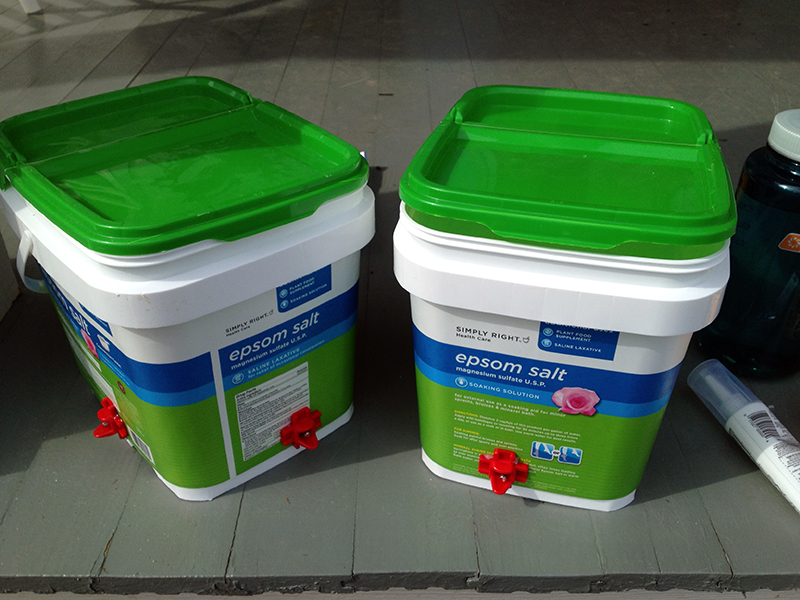
The creation of the chick waterer went so well that I wasted no time in making a few more for the main coop. These would be permanent containers, so I used clear silicone to install the nipple waterers into a couple of recycled containers. Yes, I buy epsom salts in 10 pound tubs, about fifty pounds at a go. Don’t laugh. Farming really beats up the body!
These are actually pretty great containers because 1. they were free, 2. they’re opaque, which helps prevent algae growth, 3. they’re sturdy—if they held ten pounds of epsom salt they’d have no trouble holding ten pounds of water, and 4. they had well-positioned handles to make hanging easy.
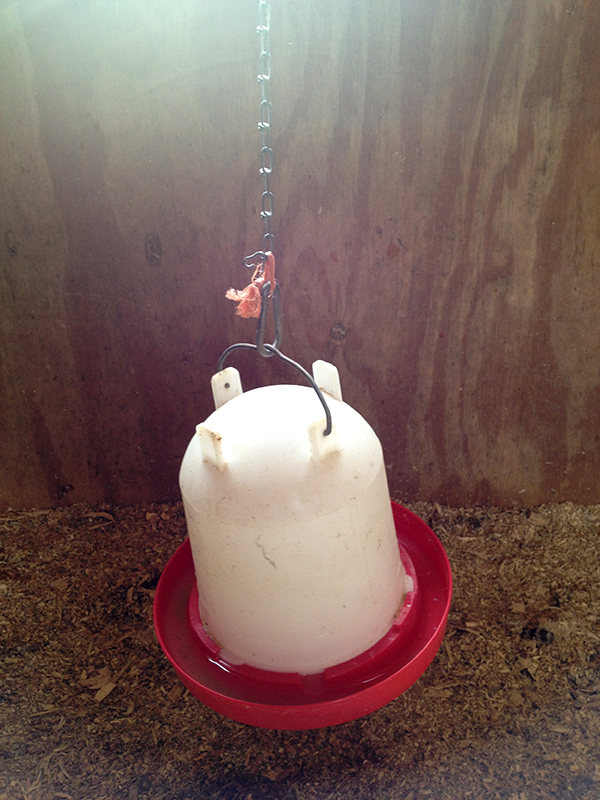
The idea was to get rid of the situation below—hanging waterers that were the bane of my chicken-keeping life. The water got so dirty, downright filthy in the heat of summer, and when the chickens drank it down low enough the whole thing tipped, spilling the water out into the bedding and wetting the wooden floor of the coop enough to cause it to rot. The wet bedding is bad for birds, makes habitat for disgusting flies, and stinks. Plus, the one-gallon waterer needed to be filled twice a day in the heat of summer, and required frequent checking to make sure it hadn’t spilled.
With my new waterers assembled, it was time for some framing in the coop. I assembled a few bucks worth of supplies and fired up the drill.
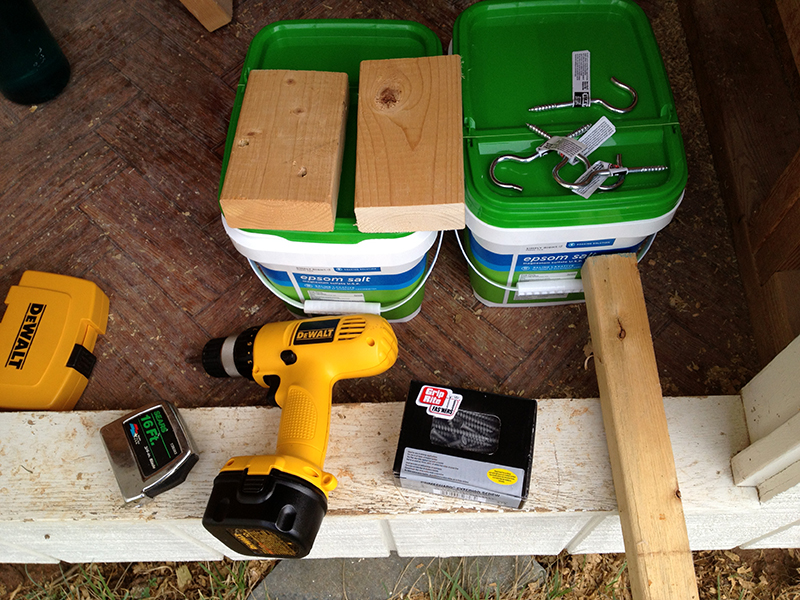
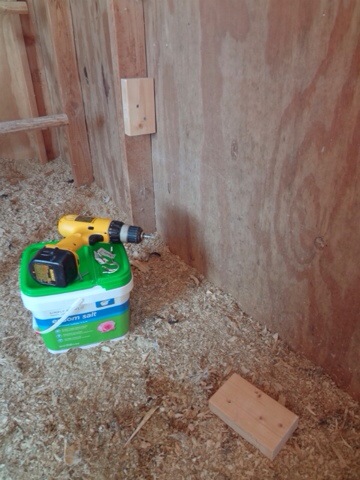
First I put up some blocking, using a couple of scrap 2×4 pieces.
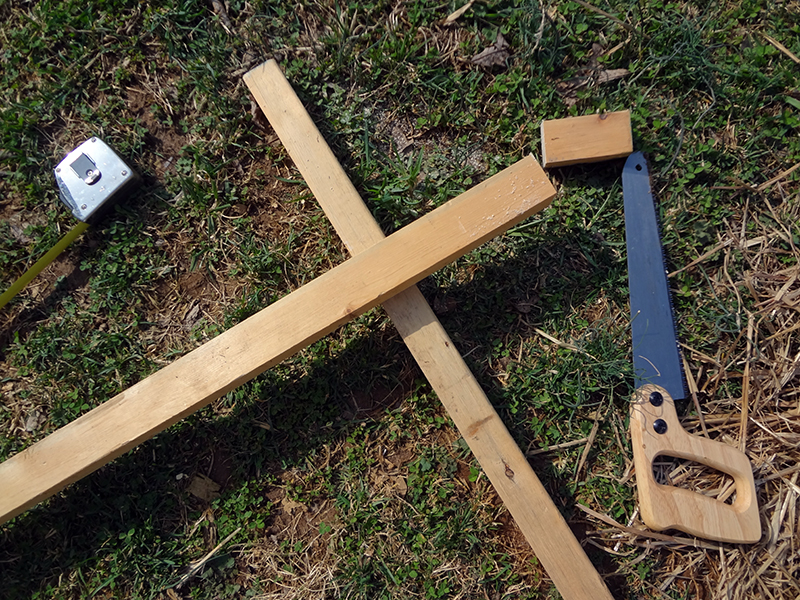
Then I cut a piece of scrap wood to length and screwed it in place on top of the blocking.
Finally I installed heavy-duty cup hooks to fit the width of the container handles.
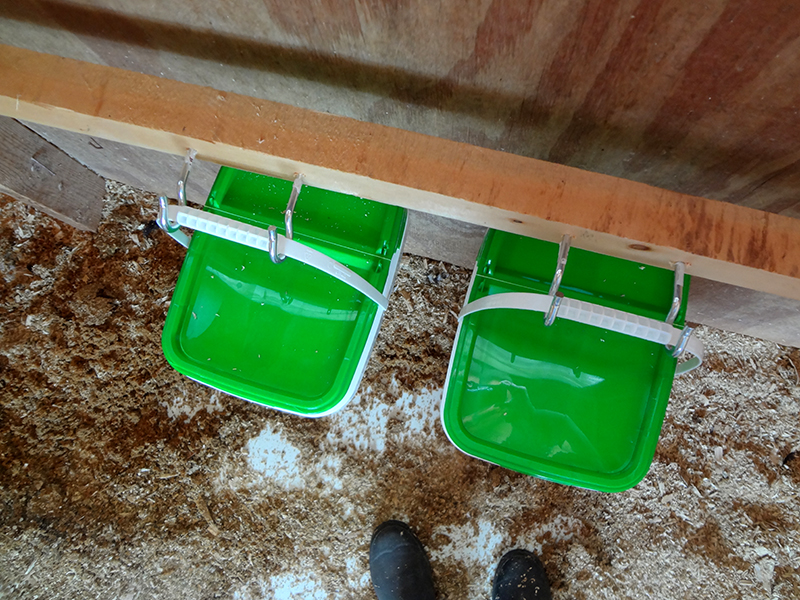
And voila! A new chicken watering system!
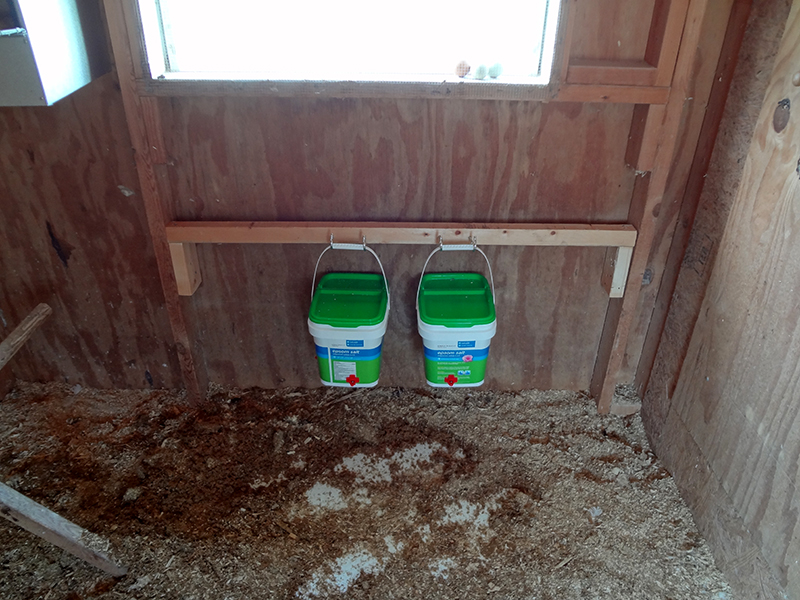
I taught the chickens how to use the new waterers with the cranberry trick I used in the broody coop, and after a few weeks of use I am still happy with this system. The bedding remains dry, there’s enough water in the containers to avoid filing them every day, and it stays clean and fresh. Down the line I could even add more containers if I wanted. In all this is an incredible upgrade that solved the biggest, messiest problem of chicken-keeping, and I am happy with how it turned out. I only wish these new horizontal nipple waterers would have been available four years ago when I started keeping chickens!
April 25th, 2014 §
I set the new chicken water in the broody coop, using a block of wood to elevate it to the level of the chicks’ heads. I chained it to the coop wall, and that, combined with the weight of the water, was enough to keep the container upright even when bumped by the birds.
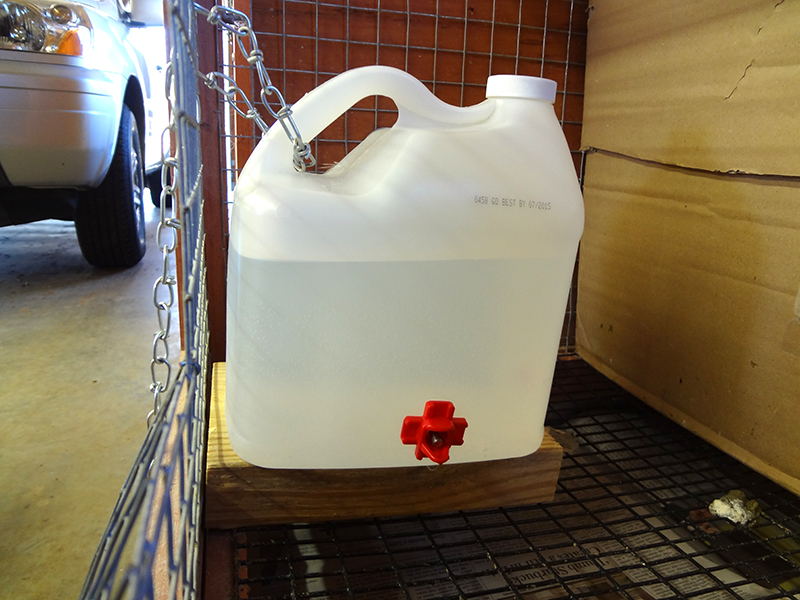
The chicks were wary of the new contraption at first, and reluctant to approach. So I took some dried cranberries and stuck them on the ends of the watering nipples. Once the mother hen figured out where she could get a sweet treat, she hungrily pecked the waterers, and in doing so discovered that her action produced water. And that was all it took. In about five seconds she had shown her chicks how to use the waterer, and they all crowded around to explore the new device. It was another great example of why I like using a broody hen to raise chicks—it’s fascinating to watch her teach the babies exactly what they need to know, and they learn from her instantaneously.
These horizontal watering nipples are not recommended for chicks of less than ten days old. It takes a fair amount of strength for them to manipulate the spring-loaded mechanism with their beaks, so I can see how smaller chicks wouldn’t be able to drink from them.
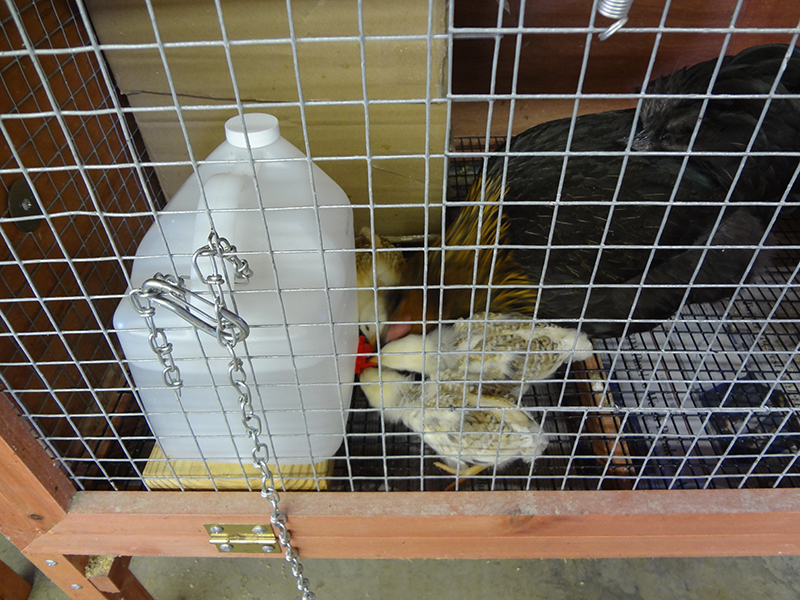
I had marked the starting water level on the side of the jug, just to make sure that the birds were actually getting water out of it during this transition. And I watched them carefully for the next few days to make sure no one was suffering from dehydration. But training them to use the new waterer couldn’t have been easier, and overall it is a huge improvement from the old, dirty, spilling chick fount.
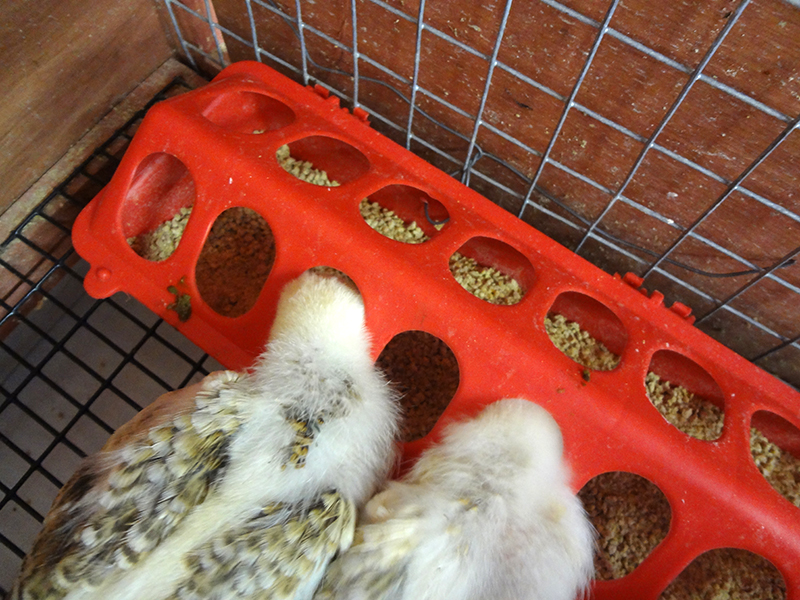
While I was updating the watering system, I also introduced a new feeder to eliminate the problems I was having with the chicks, and mama hen, scratching out and wasting so much food. I drilled a few sets of holes into this plastic trough feeder and wired it to both the side and bottom of the coop. That holds in securely in place against being tipped over, and it’s easy to pop the top off to refill. The birds are wasting much less food with this design.
The birds have been using the new water and food systems for a couple of weeks now, and all is well. Especially for me, as with these simple and inexpensive upgrades I solved two of the most disgusting and wasteful problems of chicken keeping!
April 2nd, 2014 §
Having a broody hen hatch and raise chicks is far easier, to me, than worrying about fluctuating incubator conditions or heat lamps. However, now that I’ve worked with a broody hen a few times, I realize that using a broody raises some specific issues that are easily addressed with a little bit of construction. I hope that publishing my trial-and-error process will save you time and mess and maybe even the lives of your chicks.
A full-size hen in a small broody coop can be like a bull in a china shop. Certain hens are more gentle than others, but the one I am working with now is a real bruiser. She is just acting out a chicken’s nature, which is to scratch and peck everything in sight. But when everything in sight is a newspaper-lined coop, open food dishes, and a top-heavy chick waterer, not to mention eight delicate little chicks, we have problems. The instant I filled the food bowl with chick feed, the hen would scratch it out to fall through the wire cage floor onto the tray below, wasting pounds of food a day, starving her growing chicks, and sometimes flipping the entire heavy, ceramic feed bowl into their heads. Then she’d continue scratching, ripping up the newspapers that lined the coop’s wire floor, which I used to give the chicks a solid, warm flooring to protect them from drafts. And then she’d knock over the waterer, which was usually filled with food, poop, and wet newspaper, draining the water into the spilled food.
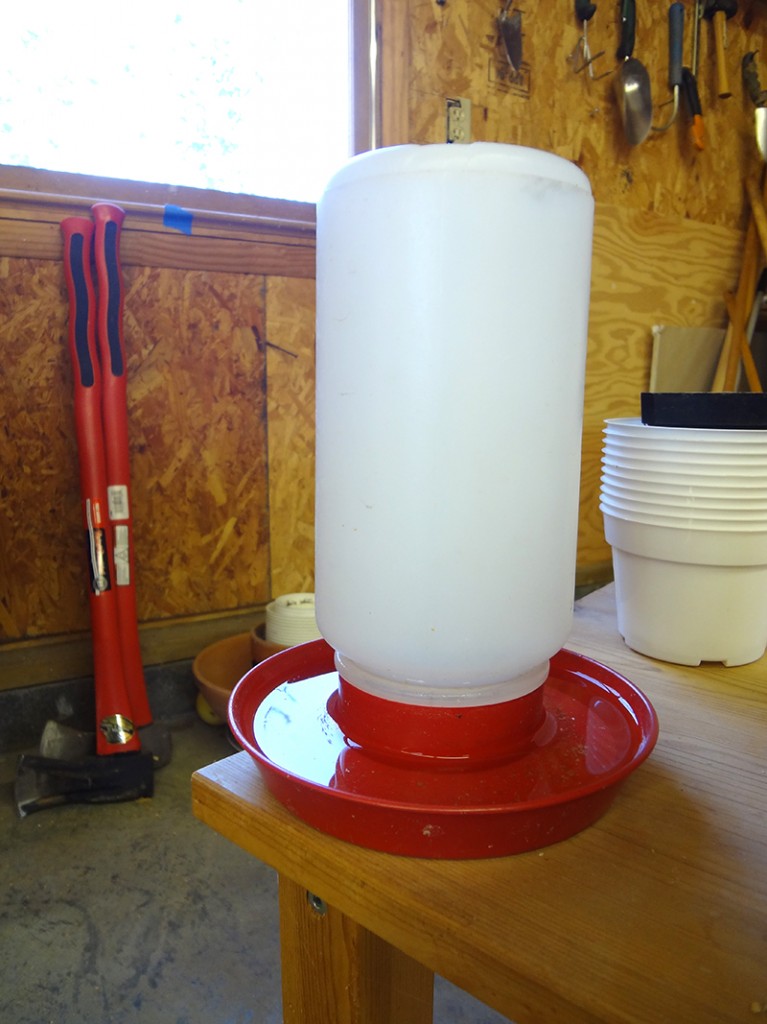
I tried all sorts of tricks—tying the waterer in place, using various dishes and pieces of cardboard under the food bowl, but the whole system was a mess despite cleaning three times a day. Disgusting living conditions aside, the final straw was the fatal implication of a tipped-over waterer. Birds as tiny as these chicks can only go for a couple of hours without water before they’ll die.
A lot of internet research revealed that poultry keepers usually have great success with “nipple waterers,” which are used in commercial poultry production. An evening spent typing “chicken nipple” into various Web sites (what will Google think?!) revealed options such as this, which were supposed to be relatively easy to install on the bottom of a bucket:
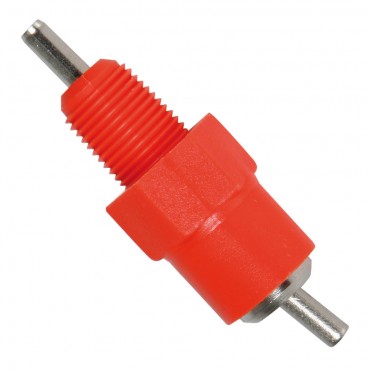
However, I had a hard time imagining filling the waterer with the valves installed on its bottom, not being able to set it down. What a pain! I thought there had to be a better solution. After more searching, I discovered the much-less-common “horizontal nipple” and ordered a few from an eBay seller. According to this article in Mother Earth News, this new style of nipple was just introduced a few months ago. Instead of being installed on the bottom of the water container, these go on the side. They are spring-loaded and have a little drip cup underneath to catch the water and help the chickens drink.
My new nipples arrived yesterday and I began to build my improved chicken waterer. 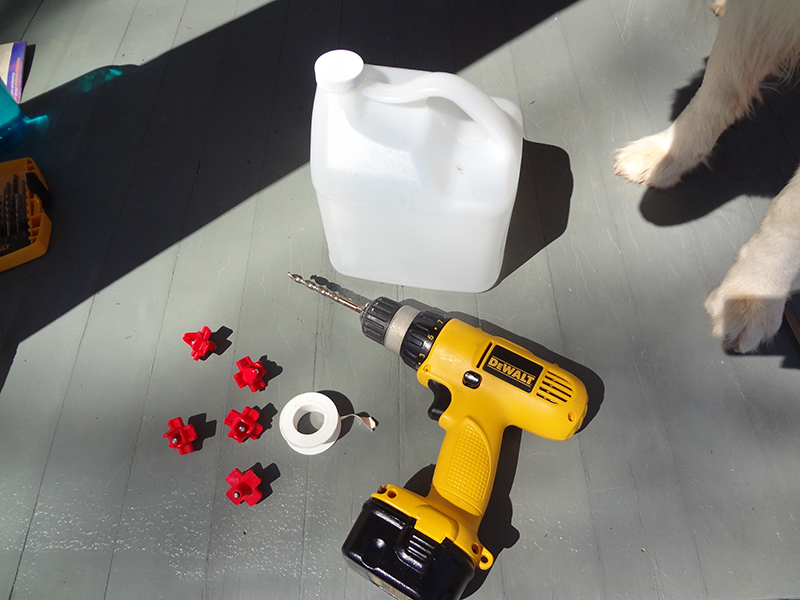
I used a gallon aloe vera juice container because its squared off shape fit more easily in the coop, and I thought I had a better chance of a good seal between the nipple and the container if the container walls weren’t curved. I drilled a couple of 3/8″ holes in the container. I considered installing the nipples with silicone sealant, which would surely eliminate leaks, but I wanted to be able to reuse these nipples on another container. So I wrapped the threads with plumber’s tape in hope that it would improve my odds of a leak-proof seal.
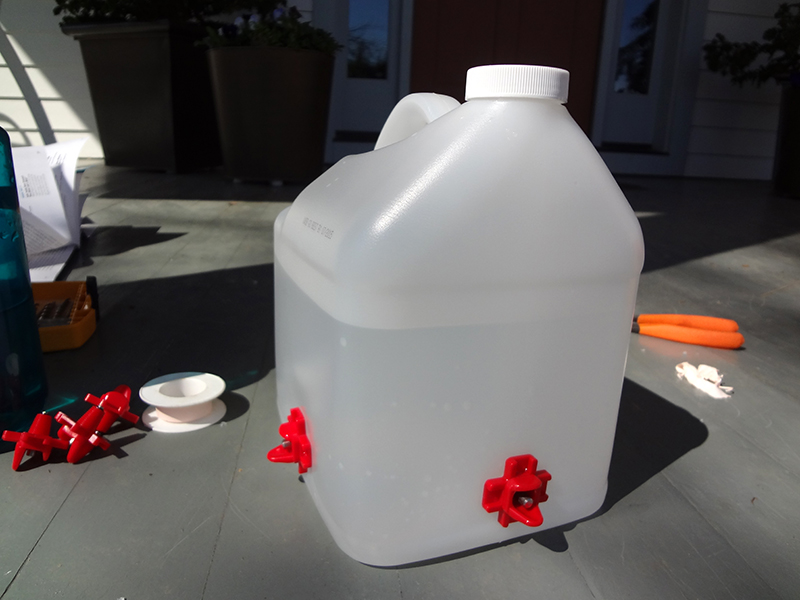
My first attempt yielded one leaky nipple, so I took it out and saw that some bits of container plastic in the drill hole were impeding a tight seal. I cleaned up the edges of the hole, rewrapped the nipple threads, and put it in again. When it seemed like it had a good seal, in that the nipples were very hard to turn as they got further into the container, I filled the container with water and let it sit on the porch all afternoon, watching for leaks. When I saw none, it was time to introduce the birds to their new drinking fountain.
Up next: teaching the chickens to use the new waterer and fixing the food dish problem.
March 26th, 2014 §
It started to clear yesterday evening around six, and what had been a socked-in, heavily snowing day turned into a stunning evening. Once again I was reminded of how the landscape around my house is so dynamic, its changes driven by the seasons, time, and weather. Mountains disappear and reappear, evergreens that usually fade into the background take center stage during a snowfall. Every tree limb is outlined and the horizon underscored. Under snow, previously unseen folds and valleys in the hills surrounding my house pop into relief and reveal unexpected topography. It was a beautiful night. There is always something new to see, and if I don’t like the view out the window it will change in minutes. I am never bored.





March 25th, 2014 §
March 25th, 2014 §
Then it was supposed to be an inch of sloppy snow accumulation. But now it’s been snowing all day hard enough that I can’t see the mountains in either my front or back yard, and there are five inches on the ground and it’s still coming down.

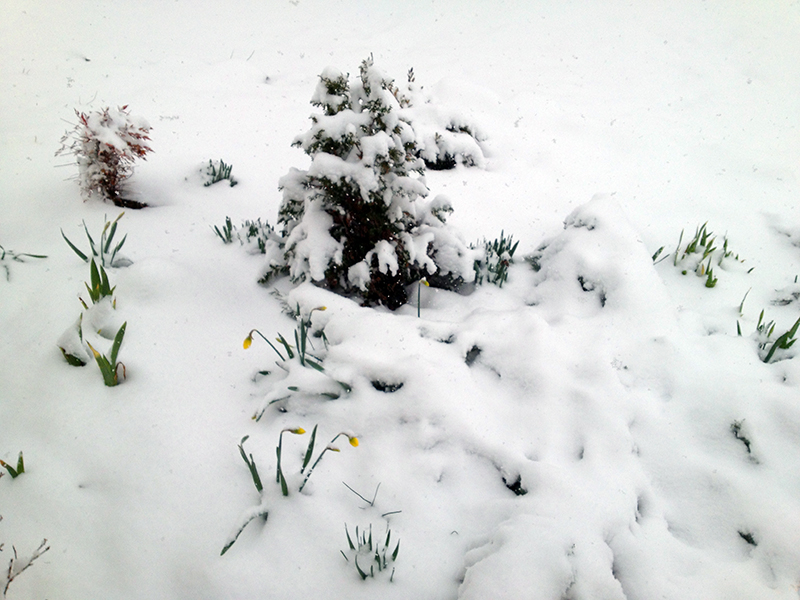
The daffodils have wisely not yet bloomed.

This is a pretty good representation of how I feel about today’s weather developments, and this whole miserable winter that just won’t end.

Interestingly, though, it was snowing on this day last year.
March 24th, 2014 §
Last fall I had grand ideas of building a cold frame to overwinter spinach, kale, chard, and salad greens. In late October, right before the first frost, I stuffed 18 strawbales in the bed of the pickup and when I got home used them to build a small fortress around some rows of greens that I’d sowed earlier in the fall.
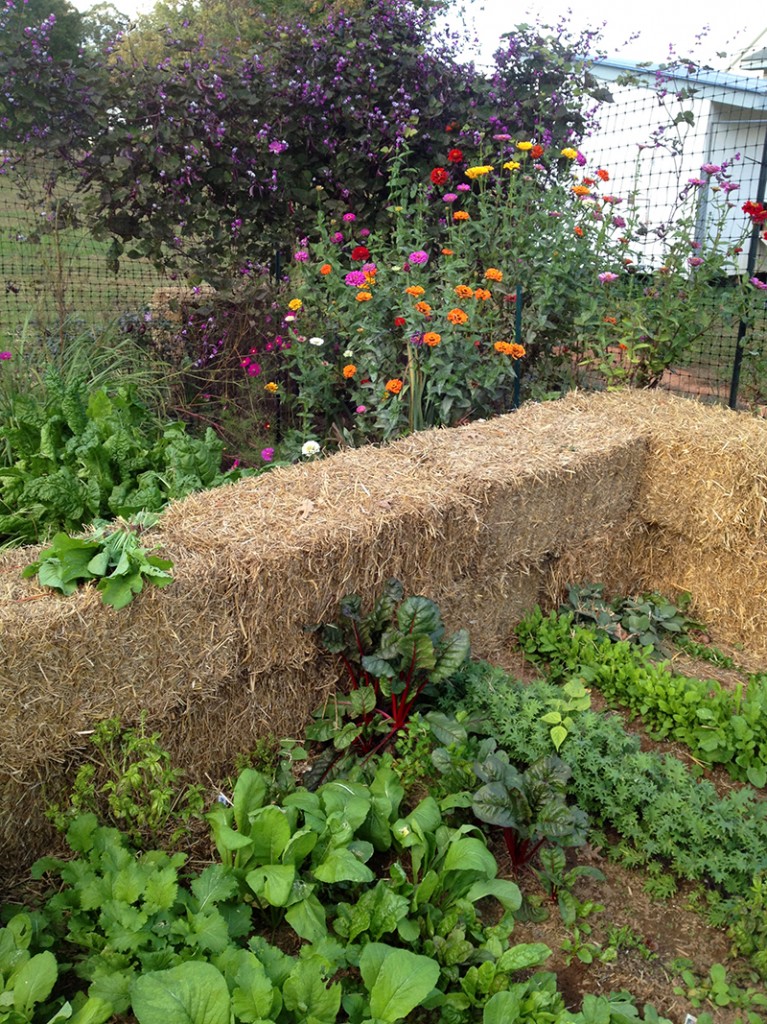 October 22, 2013
I made a one-and-a-half-story, south-facing design thinking that the angle would help trap the sun’s heat and shed water off the big sheet of contractor’s plastic that I draped over the top for a lid. I secured the plastic on top of the bales with some scrap lumber, bricks, and cinder blocks. It was admittedly a hot mess to look at, but that’s one reason that I hid the veg garden out of sight from the house and road!
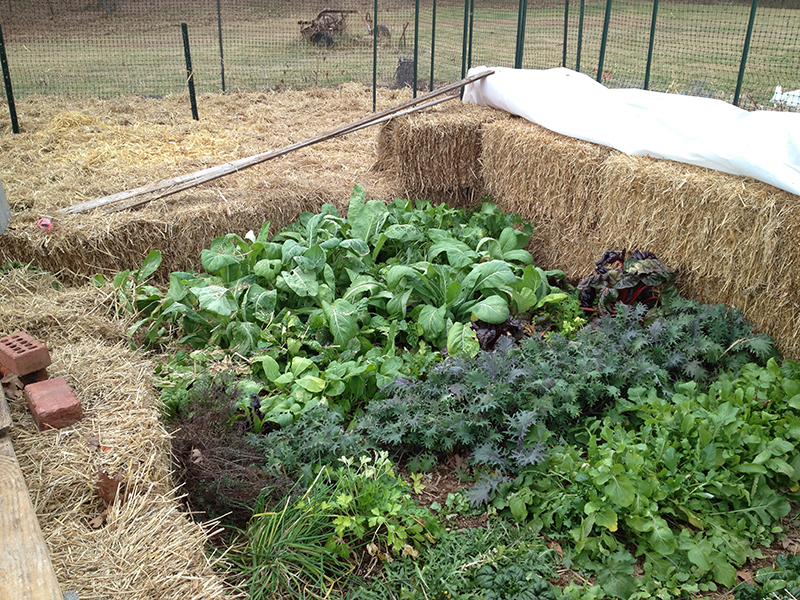 December 5, 2013
Things looked good into December, and I kept harvesting greens. But then it started to get really cold and going out to the garden to wrestle with frozen plastic and the icebergs caught in its folds didn’t appeal. So I abandoned the cold frame to the savages of this very long, cold, and snowy winter.
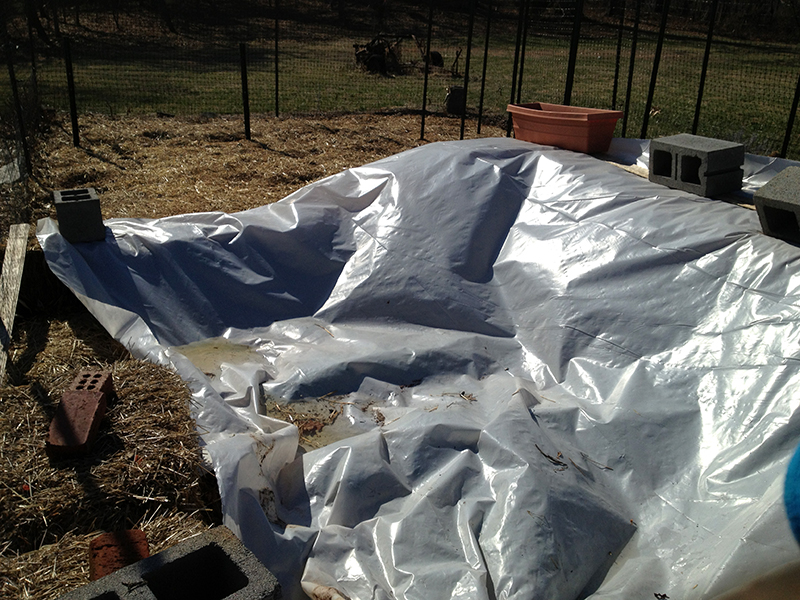
Today I thought I would peek under the plastic, and I was surprised to find quite a few plants happily growing. There were vigorous-looking weeds starting to set seed, though outside the protection of the cold frame none of these weeds are growing yet anywhere on the property—proof that I was successful at creating a little warm microclimate! I was pleased to see chicory, which is called a weed but is actually a very healthy edible spring tonic that you can add to your salad. The Red Russian kale looked pretty good, as did the spinach, and the arugula was flowering. The chard and mustard didn’t make it through as well.
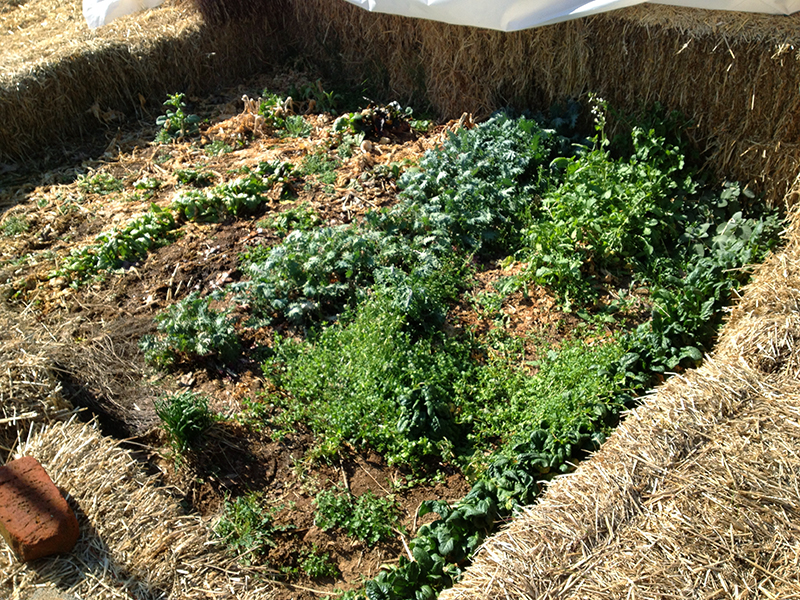 March 24, 2014
This is a happy discovery as these little plants, which have existed in suspended animation over the winter, mean a jump on the spring growing season—saving weeks of waiting for spring-sown seed to germinate in cold soil. These plants are undoubtedly strong beneath the surface, and all they will need to get up and growing is some more heat and water. After we get through this week—with more cold temps and even possible snow tomorrow—I will start opening the top of the cold frame for short spells to get the plants used to the temperatures and sun.
When it comes time to plant the whole garden, I will spread the nicely aged straw in these bales around the garden as part of my deep mulching soil-conditioning and weed-suppressing strategy.
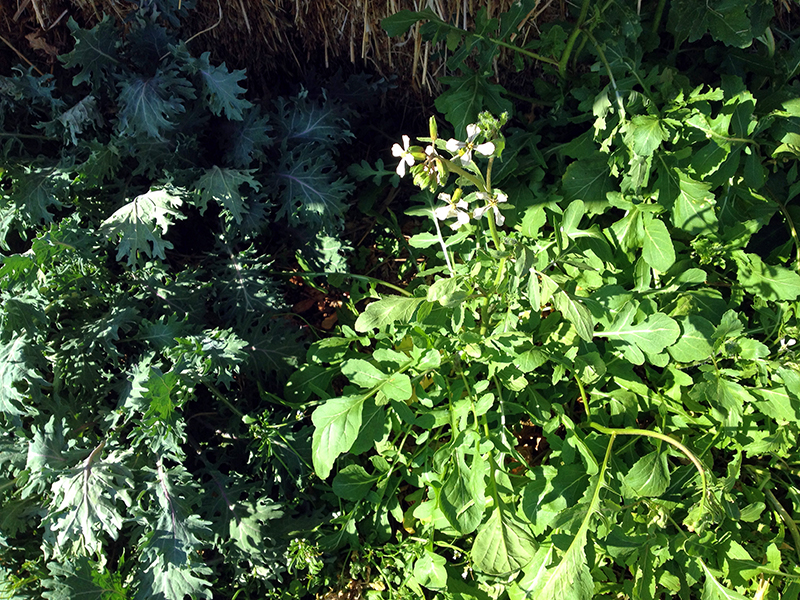
I will still probably sow some more greens from seed, just to experiment, but while I wait I will be enjoying winter-sweetened greens that amazingly hung in there through multiple polar vortices, being flattened under 16″ of snow, and everything else this winter threw at them.
I am pretty happy that what I thought was a failed experiment at getting greens to grow all winter actually isn’t a total failure. I maybe wasn’t eating lush garden-grown salad in the deepest part of winter, but I can right now, and I probably could have weeks ago had I just peeked under the plastic!
March 23rd, 2014 §
For historical record it’s worth noting that last weekend I said goodbye to Griz, the rooster hatched last summer from a well-traveled egg. Griz had been up on CraigsList for months, for free, after he predictably began challenging his father, Calabrese, in bloody fights for control of the hens. I’d separated Griz on his own in a garage coop and left him to await his fate.
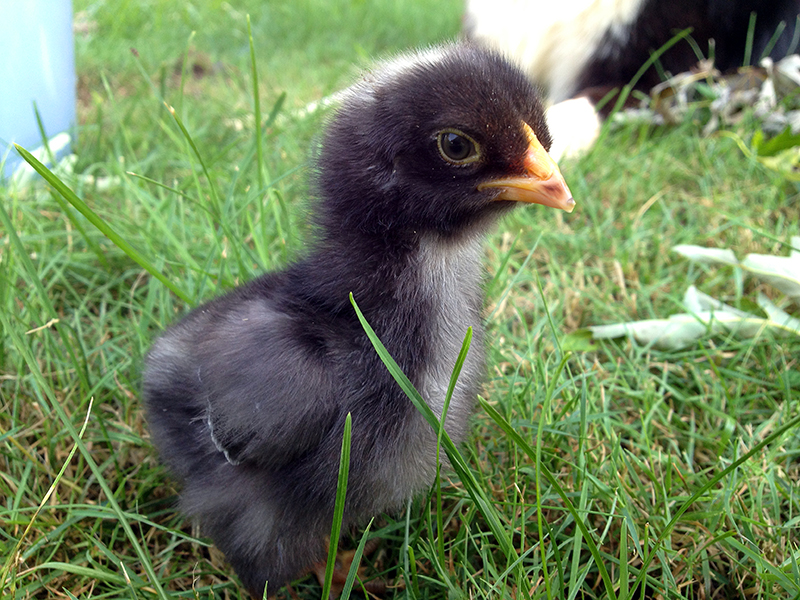
Here he is on the way to his new life. He turned out to have the Cuckoo Marans coloration of his olive egger mother but the green and gold feathers came from Calabrese, his Wheaten Ameraucana father.
It’s a funny thing that he got his name from my brother, who I gave naming honors because Griz’s egg spent time in my brother’s refrigerator before being recalled to Free Union to hatch. My brother chose Grizabella as the name for this chick, which when he turned out to be a cockerel I shortened to Griz. Just the other day I was reading some British magazines and learned that “grizzly” is a term used in that part of the world to describe a chicken of this black and white barred feather patterning—something I’d never heard in America. Weird coincidence, huh?
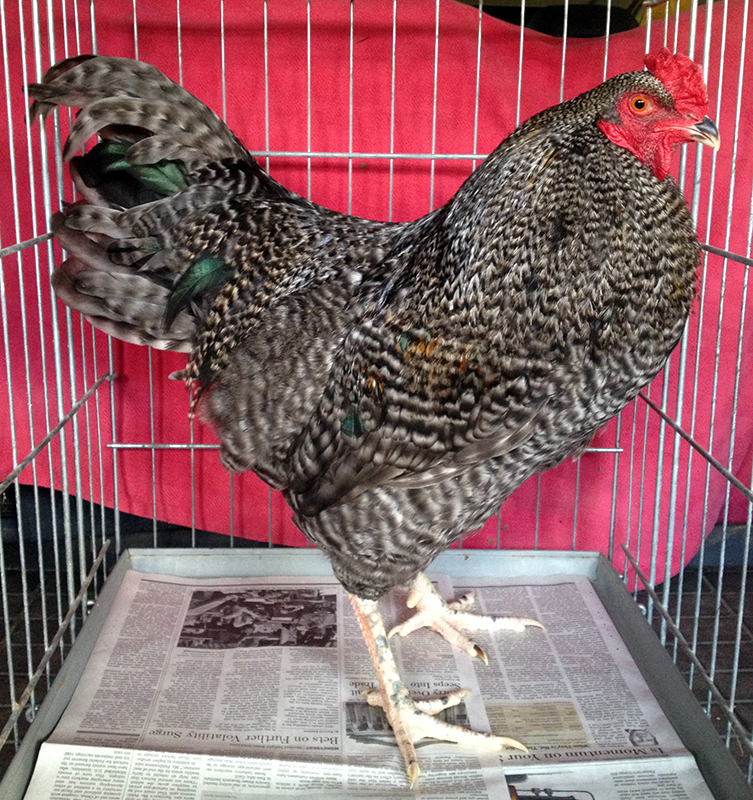
I am happy to report that Griz has gone on to a new family, who kept his name, and a flock of his own, along with a dozen of my hatching eggs. Part of the Bonafide flock will live on now in Madison, VA.
I got an e-mail from Griz’s new owner the other day:
Griz is doing well. He wasted no time on flowers when he met the ladies and they are all fast friends now. Thanks again.
I have to say I have met the nicest people in all my CriagsList chicken dealings. Maybe keeping chickens is particular to a certain personality type—who knows?—but I have always had positive experiences both buying and rehoming birds this way. It’s great to know a chick I hatched from an egg has found a good new life.
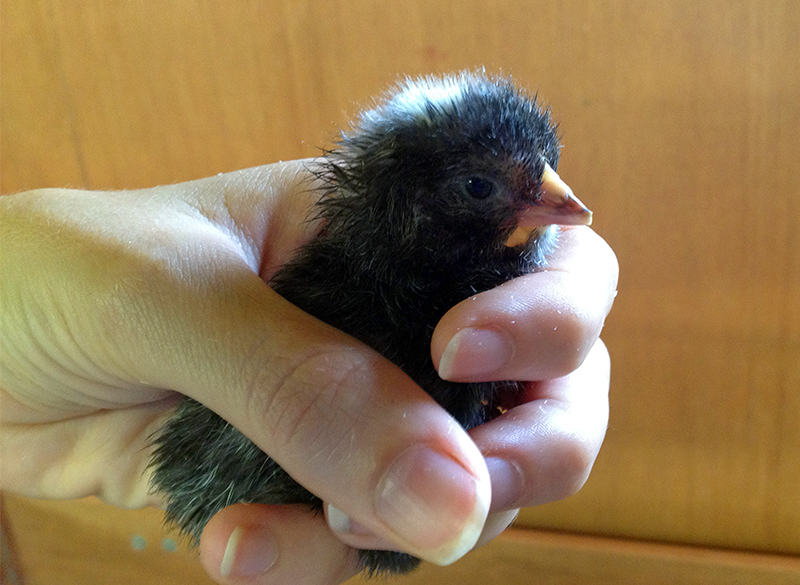
Just-hatched Griz, still damp, July 2013
Griz at one week
March 20th, 2014 §
And happy first day of spring!

March 19th, 2014 §
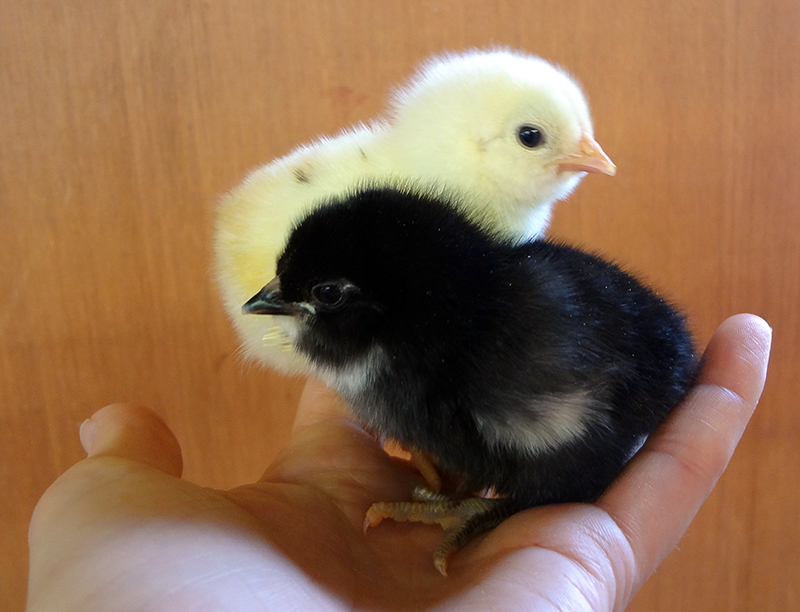
Yesterday morning I discovered that the broody hen had left her nest box and taken her chicks to eat and drink for the first time. There are eight perfect chicks—seven yellow and one black. It’s a genetic mystery to me that I set two green eggs, which I thought that based upon their mothers would hatch into two black chicks, amongst a bunch of yellow Wheaten Ameraucana eggs. But one of the green eggs apparently hatched a yellow chick. It will be interesting to see how the chicks feather out and whether or not I can tell who’s who when they’re older. The yellow chicks show some color variation too. One is almost red! Very cool.
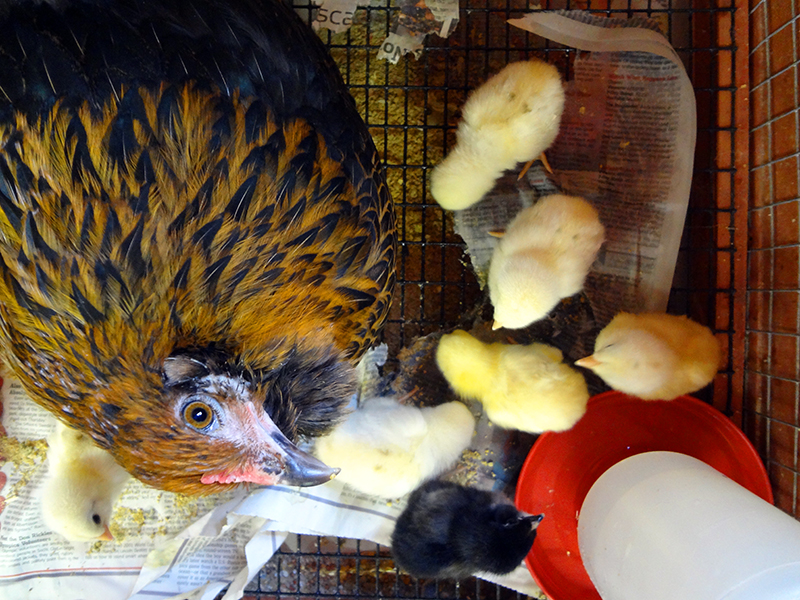
The chicks are all eating and drinking on their own. When they’re not out discovering their new world, they huddle under the hen and she keeps them warm beneath her wings. It’s pretty cute to see a hen with a bunch of tiny feet sticking out under her breast.
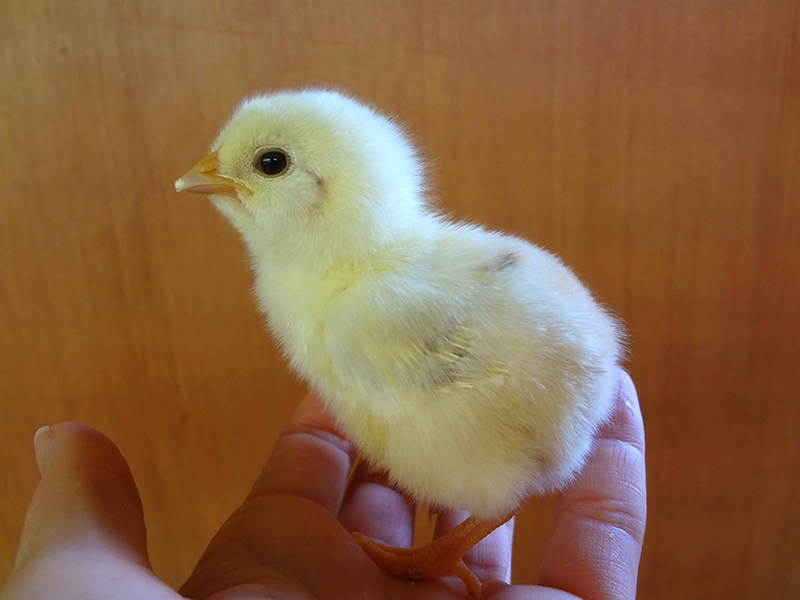
This broody kept her nest the cleanest of all the broodies I’ve had, and she ate every speck of the discarded shells as the chicks hatched. The eggs shells and membranes are very nutritious and she needs them to regain her strength as she ate less than a quarter cup of food for almost a month while incubating the eggs.
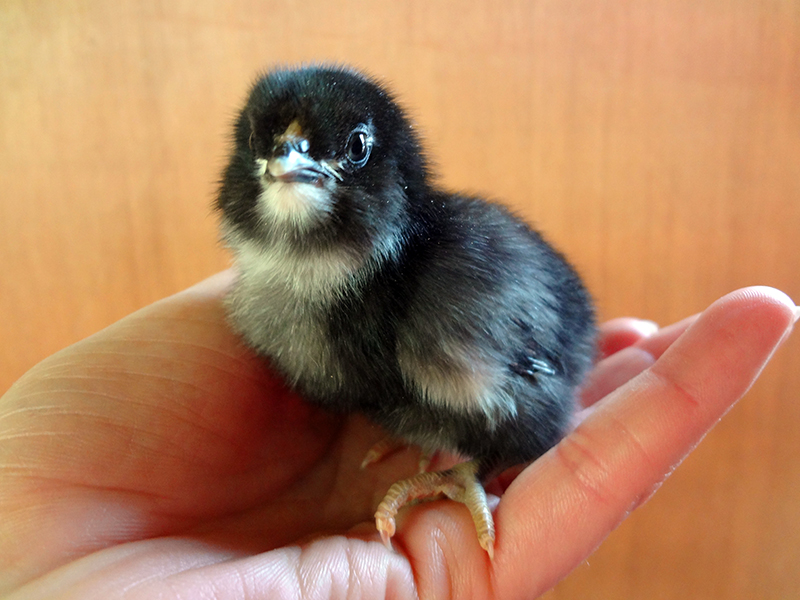
Chicks grow amazingly fast and knowing that I am spending as much time as I can marveling at these babies. In just a couple of days their downy fluff will be replaced with first feathers and they will be well on their way toward looking like the awkward dinosaurs from whence they descended.

But in the meantime I am loving these tiny creatures. It is easy to forget any worries or thoughts for the past and future with a tiny chick or two tucked in my hand. In that way working with the birds reminds me of what I liked so much about beekeeping, and many other farm-related tasks. The attention and focus required to handle the chicks or the bees or other animals and living things clears extraneous thoughts from my head and quiets my constant internal monologue. I am transported smack into the present moment in a way that years of yoga classes and meditation have never managed to do. This gateway to a perfectly still moment of being and a quiet, singularly focused mind is one of the greatest gifts the animals in my life have given me.
