October 15th, 2013 §
After harvesting more than 100 ears of ‘Glass Gem’ corn, I needed to do something with it. A harvest wreath was the perfect project. I love to make wreaths—I love the seasonal symbolism of them and the way they act as jewelry for the house, dressing it up in a way that shows that the person who lives there cares enough to make the public face of their home pretty and welcoming.
However, the wreaths one most often encounters in stores are all too frequently plasticly hideous, reminding me of cheap gravestone decor, while being simultaneously, ironically expensive. It’s very hard to find a good wreath, which in my definition is one that looks natural and fairly understated, while also having enough going on to be interesting. The wreath should also be complementary to the home that it’s decorating.
Because I am picky about wreaths, I tend to make my own each season. I’ve done fall fruit wreaths, winter greens wreaths and spring wildflower wreaths, but I’d never before attempted an Indian corn wreath. It was a bit of a learning curve, but here’s how it all went down.
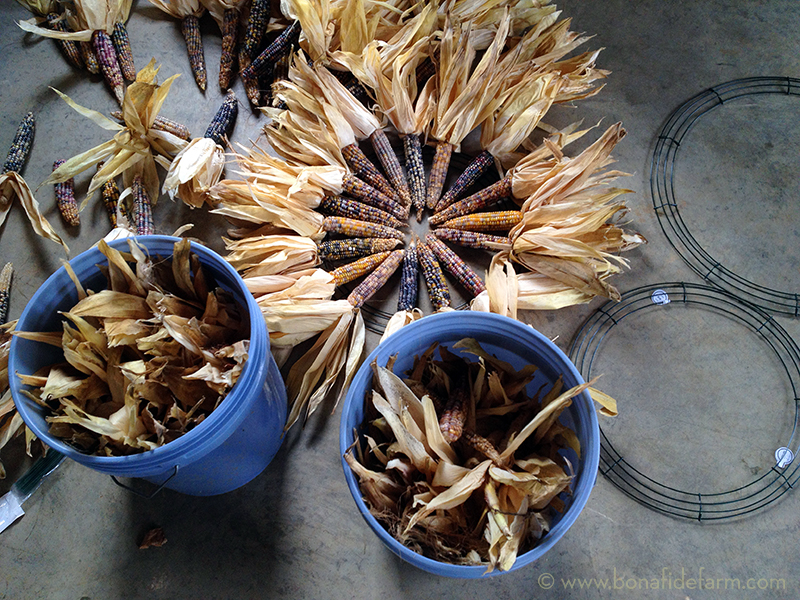
I got a few cheap wire wreath frames, and then I set to work sorting my best-looking ‘Glass Gem’ corn by length into separate buckets. I figured I had enough good corn for two fairly substantial wreaths. Then I did a test fit for the first wreath, choosing the ears for the four cardinal directions and then filling in between them with a nice balance of colors.
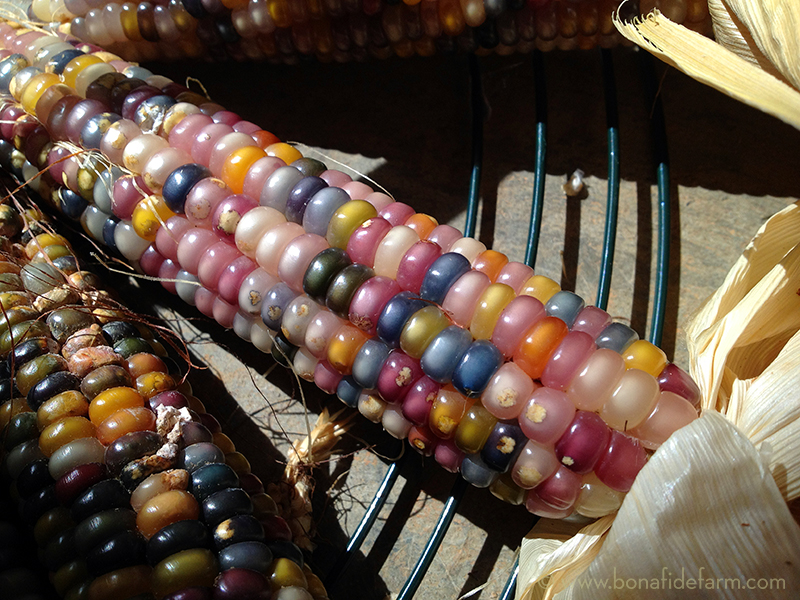
I soon realized that the corn wasn’t thick enough to totally hide the wire frame. I did two things to fix this issue. First, I wired some pieces of rafia sheeting, which were actually cut-up IKEA window screens that I’d had for many years, to the wire base. Second, I folded a few pieces of corn husk back behind each cob, trimming the husk that stuck out past the end of the cob.
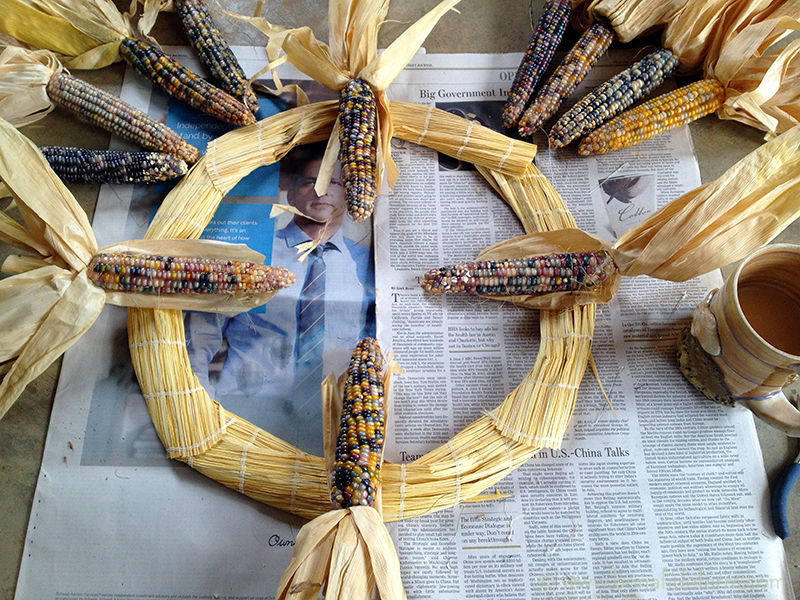
After I hot glued each ear down, they still needed more support to stay on the frame. I had to make two points of connection on each ear to keep them from flopping around or falling off when the wreath was hung. I got a big needle and some very fine gauge wire and sewed each ear onto the frame, going around twice. The silver wire blended in pretty well and wasn’t too noticeable. I tied the wires off in the back of the wreath, leaving them long enough that I could tighten them again should the corn shrink as it dries.
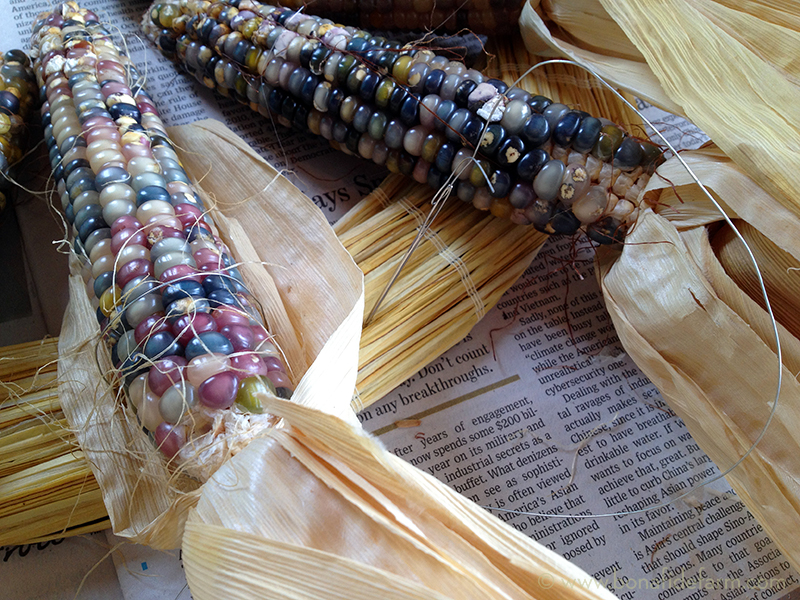
And then I just kept going, glueing and wiring the corn in place, all while sitting on the floor of the garage.
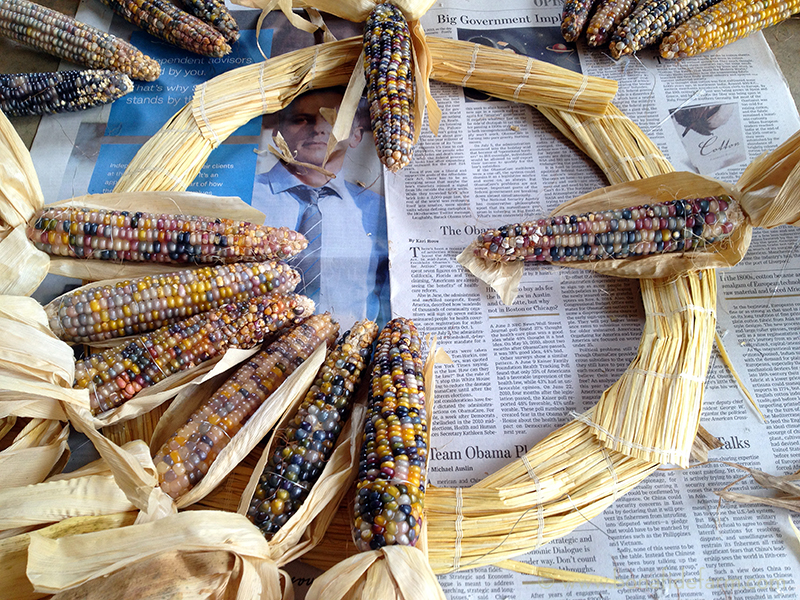
It took a long time to fuss with each piece to make it look nice, but I had lots of company.

In fact, the chickens seemed pretty happy to be snacking on runaway ‘Glass Gem’ corn kernels. What a gourmet treat!
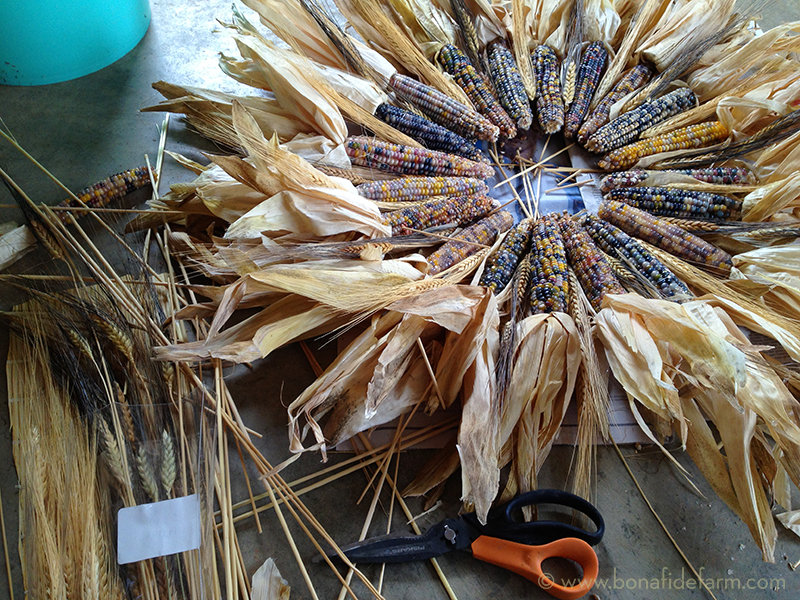
Once I got all the corn cobs attached, I went back and filled in some thin-looking spots with extra corn husk. Some of cobs had lost their husks entirely, so I hot-glued prosthetic husks to them. And then I got some wheat stems (picked up at the craft store) and glued them in between each cob for another layer of interest. I trimmed the tips of some of the cobs with my pruners to help make the negative space in the center of the wreath as even as possible.
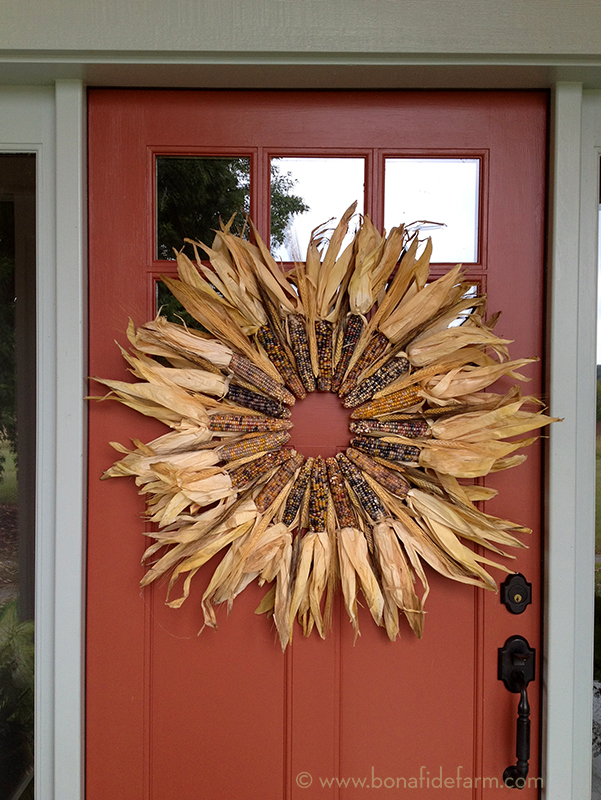
After a test-hang to check for any weird-looking spots, the wreath was ready for the front door. I couldn’t have picked better corn colors to go with my house!
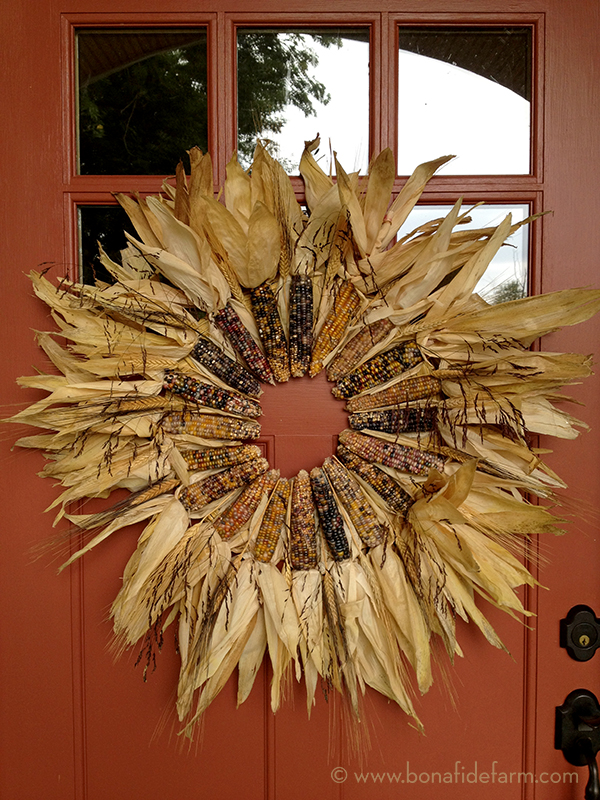
And then I made another for wreath for my mom’s front door. The wreaths have been hanging almost a month and seem to be holding up pretty well. They’re both on protected porches, which I am sure helps to extend their life. But if they should decide to take a turn for the ugly, I know a bunch of chickens that would be pretty thrilled to help dispose of the remnants of my harvest wreath.
September 25th, 2013 §
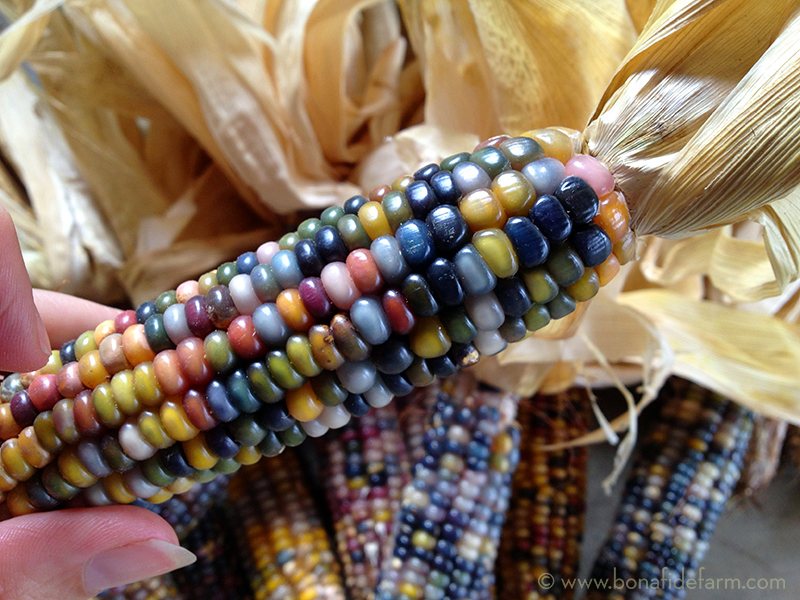
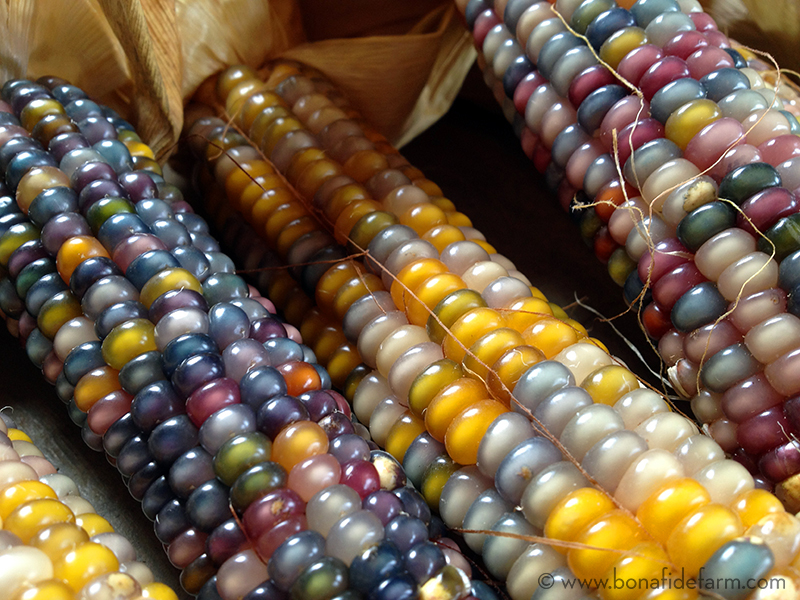
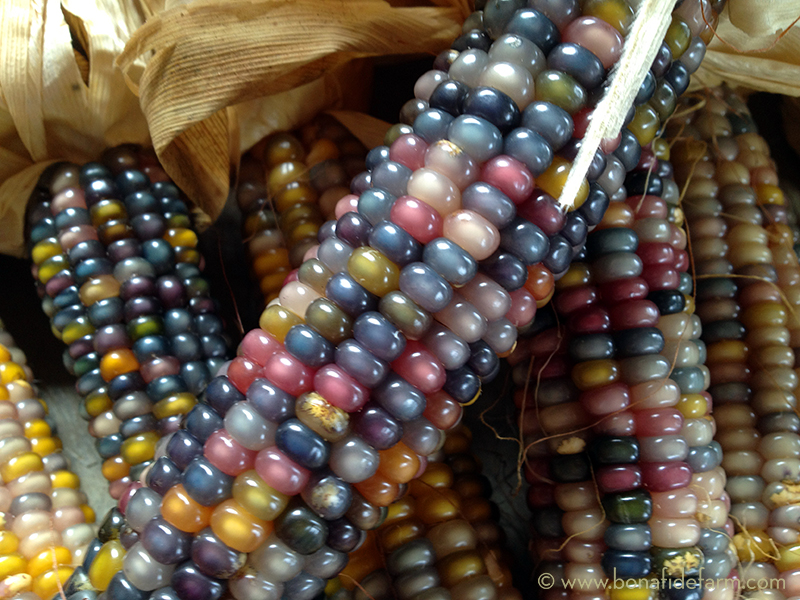
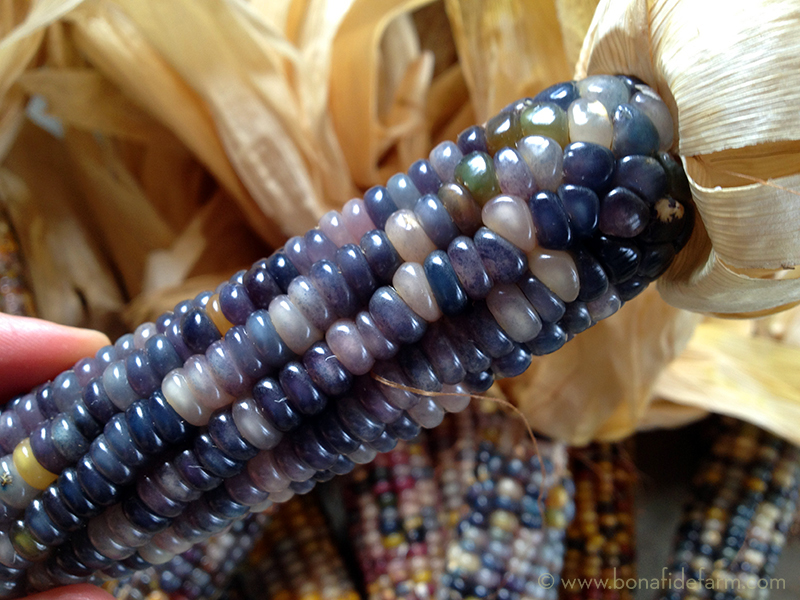
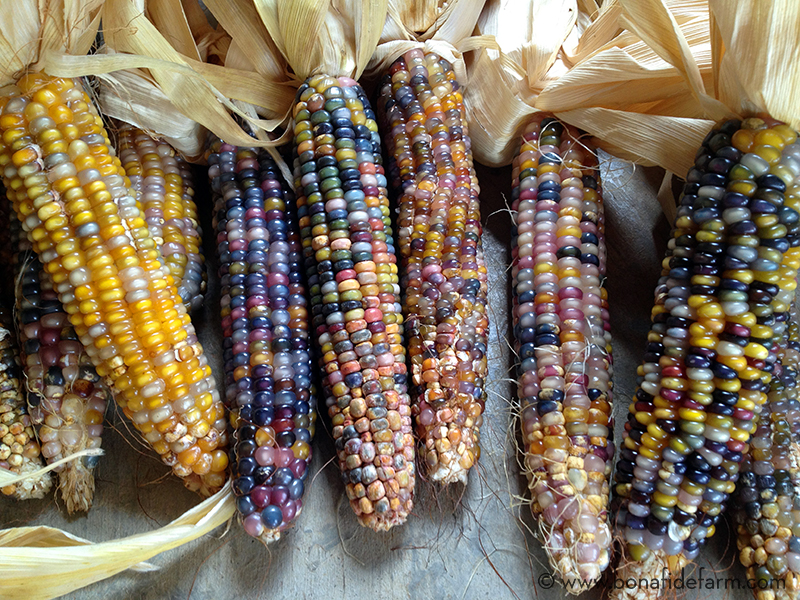
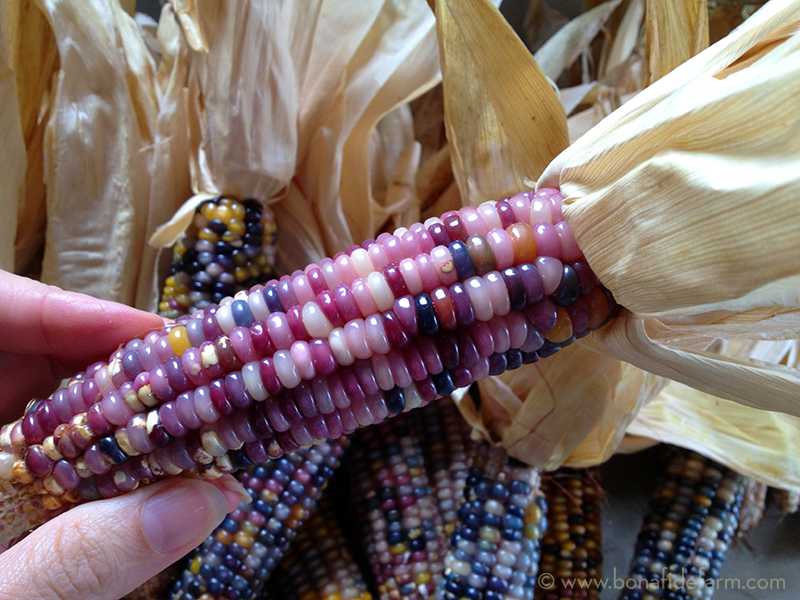
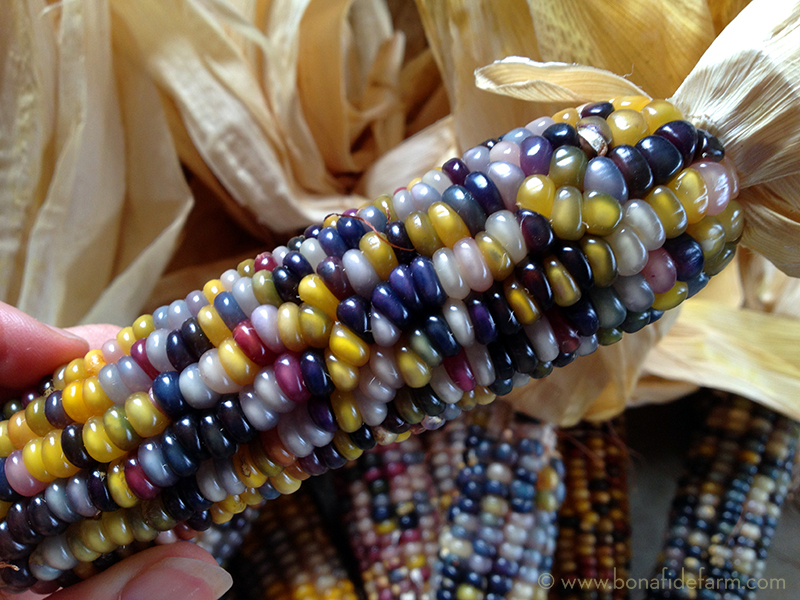
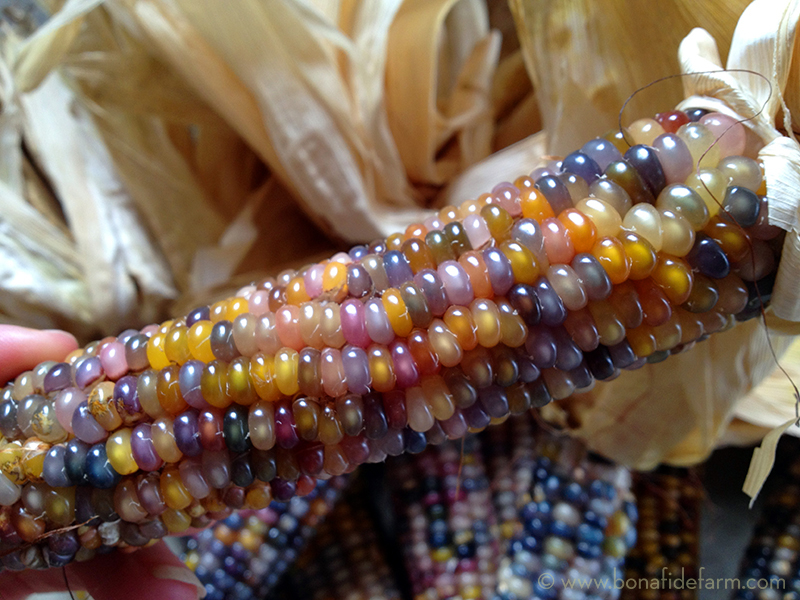
Here’s just a selection of the Glass Gem corn I grew this summer. As you can see, the range of colors is incredibly wide, both within each cob and between different ears. Glass Gem is a color lover’s dream. There’s something here for everyone, whether you prefer your corn in nursery pastels, sophisticated navy, screaming magenta, classic yellow, or my favorite, all mixed up teal green, purple, turquoise and pink.
These photos aren’t digitally altered, nor did I use any special shooting setup—this really is what this corn looks like. I just snapped a few shots with my phone as I lay the corn out on the garage floor after shucking.
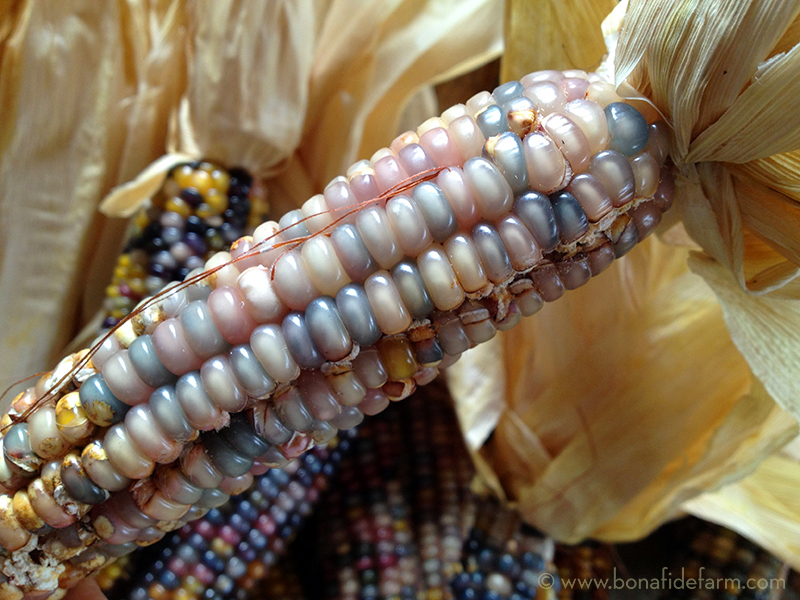
To read about the entire 2013 Glass Gem corn experiment, please visit:
September 24th, 2013 §
Once I had all the Glass Gem corn picked, it was time for the best part: opening each ear to reveal the multicolored kernels held within. I set up a little shucking station in the garage and got to work. It was kind of like Christmas as each ear exposed a new and different surprise. I separated and saved the best looking corn silk, in the basket below, for tea.
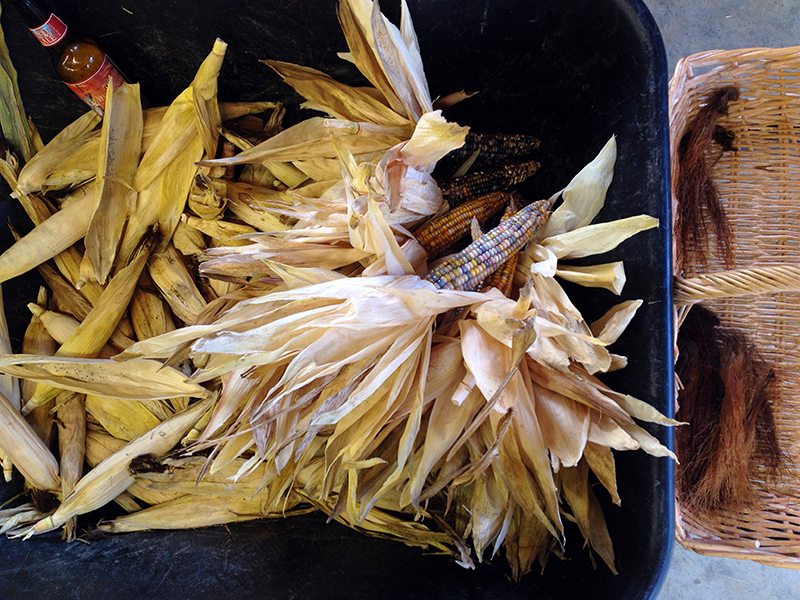
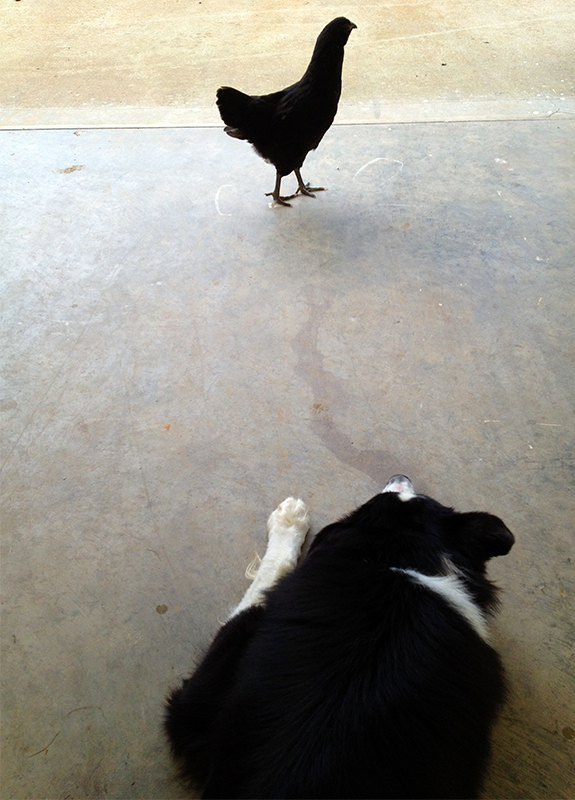
Of course I had company, though one companion grew pretty bored when the shucking stretched into a multihour endeavor.
Shucking more than 100 ears, plus the time required to marvel at each beautiful ear, added up as I worked through sundown and into the evening. The rest of the crew got more and more curious as I lined the shucked cobs up on the garage floor, sorting them by size and condition. I was very pleased to see what I consider to be pretty good pollination and kernel set in most of the ears. I found only one insect, a little worm, in all 100+ ears, which seems remarkable to me given how much I struggle with bugs on some of my other crops. Perhaps I have the bluebirds and their nightly visits to the corn patch to thank?
A few of the ears contained kernels that looked as though they were starting to pop. I will have to do more research to figure out what causes that. But in all, I was pretty pleased with my harvest. Maybe it’s just beginner’s luck, or the blessing of an unusually rainy summer, but it’s not too bad for my first corn-growing experience!
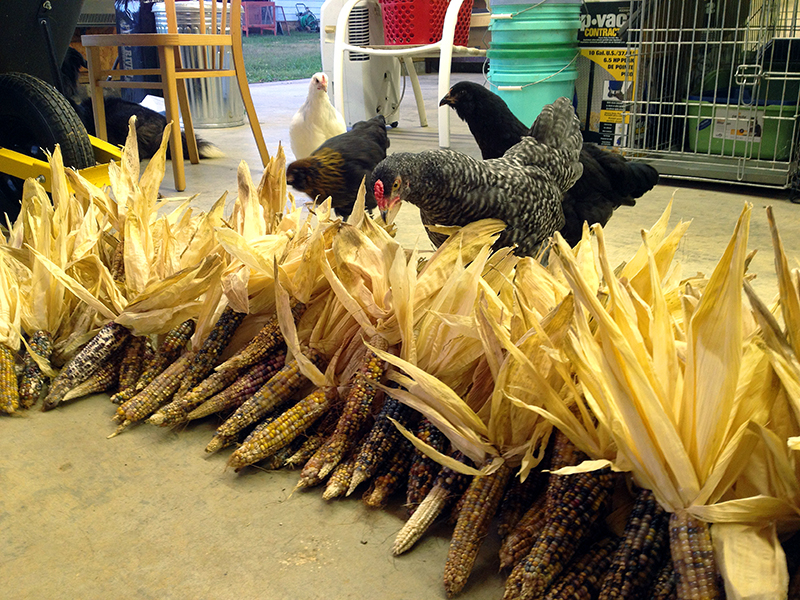
Though they were intrigued, the chicks hadn’t yet figured out that corn is one of the most delicious chicken treats around. And this wasn’t just any corn—it was the famous Glass Gem!
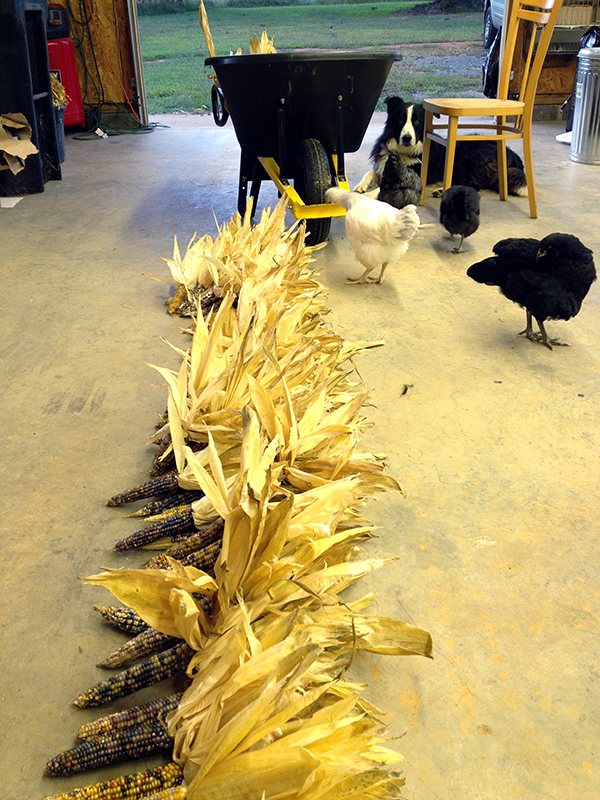
Up next, a closer look at the Glass Gem harvest…and all the pretty pictures you’ve been waiting for!
September 21st, 2013 §
During the last few weeks, the Glass Gem corn—my summer experiment—has begun to dry out and turn brown.
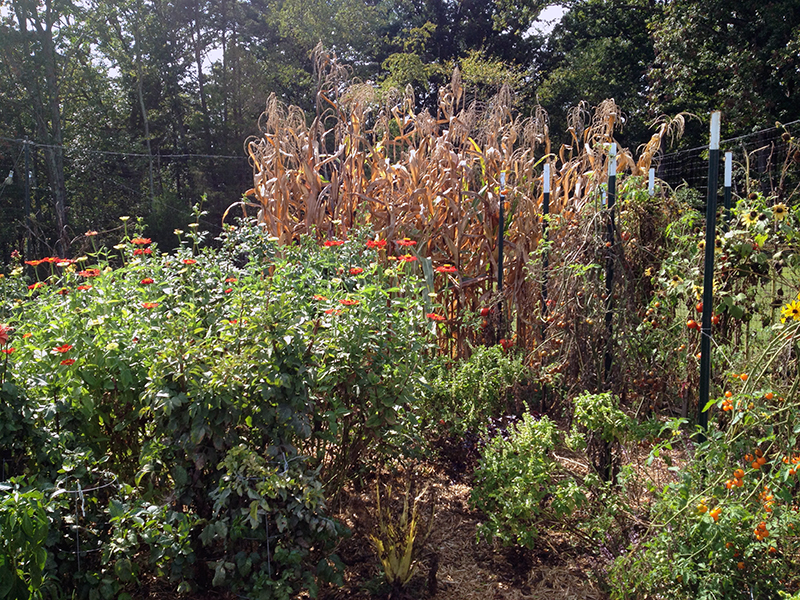
I picked a few test ears and determined that it was time to harvest. But first I needed to fight my way through a wildlife gauntlet to claim my jewel-toned treasure. First, a black widow protected the garden entry, tucked up inside her cinderblock lair.

Not only was she guarding the garden, she was also guarding a few egg sacks. Mother and young were slayed with scissors and wasp spray.
Then I re-engaged a known enemy. A couple of weeks ago, while harvesting my test ears, I was stung on the right wrist by a wasp. Turns out it was one of a gang that had built a little fortress hidden on the underside of one of the corn leaves.
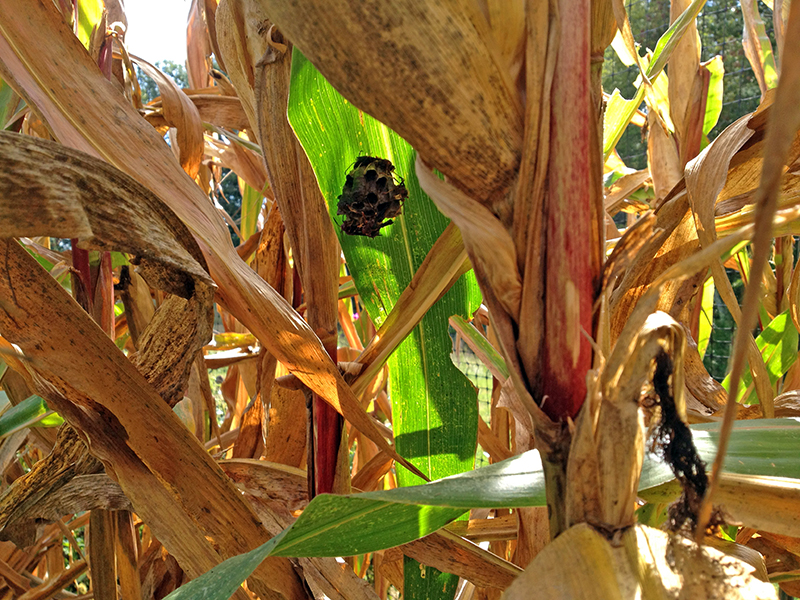
With throbbing wrist I had hastily retreated to ice packs and antihistamines, conceeding round one to the wasps. My entire arm ached for a week, feeling like it was broken deep inside.
But now I was back and better prepared. Before the wasps could mount a defense, I shot them all with a strong stream of wasp spray. They fell to the ground, writhing. A quick perimeter check found no more wasp nests, and the coast was clear for me to begin my plunder.
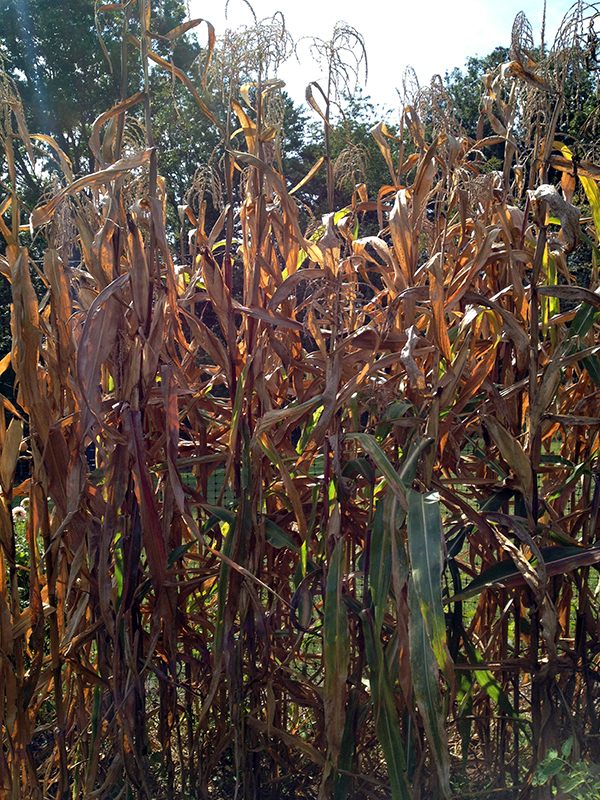
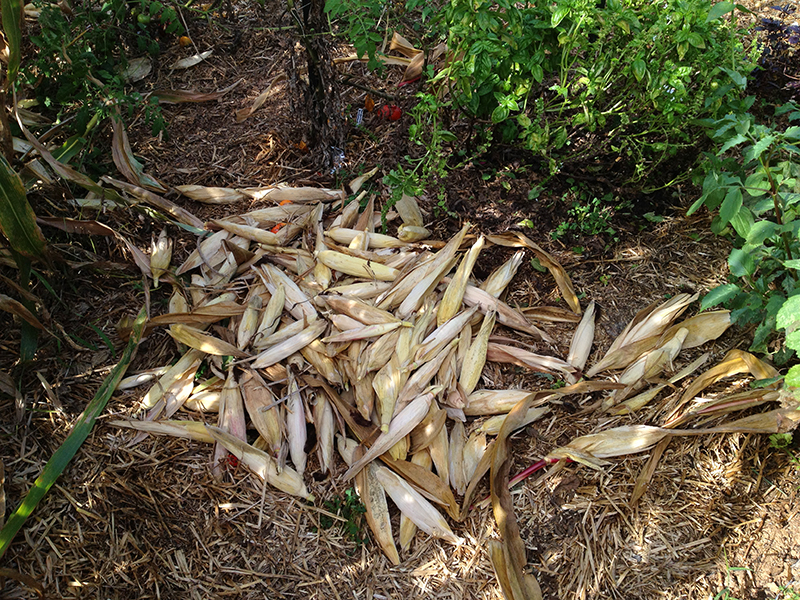
Harvesting corn is no fun. Between the fear of more hidden stinging creatures, and the claustrophobic feeling induced by threading myself amongst the close-spaced cornstalks, I wanted to get it over with as soon as possible. I wrenched the ears off the stalks, and cut the ones that didn’t come away easily with my pruners. I tossed them all in a pile to be sorted later.
Just when I was about done and feeling like I was home free, I encountered my final challenger. I reached into the stand of cornstalks and as I did felt a burning, stinging sensation travel up my arm from wrist to elbow. I screamed and flipped over a leaf to see this guy, just before I ran to the outside hose to douse my arm in cold water.
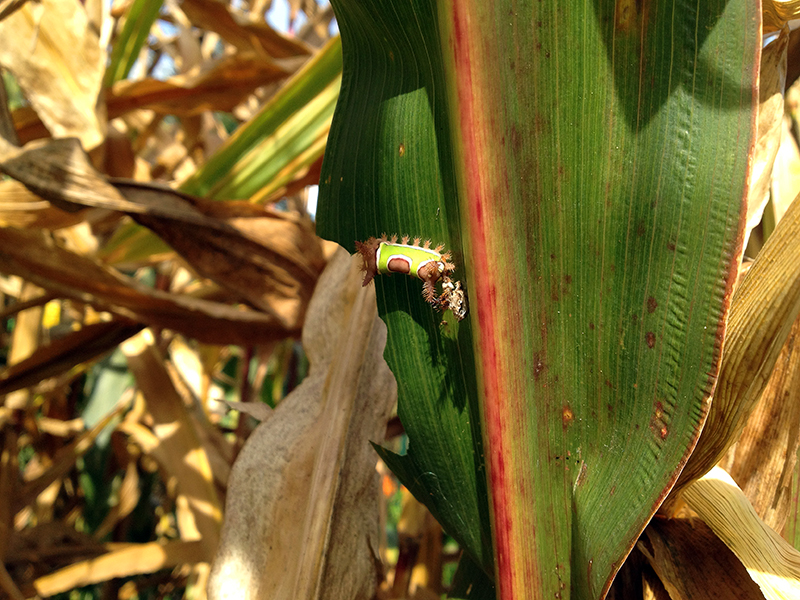
Meet my Cerberus, a saddleback caterpillar, its spiked protrusions covered with urticating hairs that had just set my arm on fire. A fitting final foe for what had been a hellish harvest.
But now came the fun part: opening each ear to see the multicolored surprises held within…
July 7th, 2013 §
The “Glass Gem” corn is now taller than I and just beautiful. All this rain has created a great year to trial corn for the first time. And I am definitely seeing the benefits of all the soil building I have done during the last three years. Thus far the insect pest load seems lighter than in years’ past, which is a good indication that the plants are healthy enough to defend themselves. Running the chickens in the garden during the winter probably helped too, as they no doubt ate up overwintering eggs and larvae.
I had a moment of sheer joy the other day when I went to transplant a dahlia into the veg garden. My shovel blade sank all the way into the soil without any effort from me. This is nothing short of a miracle given the solid, almost impenetrable clay soil I began with. Now if only the soil in the ornamental garden around the house was in such good shape. I still need a pickax to plant in it, and my plants suffer for it.
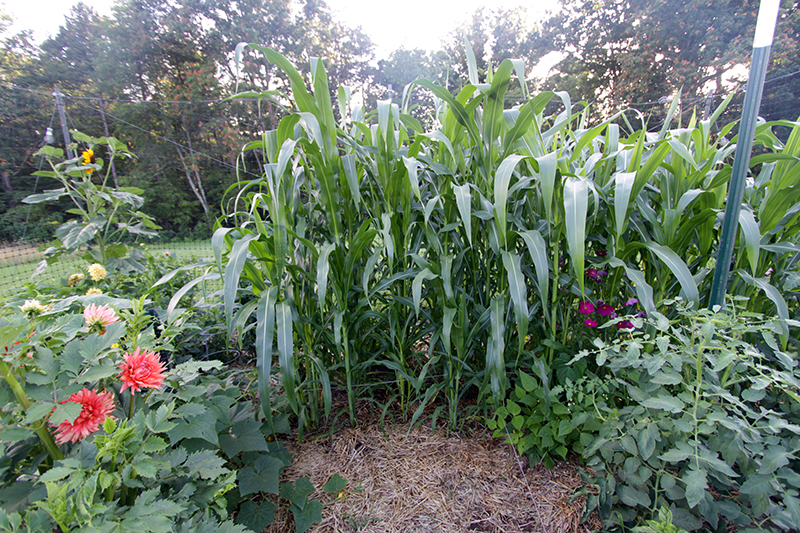
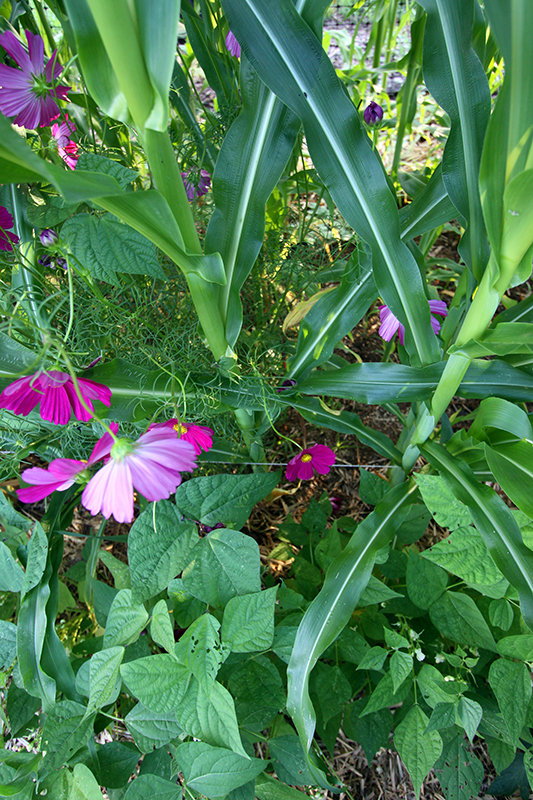
Corn and beans and cosmos
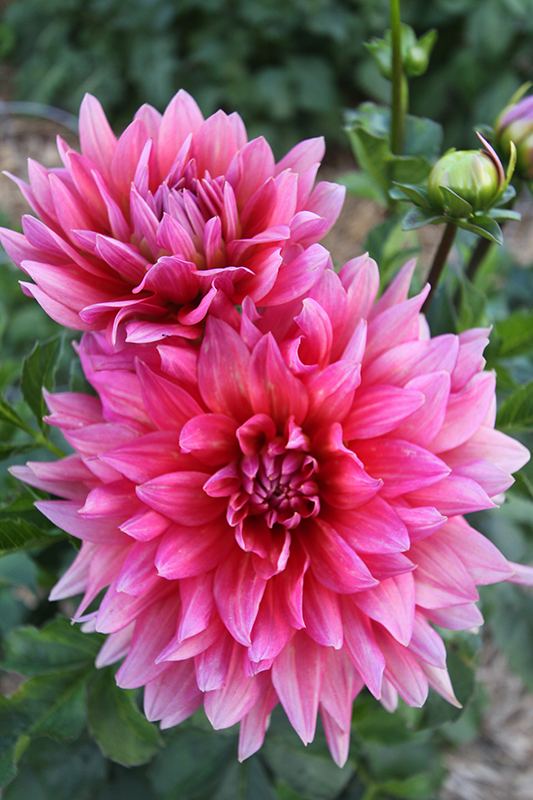
Several of the dahlias are now blooming. Starting them in March really gave me a huge jump on the season, and I think the second-year tubers are also quicker to get out of the ground than first-year tubers. Makes sense. When I dug some of my first-year tubers last fall, what began as a piece the size of my thumb had, in some cases, become a clump so large I needed two hands to hold it. All that stored energy has got to go somewhere, and thus the big, early plants I am seeing this year.
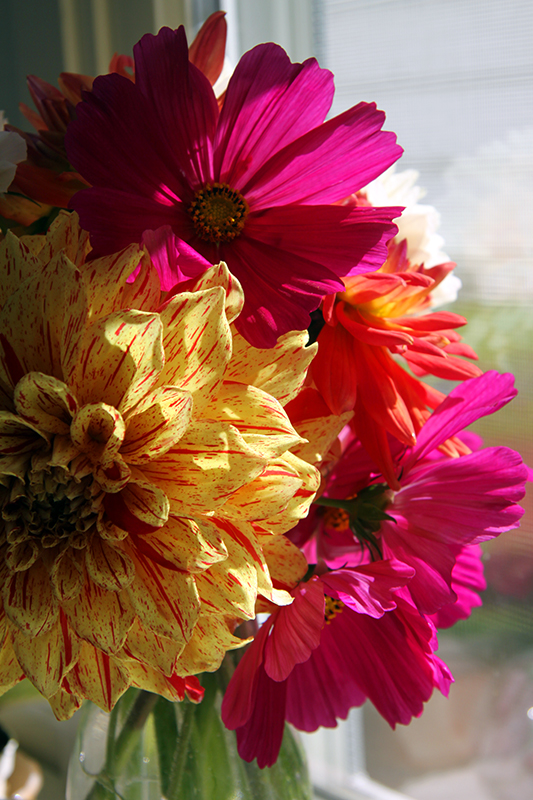
I love being able to have beautiful cut flowers whenever I want them. It’s one of the best things about summer.
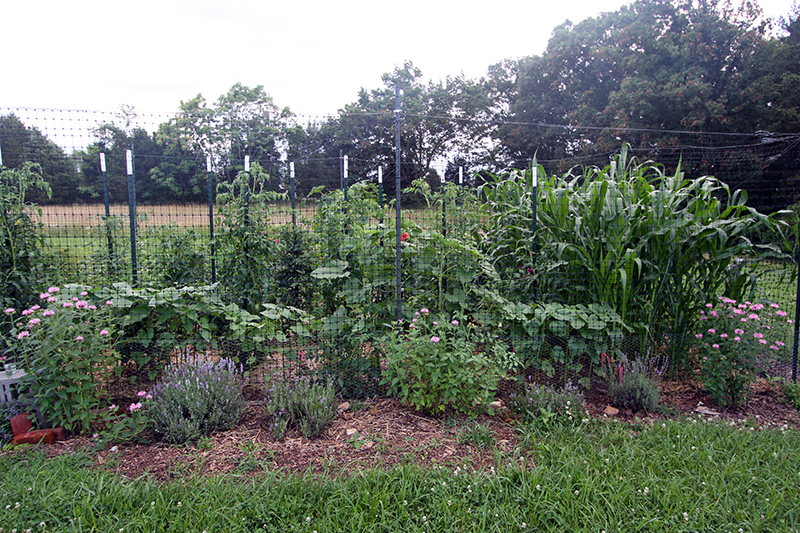
Finally, I am starting to see progress with the plantings around the front of the garden, where I haven’t developed the soil. I stuck some lavender in there last year. It’s horrible soil for lavender, straight clay that holds water all the time. I lost several lavender plants over winter to these poor growing conditions, but a few came back and have bloomed. In the holes made by the dead laveneder I planted some of last year’s bee balm, just chunks I hacked off a main plant that overwintered in a bucket behind the shed with no love from me. Well, each hunk has turned into a good-sized plant and they’re blooming. Everything planted out here needs to be unpalatable to deer and attract more pollinators. I definitely am on the right path now with the lavender, bee balm, and a bit of cat mint. Soon the sunflowers planted within the garden, just in front of the tomatoes, will bloom and join the party.
June 14th, 2013 §
The garden tour continues with a pepper patch, in the foreground below, some dahlias, and giant volunteer pumpkin. I couldn’t figure out where all the pumpkins were coming from, as I’ve never successfully grown any in my garden. And then I remembered that all last winter I split my Halloween pumpkins open and fed them to the chickens as they were penned in the garden. A ha!
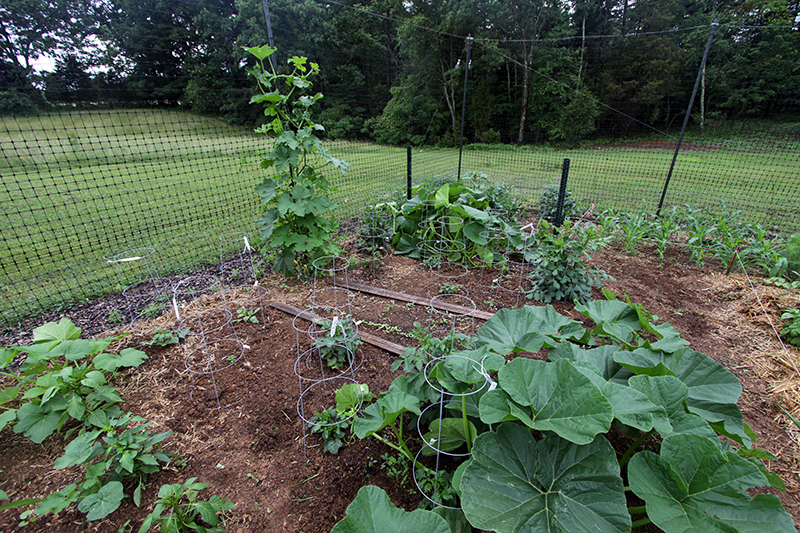
It was a tough call, but I just ripped out all the volunteer pumpkins. I’d love to grow them, but I just don’t have the space. It’s only June and the vines were already overtaking the garden, shading plants I actually am trying to cultivate (like the dahlias). So out they came.
You can also see my squash experiment, above, growing up a post. Ever since I’ve had this garden I’ve battled squash bugs, which have always killed my vines about the time they set their first fruit. This year I said no more squash—too much a waste of resources and space for something that’s bound to die and also cheap to buy in the grocery. Then I came across something that suggested growing squash vertically, as the squash bugs multiply more rapidly when hiding under leaves near the ground. So I used these volunteer squash plants as guinea pigs, tying them up the posts with strips of plastic bag and trimming off the leaves closest to the ground. Despite seeing (and killing) just a handful of squash bugs, the vine below has already succumbed to something. Le sigh. The vegetable that most people can’t give away fast enough eludes me. I think I will do a post-mortem and cut open the stem looking for squash vine borers.
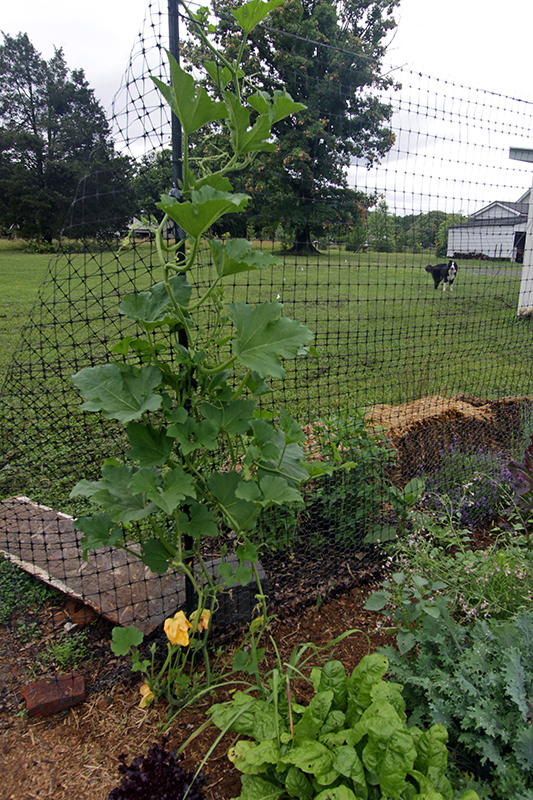
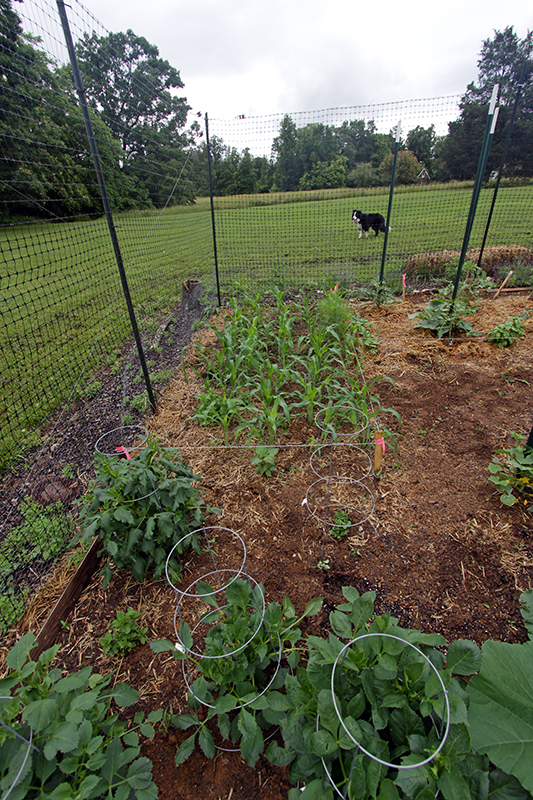
My little “Glass Gem” corn patch is doing well. The stalks have about doubled in the days since taking this photo. The several inches of rain we’ve had in the last week are working wonders in the gardens. More caged dahlias, too, just budding out. The trick of starting them in pots in April has really worked—they are many weeks ahead of where they were last year when started in the ground.
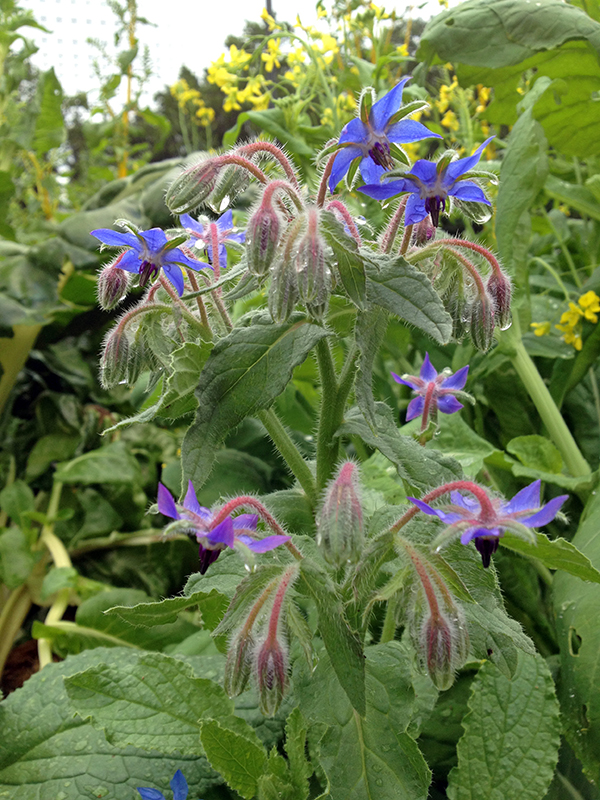
One of my new favorite plants, borage, below. I don’t know why, but I am so drawn to this plant that it’s kind of nuts. It has wide, fuzzy leaves that taste just like cucumber.
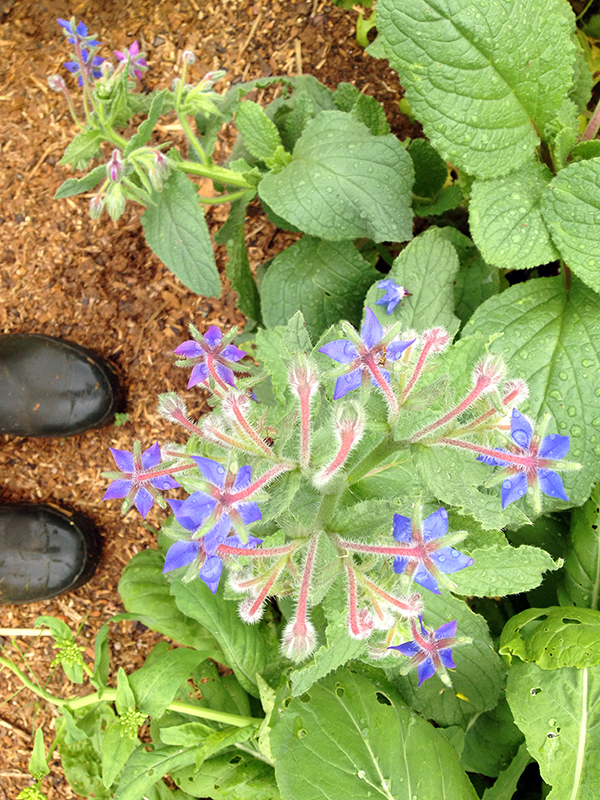
That was exciting enough for me, but then I planted it out and it pulled this trick—blooming with one of the most lovely flowers I’ve seen. There’s something magical about this plant for me. I am just waiting to learn from it.
A better shot of my new dahlia cages. They seem to be working extremely well—we’ll see how they do when the plants get five feet tall!
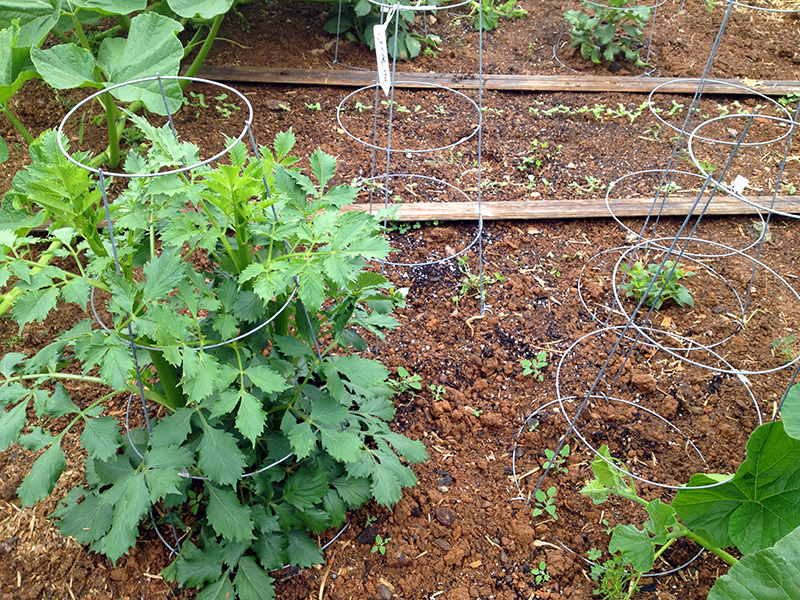
Since taking these photos, I ripped out the old spinach, took out the volunteer pumpkins, weeded, and mulched the entire garden with rotted straw. All the recent rain at the start of the growing season, and more on the way, helps put us in good shape heading in to summer. Up next, a tomato-only tour.
June 2nd, 2013 §
This spring I was lucky enough to get my hands on some “Glass Gem” corn seeds. Glass Gem is not a sweet corn. It’s an incredibly beautiful heirloom flint, or popcorn, and it’s quite a phenomenon in the gardening world, spurred on by photos like this that have been circulating online for a couple of years. You can read more about it here.
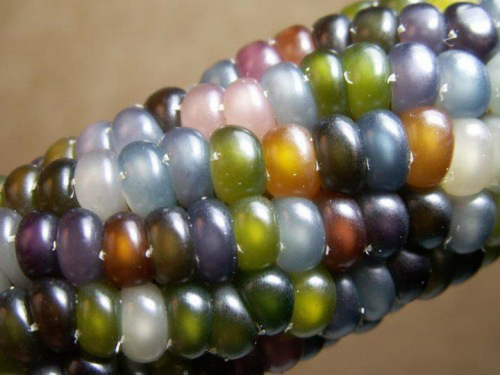
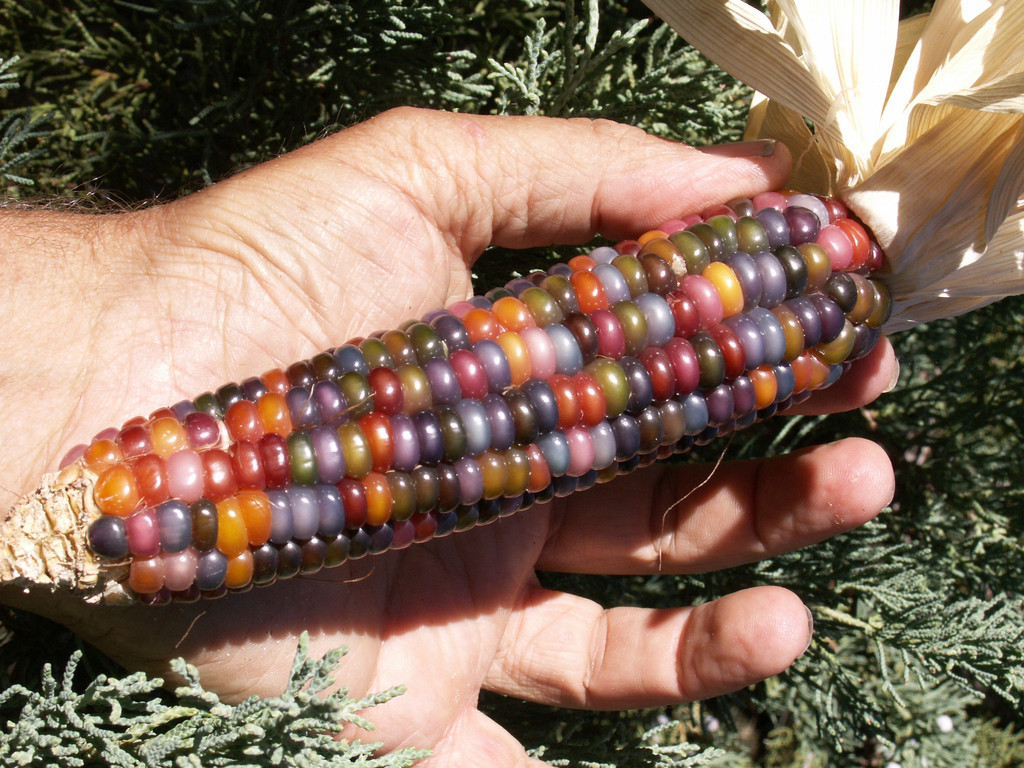 (Photo from Native Seeds/SEARCH)
Everyone was nuts to get some Glass Gem seeds, but they became available only this year from Native Seeds/SEARCH, a Tucson, Arizona-based nonprofit that works to conserve seed from plants of genetic and cultural importance.
I first discovered Native Seeds when I lived within walking distance of their retail store on Fourth Avenue in Tucson. It was one of my favorite shops in the city, filled with Native crafts and, of course, unusual seeds. One year I bought my dad a bunch of hot chile pepper seeds and sent them home to Virginia, where he planted a giant chile garden. For years my parents had hot peppers languishing in the freezer from that massive experiment.
I was on a waiting list for more than a year until I got an e-mail this spring saying I could purchase one packet of Glass Gem seeds. Which I did, immediately. People are so nuts to get this corn that I’ve seen online auctions and stores selling each seed for a dollar or more, which is crazy because it’s still for sale on the Native Seeds Web site. It’s also nuts because corn is wind-pollinated, which means you need a pretty sizable stand (at least 40 plants) in order for cobs to set, unless you want to hand-pollinate.
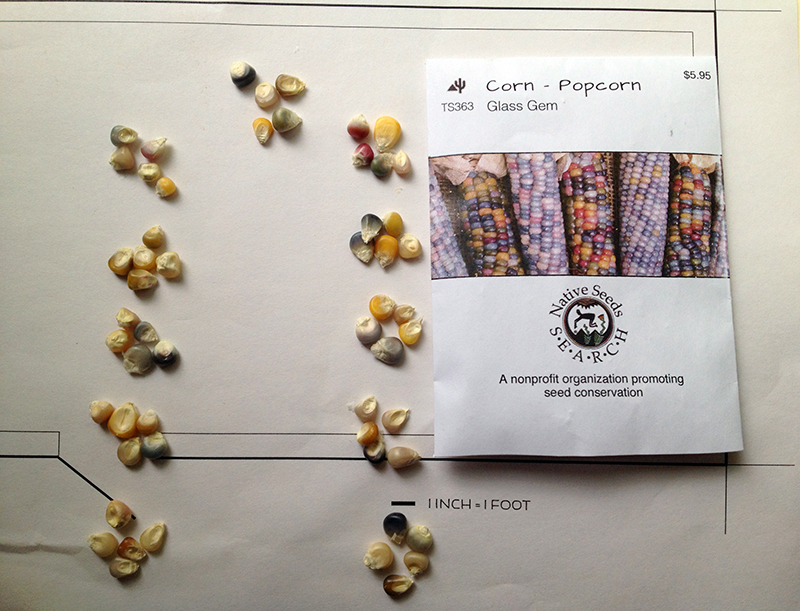
I received 65 kernels in my allotted packet of seeds. I have never grown corn before, so this experiment has required quite a bit of research as well as some garden plan drawings before I could start. And then I had to wait for the soil to warm up…
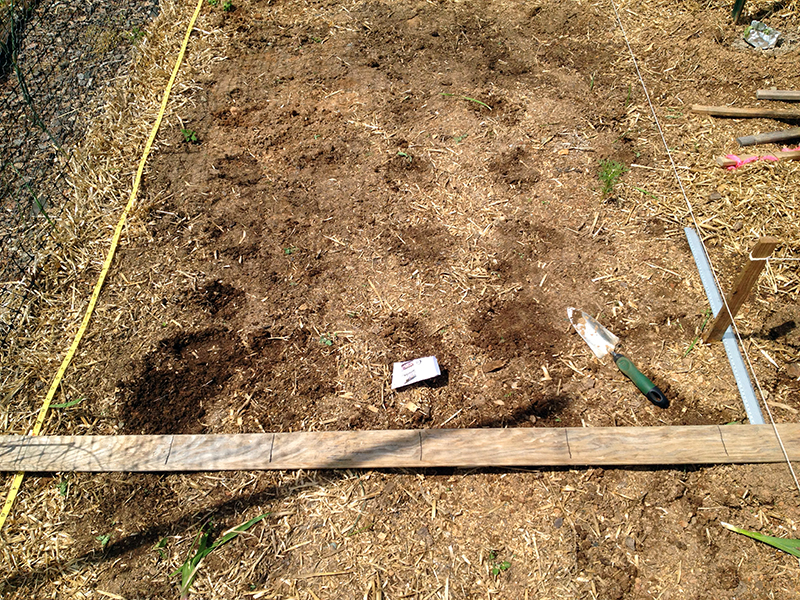
On May 11, I marked out the placement for each kernel using sophisticated measuring apparatus. Don’t laugh. It worked. I planted seeds one foot from each other in both directions, creating the suggested “block” configuration that helps insure pollination.
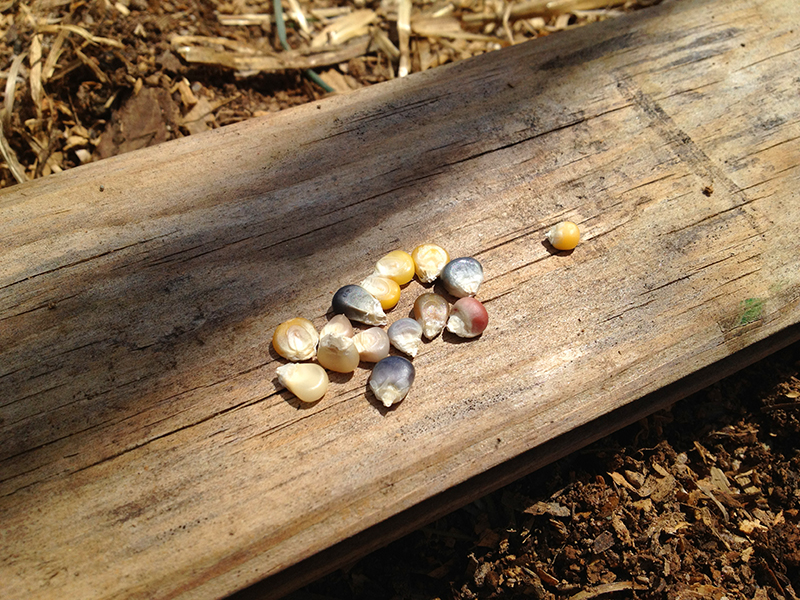
Glass Gem corn, ready to go in the ground. We had some nice rains in May and after about a week the corn germinated. Sixty-three of the sixty-five planted kernels came up, which is a pretty amazing germination rate: 97%!
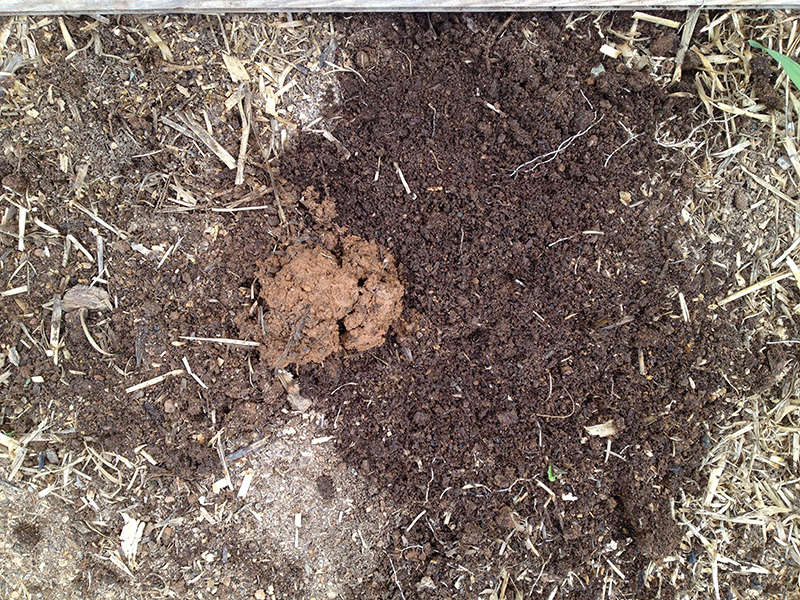
I’d like to take a moment now for some soil appreciation. The darker soil, above on the right, is what most of my vegetable garden looks like now, after three years of concerted effort to build soil tilth and fertility through sheet mulching, composting in place, running chickens in the garden, and adding homemade compost at regular intervals. The red clay blob is the native soil, dug from just a foot away at the edge of the garden. Quite a difference, huh?! I know it’s nuts to be proud of your soil, but that photo above represents countless hours of my life spent in research and hard physical labor, so it’s wonderful to see such an obvious improvement.
The corn is now about eight inches tall and this week’s heat wave (highs above 90 degrees) has had a noticeable effect. Corn loves heat, and just as I’ve heard in gardening folklore, you can watch it grow.
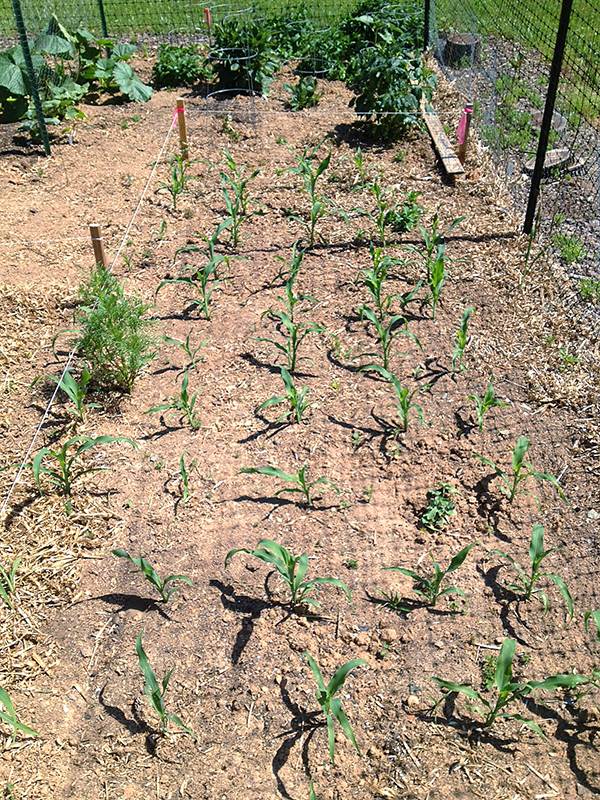
Many other bloggers are growing Glass Gem and writing about it, so it will be interesting to compare experiences. Some gardeners are really coddling their Glass Gem, but coddling isn’t really my gardening style and I am prepared to accept failure with this experiment. It’s a big risk as I devoted a relatively large section of my too-small garden to this corn, but I figured I had to at least give it a shot! We’ll see what happens!


